AWS Amplifyで、カスタムカテゴリを作って、カスタムリソースを追加してみた

今まで、Amplifyが用意する以外のリソースを使いたい場合は、 <project_root>/amplify/backend/api/<API name>/stacks ディレクトリの中に、CloudFormation(CFn)ファイルを作成して対応してきました。
AWS AppSync + Amplify JavaScript + CustomResourcesで、既存のDynamoDBなどをDatasourceとしたリゾルバーを作成する - メモ的な思考的な

 
それ以外の方法がないかを探したところ、以下のissueコメントに、カスタムカテゴリを作っても追加できる旨が記載されていました。
Support for custom Resources/CloudFormation templates · Issue #80 · aws-amplify/amplify-cli

そこで、issueに書かれた方法で試してみたため、メモを残します。

 
ちなみに、「カスタムカテゴリ」と表現するのが正しいのかは微妙ですが、

$ amplify --help


| Category      |
| ------------- |
| analytics     |
...

と、元々あるAnalyticsやAPIはカテゴリ(Category)と呼ぶようです。

そのため、この記事ではそれにならって、今回自作するカテゴリのことをカスタムカテゴリと呼ぶことにします。

 
目次


環境

 
今回は amplify init & amplify api add で、APIモジュールを追加した後の環境で、

  • CognitoのIDプールを作成し、amplify init で作成した承認済/未認証ロールを紐付ける
  • AppSync GraphQLへのアクセスを許可するIAMポリシーを作成し、未承認ロールに割り当てる

というカスタムリソースを書いてみます。

amplify init & amplify api add は以下のような感じです。

# 初期化
$ amplify init
Note: It is recommended to run this command from the root of your app directory
? Enter a name for the project CustomCategory
? Enter a name for the environment dev
? Choose your default editor: Visual Studio Code
? Choose the type of app that you're building javascript
Please tell us about your project
? What javascript framework are you using none
? Source Directory Path:  src
? Distribution Directory Path: dist
? Build Command:  npm run-script build
? Start Command: npm run-script start
Using default provider  awscloudformation

For more information on AWS Profiles, see:
https://docs.aws.amazon.com/cli/latest/userguide/cli-multiple-profiles.html

? Do you want to use an AWS profile? Yes
? Please choose the profile you want to use default

# APIの追加
$ amplify api add
? Please select from one of the below mentioned services GraphQL
? Provide API name: CustomCategoryAPI
? Choose an authorization type for the API API key
? Do you have an annotated GraphQL schema? No
? Do you want a guided schema creation? No
? Provide a custom type name MyType


カスタムカテゴリを追加 

ディレクトリの作成

<project_root>/amplify/backend/ ディレクトリの下に、 identity ディレクトリを作成します。


CFnテンプレートの作成

今回はIDプールとRoleのマッピングを行うため、

  • AWS::Cognito::IdentityPool
  • AWS::Cognito::IdentityPoolRoleAttachment

の2つのResourceが必要です。

そのため、このResourceが含まれるファイルを template.json として、上記の identity ディレクトリに作成します。


IDプールの作成

まずは AWS::Cognito::IdentityPool のリソースを作成します。

amplifyのenvとIDプールの名称をパラメータとして受け取り、CoginitoのIDプールを作成します。

AllowUnauthenticatedIdentities: true としてありますが、IDプールの 認証されていない ID に対してアクセスを有効にする にチェックを入れてみたかっただけで、特に深い意味はありません。

{
  "AWSTemplateFormatVersion": "2010-09-09",
  "Parameters": {
    "env": {
      "Type": "String",
    },
    "IdentityPoolName": {
      "Type": "String"
    },
...
  },
  "Resources": {
    "IdentityPool": {
      "Type": "AWS::Cognito::IdentityPool",
      "Properties": {
        "IdentityPoolName": {
          "Fn::Join": [
            "__",
            [
              {
                "Ref": "IdentityPoolName"
              },
              {
                "Ref": "env"
              }
            ]
          ]
        },
        "AllowUnauthenticatedIdentities": "true"
      }
    },


amplify initで作成されたものをnested-cloudformation-stack.ymlで確認し、ロールを割り当て

AWS::Cognito::IdentityPoolRoleAttachment を設定するには、

  • 認証されていないロール
  • 認証されたロール

が必要です。

今回は、Amplifyの動きと同じく、amplify init で作成される認証されていないロールと認証されたロールを、自作のIDプールに割り当ててみます。

CFn内でamplify initで作成されるロールを参照する方法を探したところ、 <project_root>/amplify/backend/awscloudformation/nested-cloudformation-stack.yml に記載されているリソースを使えばよさそうでした。

今回は、

  • AuthRole
  • UnauthRole

のArnを Fn::GetAtt で参照します。

 
ただ、CFnのテンプレート内では参照できなかったため、

  • CFnテンプレート (template.json) は Parameter で外部から値を受け取る
  • CFnテンプレートに値を渡すためのファイル parameters.json を作成し、その中で Fn::GetAtt を使ってロールのArnを取得・設定する

としました。

関係する部分を抜粋したのは以下です。

template.json

{
  "AWSTemplateFormatVersion": "2010-09-09",
  ...
  "Parameters": {
    ...
    "AuthRoleArn": {
      "Type": "String"
    },
    "UnauthRoleArn": {
      "Type": "String"
    }
  },
  "Resources": {
    ...
    "IdentityPoolRoleMap": {
      "Type": "AWS::Cognito::IdentityPoolRoleAttachment",
      "Properties": {
        "IdentityPoolId": {
          "Ref": "IdentityPool"
        },
        "Roles": {
          "unauthenticated": {
            "Ref": "UnauthRoleArn"
          },
          "authenticated": {
            "Ref": "AuthRoleArn"
          }
        }
      },
      "DependsOn": "IdentityPool"
    }
  },
...
}

 
parameters.json

{
  "IdentityPoolName": "CustomIdentityPool",
  "AuthRoleArn": {
    "Fn::GetAtt": [
      "AuthRole",
      "Arn"
    ]
  },
  "UnauthRoleArn": {
    "Fn::GetAtt": [
      "UnauthRole",
      "Arn"
    ]
  }
}


amplify env checkout

このままの状態で amplify push しようとしても、まだAmplify CLIにはAPIしか認識されていません。

$ amplify status

Current Environment: develop

| Category | Resource name     | Operation | Provider plugin   |
| -------- | ----------------- | --------- | ----------------- |
| Api      | CustomCategoryAPI | Create    | awscloudformation |

 
そのため、amplify env checkout を行い、Amplify CLIに認識してもらいます。

# 環境の確認
$ amplify env list

| Environments |
| ------------ |
| *develop     |


# チェックアウト
$ amplify env checkout develop


# 認識された
$ amplify status

Current Environment: develop

| Category | Resource name      | Operation | Provider plugin   |
| -------- | ------------------ | --------- | ----------------- |
| Api      | CustomCategoryAPI  | Create    | awscloudformation |
| Identity | CustomIdentityPool | Create    | awscloudformation |

 
また、amplify push などの情報を持っている <project_root>/amplify/backend/amplify-meta.json も更新されました。

{
    "providers": {
        "awscloudformation": {
            ...
        }
    },
    "api": {
        "CustomCategoryAPI": {
            ...
            }
        }
    },
    // 追加された
    "identity": {
        "CustomIdentityPool": {
            "providerPlugin": "awscloudformation"
        }
    }
}


amplify pushして状況確認

カスタムカテゴリが認識されたため、amplify push すると、成功しました。

$ amplify push

Current Environment: develop

| Category | Resource name      | Operation | Provider plugin   |
| -------- | ------------------ | --------- | ----------------- |
| Api      | CustomCategoryAPI  | Create    | awscloudformation |
| Identity | CustomIdentityPool | Create    | awscloudformation |
? Are you sure you want to continue? Yes

GraphQL schema compiled successfully.

? Do you want to generate code for your newly created GraphQL API Yes
? Choose the code generation language target javascript
? Enter the file name pattern of graphql queries, mutations and subscriptions src/graphql/**/*.js
? Do you want to generate/update all possible GraphQL operations - queries, mutations and subscriptions Yes
? Enter maximum statement depth [increase from default if your schema is deeply nested] 2
...
✔ All resources are updated in the cloud

GraphQL endpoint: https://host.appsync-api.region.amazonaws.com/graphql
GraphQL API KEY: xxx

 
CognitoのIDプールを確認したところ、たしかに作成されていました。
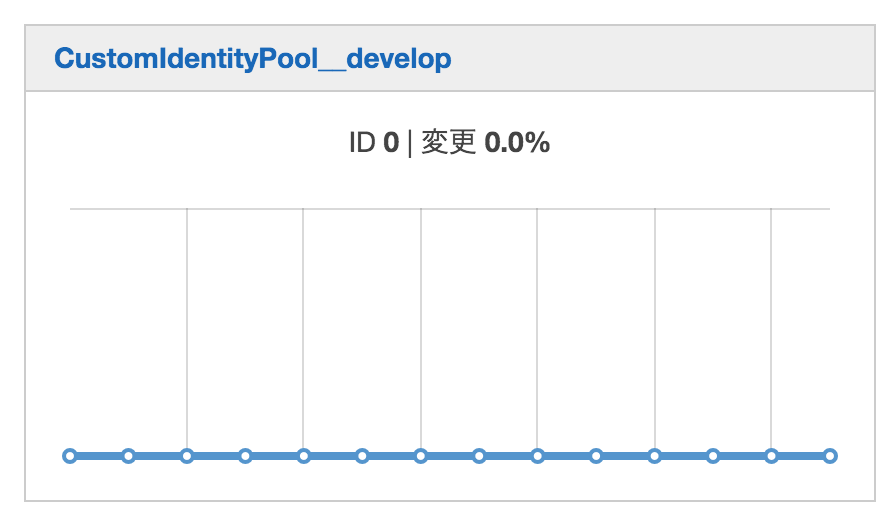
f:id:thinkAmi:20190730221051p:plain:w450


IAMポリシーの作成と未承認ロールへの割り当て

まずは、AppSync GraphQLへのアクセスを許可するIAMポリシーを作成します。

IAMポリシーでGraphQLへのアクセスを許可するには "arn:aws:appsync:${AWS::Region}:${AWS::AccountId}:apis/${apiID}/types/Mutation/* のようなResourceに対して設定する必要があります。

ただ、この中の apiID については、カスタムカテゴリの中では取得できませんでした。一方、APIカテゴリの中では取得できました。

 
そのため、 <project_root>/amplify/backend/api/<API name>/stacks/ ディレクトリの中に IAMRole.json を作成します。

この中で

  • パラメータ AppSyncApiId を参照し、AppSyncのAPI IDを取得
  • パラメータ UnauthRoleName を参照し、未承認ロールに対しポリシーを割り当て

を行います。

{
  "AWSTemplateFormatVersion": "2010-09-09",
  "Description": "AppSync GraphQL Policy",
  "Metadata": {},
  "Parameters": {
    "AppSyncApiId": {
      "Type": "String",
      "Description": "The id of the AppSync API associated with this project."
    },
    "env": {
      "Type": "String",
      "Description": "The environment name. e.g. Dev, Test, or Production",
      "Default": "NONE"
    },
    "UnauthRoleName": {
      "Type": "String"
    }
  },
  "Resources": {
    "AppSyncGraphQLPolicy": {
      "Type": "AWS::IAM::ManagedPolicy",
      "Properties": {
        "PolicyDocument": {
          "Version": "2012-10-17",
          "Statement": [
            {
              "Effect": "Allow",
              "Action": [
                "appsync:GraphQL"
              ],
              "Resource": [
                {
                  "Fn::Sub": [
                    "arn:aws:appsync:${AWS::Region}:${AWS::AccountId}:apis/${apiID}/types/Query/*",
                    {
                      "apiID": {
                        "Ref": "AppSyncApiId"
                      }
                    }
                  ]
                },
                {
                  "Fn::Sub": [
                    "arn:aws:appsync:${AWS::Region}:${AWS::AccountId}:apis/${apiID}/types/Mutation/*",
                    {
                      "apiID": {
                        "Ref": "AppSyncApiId"
                      }
                    }
                  ]
                }
              ]
            }
          ]
        },
        "ManagedPolicyName": {
          "Fn::Join": [
            "-",
            [
              "AppSyncGraphQLPolicy",
              {
                "Ref": "env"
              }
            ]
          ]
        },
        "Roles": [
          {
            "Ref": "UnauthRoleName"
          }
        ]
      }
    }
  },
  "Outputs": {
    "EmptyOutput": {
      "Description": "An empty output. You may delete this if you have at least one resource above.",
      "Value": ""
    }
  }
}


結果確認

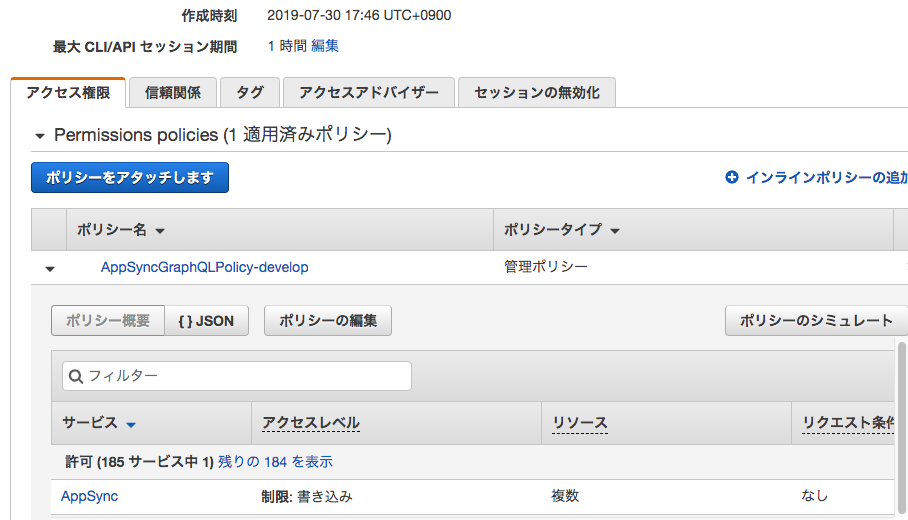
未認証のロールに、AppSyncのGraphQLアクセスを許可するIAMポリシー AppSyncGraphQLPolicy-develop が割り当てられていました。

Cognito IDプールでの未認証ロール
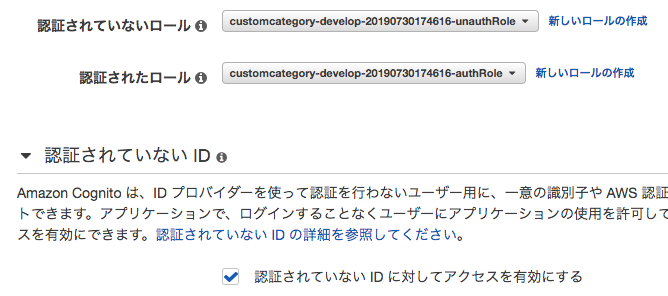
f:id:thinkAmi:20190730222341p:plain:w450

ロールに割り当てられたポリシー

f:id:thinkAmi:20190730222416p:plain:w450


カスタムカテゴリを使わず、APIのカスタムリソースとして作成

ちなみに、今回作成したCognito IDプールのCFnファイルですが、カスタムカテゴリを使わなくても、APIカテゴリのカスタムリソースとすることも可能です。

<project_root>/amplify/backend/api/<API name>/build/cloud-formation-template.json を見ても、APIのカスタムリソースのパラメータが各リソースを参照できています。

{
    "AWSTemplateFormatVersion": "2010-09-09",
    "Description": "An auto-generated nested stack.",
    "Metadata": {},
    "Parameters": {
        ...
        "AuthRoleArn": {
            "Type": "String"
        },
        "UnauthRoleArn": {
            "Type": "String"
        }
    },
    "Resources": {
        "GraphQLAPI": {
            "Type": "AWS::AppSync::GraphQLApi",
            ...
        },
        "GraphQLAPIKey": {
            "Type": "AWS::AppSync::ApiKey",
            ...
        },
        "GraphQLSchema": {
            "Type": "AWS::AppSync::GraphQLSchema",
            ...
        },
        "MyType": {
            "Type": "AWS::CloudFormation::Stack",
            ...
        },
        "CustomResourcesjson": {
            "Type": "AWS::CloudFormation::Stack",
            ...
        },
        "IAMRolejson": {
            "Type": "AWS::CloudFormation::Stack",
            ...
        },
        "templatejson": {
            "Type": "AWS::CloudFormation::Stack",
            "Properties": {
                "Parameters": {
                    "env": {
                        "Ref": "env"
                    },
                    "StackIdentityPoolName": {
                        "Ref": "StackIdentityPoolName"
                    },
                    "AuthRoleArn": {
                        "Ref": "AuthRoleArn"
                    },
                    "UnauthRoleArn": {
                        "Ref": "UnauthRoleArn"
                    }
                },


まとめ

以上より、AWS Amplifyでカスタムリソースを作る場合は

  • <project_root>/amplify/backend/awscloudformation/nested-cloudformation-stack.yml
  • <project_root>/amplify/backend/api/<API name>/build/cloud-formation-template.json

などを見て使えるリソースを探しつつ、

  • APIの中のstacksの中にCFnファイルを作成
  • カスタムカテゴリを作成し、その中にCFnファイルを作成

のどちらを行い、必要なパラメータは parameters.json に記載すれば良いことが分かりました。


ソースコード

Githubに上げました。ディレクトcustom_category 以下が今回のファイルです。
https://github.com/thinkAmi-sandbox/AWS_AppSync_Amplify-sample

AWS Amplifyで、amplify env を使って、開発環境の共有と分離をしてみた

開発をしていると、AWS Amplifyを使ったソースコードGithubなどでチームで共有することがあります。

AppSync APIやDynamoDBなどの環境を同一にして、チームで開発する方法を探したところ、公式ドキュメントに amplify env を使う方法が記載されていました。

 
そこで、実際にどんな感じになるのか試してみたため、メモを残します。

 
目次


環境


共有するソースコード

今回は、以下のリポジトリをチーム間で共有し、開発を進めるものとします。なお、 team-provider-info.json ファイルには機密情報が含まれていたため、わざと空ファイルにしてあります。
https://github.com/thinkAmi-sandbox/appsync_app_for_multi_developer

 
DataSourceとしてDynamoDBを使います。schema.graphqlは以下の通りです。

type Todo {
    title: String!
    content: String
}

input CreateTodoInput {
    title: String!
    content: String
}


type Query {
    getTodo(title: String!): Todo
}

type Mutation {
    createTodo(input: CreateTodoInput!): Todo
}

 
また、動作確認としてAppSyncを使ったWebアプリを用意します。

各ボタンをクリックすると、対応するQueryやMutationを実行します。

import Amplify, {API} from 'aws-amplify';
import awsconfig from './aws-exports';
import * as queries from "./graphql/queries";
import * as mutations from "./graphql/mutations";


const queryButton = document.getElementById('query');
queryButton.addEventListener('click', () => {
  console.log('Run Query!');
  Amplify.configure(awsconfig);
  API.graphql(
    {
      query: queries.getTodo,
      authMode: 'API_KEY',
      variables: {
        title: "hello"
      }
    }
  ).then((data) => {
    console.log(data);
  })
    .catch((e) => {
      console.log('error!');
      console.log(e)
    });
});


const mutationButton = document.getElementById('mutation');
mutationButton.addEventListener('click', () => {
  console.log('Run Mutation!');

  const content = document.getElementById('content').value;
  Amplify.configure(awsconfig);
  API.graphql(
    {
      query: mutations.createTodo,
      authMode: 'API_KEY',
      variables: {
        input: {
          title: "hello",
          content: content
        }
      }
    }
  ).then((data) => {
    console.log(data);
  })
    .catch((e) => {
      console.log('error!');
      console.log(e)
    });
});

 
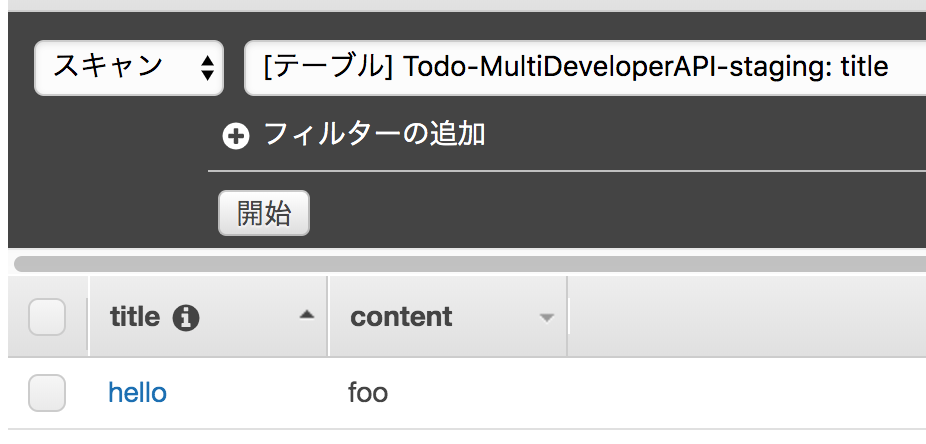
また、DynamoDBには以下が登録されているとします。

f:id:thinkAmi:20190727203118p:plain:w300


git clone & amplify init で既存のAppSync環境にアクセスする

上記のリポジトリを手元に持ってきます。

$ git clone git@github.com:thinkAmi-sandbox/appsync_app_for_multi_developer.git .

 
git cloneしただけではAmplifyの環境ができていないため、 amplify init を実行します。

ゼロから開発するときと異なり、 Do you want to use an existing environment? が表示されます。

ここでは既存のAppSync環境にアクセスするため、 Yes を選択します。

$ amplify init
Note: It is recommended to run this command from the root of your app directory

# 既存のAppSync環境へアクセスするため、 "Yes" を選択
? Do you want to use an existing environment? Yes

? Choose the environment you would like to use: dev
? Choose your default editor: Visual Studio Code
Using default provider  awscloudformation

For more information on AWS Profiles, see:
https://docs.aws.amazon.com/cli/latest/userguide/cli-multiple-profiles.html

? Do you want to use an AWS profile? Yes
? Please choose the profile you want to use default
✔ Initialized provider successfully.

 
amplify status で状況を確認します。既存の環境が認識されているようです。

$ amplify status

Current Environment: dev

| Category | Resource name     | Operation | Provider plugin   |
| -------- | ----------------- | --------- | ----------------- |
| Api      | MultiDeveloperAPI | No Change | awscloudformation |

 
動作を確認するため、必要なモジュールをインストールします。

$ npm install

 
別の開発環境で実行していると分かるよう、 webpack.config.js 中のポート番号を 9501 へと変更します。

devServer: {
...
  port: 9501

 
起動して動作を確認します。ポートは 9501 を使っているようです。

$ npm start

...
ℹ 「wds」: Project is running at http://localhost:9501/
...

 
Queryボタンを押すと、既存のDynamoDBの値が取得できました。

f:id:thinkAmi:20190727203154p:plain


新しい環境 staging を作成し、動作確認

続いて、 amplify env add で新しい環境 staging を作成します。

$ amplify env add
Note: It is recommended to run this command from the root of your app directory

# 既存の環境を使うか確認されるため、 "No" を選択
? Do you want to use an existing environment? No

# あとは、ゼロから開発したときと同様
? Enter a name for the environment staging
Using default provider  awscloudformation

For more information on AWS Profiles, see:
https://docs.aws.amazon.com/cli/latest/userguide/cli-multiple-profiles.html

? Do you want to use an AWS profile? Yes
? Please choose the profile you want to use default
⠋ Initializing project in the cloud...

# 新しくstackが作成される
CREATE_IN_PROGRESS multideveloper-staging-xxx AWS::CloudFormation::Stack             
CREATE_IN_PROGRESS DeploymentBucket                      AWS::S3::Bucket
...

 
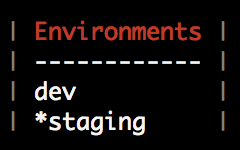
実行後、 amplify env list すると、環境が増えていました。また、新しく作成した環境 staging にも切り替わっています。

f:id:thinkAmi:20190727204103p:plain:w150

 
また、 amplify status で状況を確認すると、 Create に変わっていました。

$ amplify status

Current Environment: staging

| Category | Resource name     | Operation | Provider plugin   |
| -------- | ----------------- | --------- | ----------------- |
| Api      | MultiDeveloperAPI | Create    | awscloudformation |

 
他に、team-provider-info.json ファイルにも、新規環境 staging が追加されています。
https://aws-amplify.github.io/docs/cli-toolchain/quickstart#sharing-projects-outside-the-team-

{
    "dev": {
        "awscloudformation": {
            "AuthRoleName": "xxx",
            "UnauthRoleArn": "xxx",
            "AuthRoleArn": "xxx",
            "Region": "xxx",
            "DeploymentBucketName": "xxx",
            "UnauthRoleName": "xxx",
            "StackName": "xxx",
            "StackId": "xxx"
        }
    },
    "staging": {
        "awscloudformation": {
            "AuthRoleName": "yyy",
            "UnauthRoleArn": "yyy",
            "AuthRoleArn": "yyy",
            "Region": "yyy",
            "DeploymentBucketName": "yyy",
            "UnauthRoleName": "yyy",
            "StackName": "yyy",
            "StackId": "yyy"
        }
    }
}

 
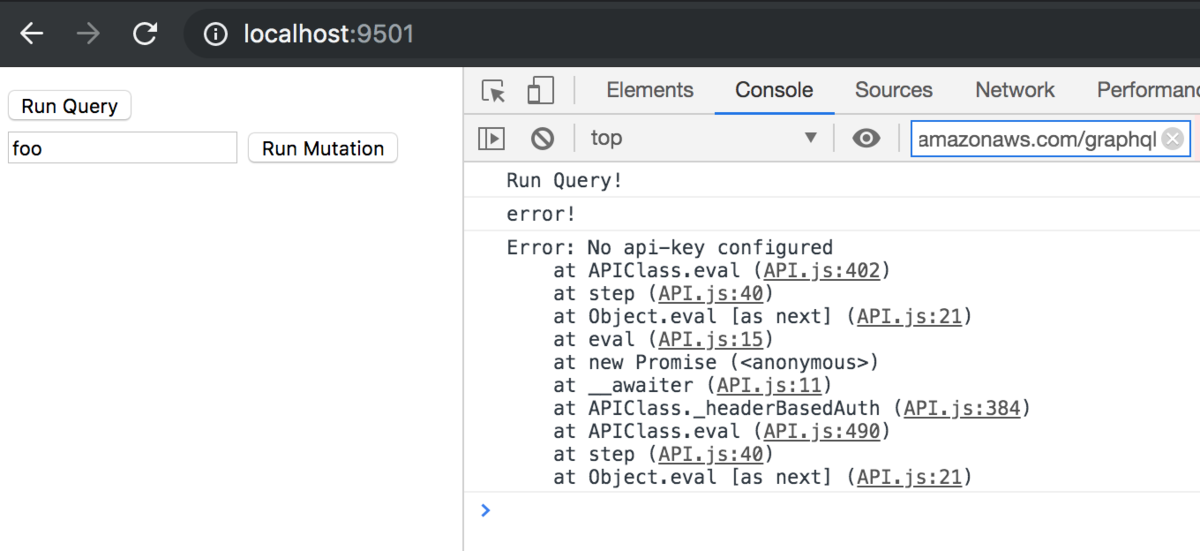
ためしに、この状態でQueryを実行してみたところ、エラーとなりました。

f:id:thinkAmi:20190727204004p:plain:w450

 
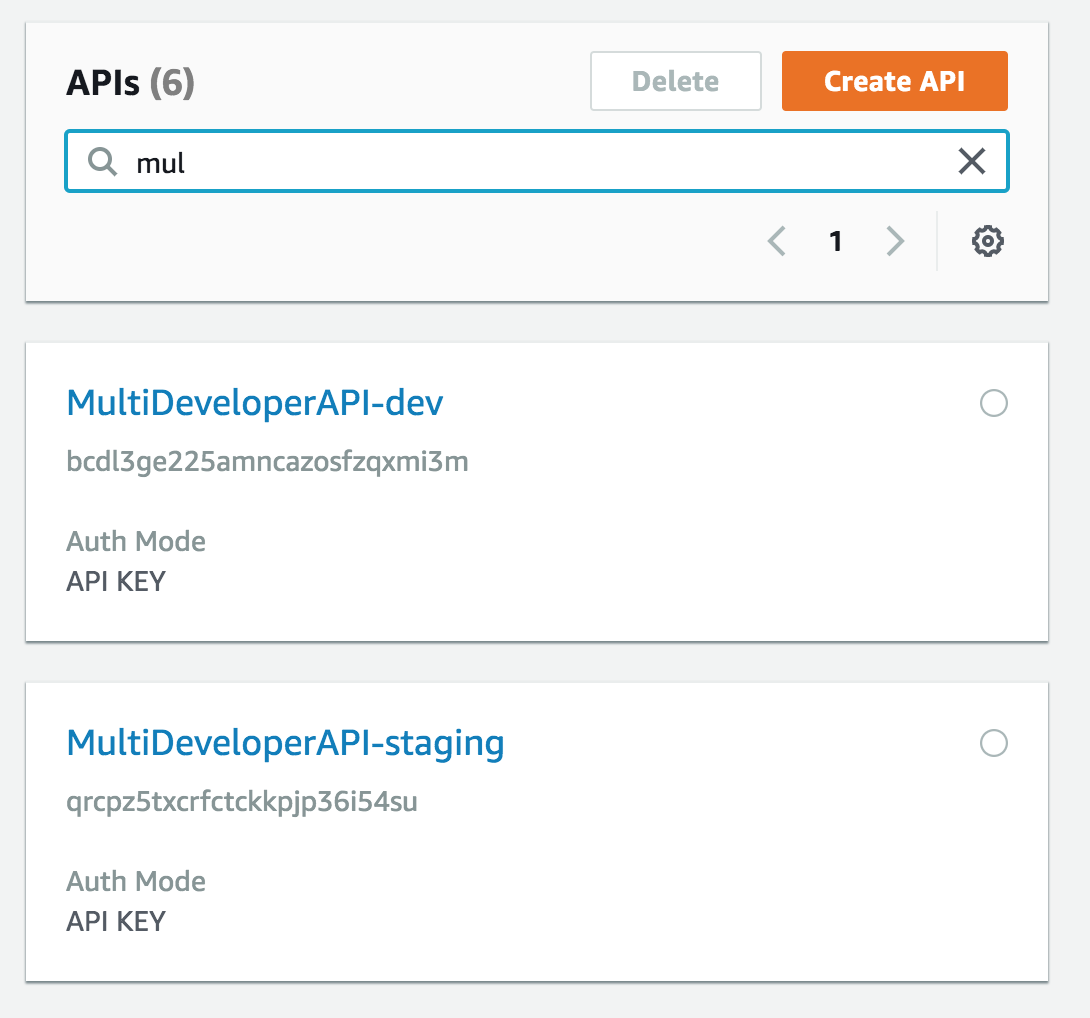
AppSync API 環境がまだ作成されていないようなので、 amplify push したところ、新しいAppSync APIが作成されました。

$ amplify push

Current Environment: staging

| Category | Resource name     | Operation | Provider plugin   |
| -------- | ----------------- | --------- | ----------------- |
| Api      | MultiDeveloperAPI | Create    | awscloudformation |
? Are you sure you want to continue? Yes

GraphQL schema compiled successfully.

? Do you want to generate code for your newly created GraphQL API Yes
? Choose the code generation language target javascript
? Enter the file name pattern of graphql queries, mutations and subscriptions src/graphql/**/*.js
? Do you want to generate/update all possible GraphQL operations - queries, mutations and subscriptions Yes
? Enter maximum statement depth [increase from default if your schema is deeply nested] 2
⠹ Updating resources in the cloud. This may take a few minutes...

...
CREATE_IN_PROGRESS apiMultiDeveloperAPI                  AWS::CloudFormation::Stack
...

 
各種AWSリソースも追加されています。

AppSync API

f:id:thinkAmi:20190727204252p:plain:w450

DynamoDB

f:id:thinkAmi:20190727204311p:plain:w450

S3

f:id:thinkAmi:20190727204338p:plain:w450

 
この状態でQueryやMutationを実行したところ、正常に動作しました。

f:id:thinkAmi:20190727204417p:plain:w450

 
DynamoDBにも登録されています。

f:id:thinkAmi:20190727204445p:plain:w300

 
以上より、 amplify env add で新しい環境を作成することで、既存の環境はそのままに、別の環境で作業できることが分かりました。


amplify env checkout で環境を切り替えて確認

再度、 dev 環境に切り替えた時に、元のリソースにアクセスできるかを確認します。

 
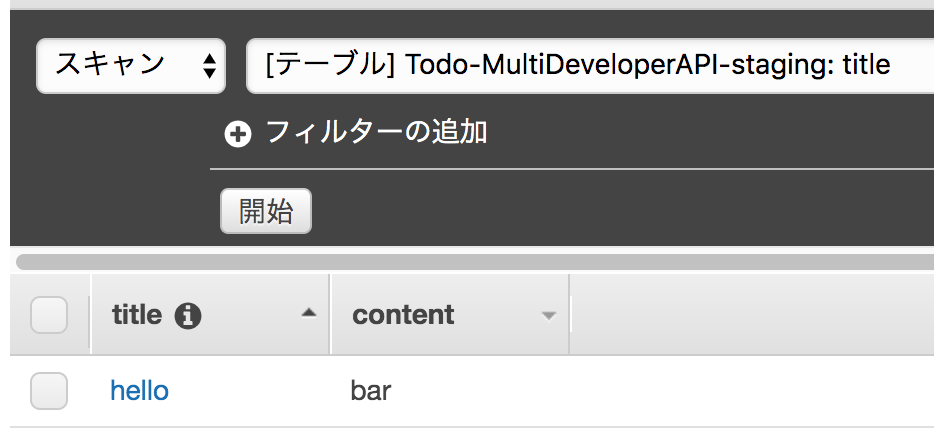
まずは、staging環境のDynamoDBの列contentsを bar へと更新します。

f:id:thinkAmi:20190727204728p:plain:w300

 
続いて、環境を切り替えます。

# 状況を確認
$ amplify env list

| Environments |
| ------------ |
| dev          |
| *staging     |

# checkout で切り替え
$ amplify env checkout dev
✔ Initialized provider successfully.
Initialized your environment successfully.

# 再度状況を確認
$ amplify env list

| Environments |
| ------------ |
| *dev         |
| staging      |

 
この状態でWebアプリのQueryを実行すると、dev環境のDynamoDBの値が取得できました。dev環境へアクセスできているようです。

f:id:thinkAmi:20190727204916p:plain:w450


注意:amplify delete は全環境を削除

amplify delete は実行時に

Are you sure you want to continue?(This would delete all the environments of the project from the cloud and wipe out all the local amplify resource files)

と表示されるように、全環境のリソースを削除します。うっかり amplify delete すると大変なことになります。

 
実際に試してみると

# env を確認
$ amplify env list

| Environments |
| ------------ |
| *dev         |
| staging      |


# stagingへと移動
$ amplify env checkout staging
✔ Initialized provider successfully.
Initialized your environment successfully.


# 削除
$ amplify delete
? Are you sure you want to continue?(This would delete all the environments of the project from the cloud and wipe out all the local amplify resource files) Yes

Deleting env:dev  # devを削除

Deleting env:staging  # stagingを削除
✔ Project deleted in the cloud
Project deleted locally.


# 確認すると、amplifyプロジェクト自体がない
$ amplify env list
/path/to/lib/node_modules/@aws-amplify/cli/node_modules/gluegun/build/index.js:13
    throw up;
    ^

Error: You are not working inside a valid amplify project.

となりました。

 
また、実際のリソースもありません。

DynamoDB

f:id:thinkAmi:20190728080221p:plain:w300

 
AppSync API

f:id:thinkAmi:20190728080245p:plain:w300

AWS AppSyncにて、同じ内容でMutationした場合に、Subscriptionがどうなるかを試してみた

AWS AppSyncでは、Mutationした時の通知をSubscriptionで受け取れます。
リアルタイムデータ - AWS AppSync

ただ、DynamoDBのレコードと同じ内容でMutationした場合でも、Subscriptionがどのように動作するのか気になったため、試してみた時のメモを残します。

 
目次


環境

  • AWS AppSync
  • aws-amplify 1.1.32


Schema

今回用意したSchemaです。Mutationに

  • createTodo
  • updateTodo

の2つを用意しています。

今回は、onCreateTodoのSubscriptionがupdateTodoのMutationに反応しないかを確認するため、create/updateと名称を分けています。

ただし、GraphQL的にはSQLのInsert/Updateのような区別はありません。

type Todo {
    title: String!
    content: String
}

input TodoInput {
    title: String!
    content: String
}

type Mutation {
    createTodo(input: TodoInput!): Todo
    updateTodo(input: TodoInput!): Todo
}

type Subscription {
    onCreateTodo(title: String, content: String): Todo
        @aws_subscribe(mutations: ["createTodo"])
    onUpdateTodo(title: String, content: String): Todo
        @aws_subscribe(mutations: ["updateTodo"])
}


ゾルバー

createTodo/updateTodoとも、リゾルバーのリクエストテンプレート/レスポンステンプレートは同じです。

リクエストテンプレート
{
  "version": "2017-02-28",
  "operation": "PutItem",
  "key": {
    "title": { "S" : "${context.args.input.title}" }
  },
  "attributeValues": $util.dynamodb.toMapValuesJson($context.args.input)
}


レスポンステンプレート
$util.toJson($context.result)


Amplifyを使ったアプリ
index.html

Mutation/Subscriptionするためのボタンを用意しています。

<!DOCTYPE html>
<html lang="en">
<head>
  <meta charset="utf-8">
  <title>Amplify Framework</title>
  <meta name="viewport" content="width=device-width, initial-scale=1">
</head>
<body>
<div class="app">
  <div>Subscribe: Create (title="foo", content="bar")
    <button id="subscribe-create">Subscribe (Create)</button>
  </div>
  <div>Subscribe: Update (title="foo", content="bar")
    <button id="subscribe-update">Subscribe (Update)</button>
  </div>

  <hr>

  <div>データ作成
    <label for="title">タイトル</label>
    <input type="text" id="title" value="foo" />
    <label for="content">内容</label>
    <input type="text" id="content" value="bar" />
  </div>

  <div>Create button
    <button id="create">Create</button>
  </div>
  <div>Update button
    <button id="update">Update</button>
  </div>


</div>
<script src="main.bundle.js"></script>
</body>
</html>


app.js

ボタンのclickイベントで

  • HTMLの内容でMutation
  • Mutationに対するSubscription

が実行されるようにしています。

 
なお、Subscriptionについては、 unsubscribe() を使っていないため、

  • title = "foo"
  • content = "bar"

な内容でMutaitonされると、毎回反応するようにしています。

import Amplify, { API } from 'aws-amplify';
import awsconfig from './aws-exports';
import * as mutations from "./graphql/mutations";
import * as subscriptions from "./graphql/subscriptions";


// データ作成
const createButton = document.getElementById('create');
createButton.addEventListener('click', () => {
  callMutation(mutations.createTodo, 'create');
});

// データ更新
const updateButton = document.getElementById('update');
updateButton.addEventListener('click', () => {
  callMutation(mutations.updateTodo, 'update');
});


// Mutation関数以外はすべて共通
const callMutation = (func, funcType) => {
  Amplify.configure(awsconfig);
  API.graphql(
    {
      query: func,
      authMode: 'API_KEY',
      variables: {
        input: {
          title: document.getElementById('title').value,
          content: document.getElementById('content').value,
        }
      }
    }
  ).then((data) => {
    console.log(`${funcType}: target data.`);
    console.log(data);
  })
    .catch((e) => {
      console.log(`mutation(${funcType}) error`);
      console.log(e)
    });
};


// --------------------------
// Subscriptions
// --------------------------

// CreateをSubscribe
const subscribeCreateButton = document.getElementById('subscribe-create');
subscribeCreateButton.addEventListener('click', () => {
  callSubscription(subscriptions.onCreateTodo, 'subscribe(Create)');
});


// UpdateをSubscribe
const subscribeUpdateButton = document.getElementById('subscribe-update');
subscribeUpdateButton.addEventListener('click', () => {
  callSubscription(subscriptions.onUpdateTodo, 'subscribe(Update)');
});


// Subscription関数以外は共通
const callSubscription = (func, funcType) => {
  Amplify.configure(awsconfig);

  console.log(`subscribe(${funcType}): start...`);

  const client = API.graphql(
    {
      query: func,
      authMode: 'API_KEY',
      variables: {
        title: "foo",
        content: "bar"
      }
    }
  ).subscribe({
    next: (data) => {
      console.log(`subscribed: ${funcType}`);
      console.log(data);
    },
    error: (err) => {
      console.log(err);
      console.log(`sub error (${funcType})`);
    },
    close: () => console.log('sub done')
  })
};


動作確認

準備:Subscription開始
  • createTodo
  • updateTodo

のMutationに対してSubscriptionを実行しておきます。

f:id:thinkAmi:20190726215322p:plain:w450


新規登録時

Mutation createTodo() の実行ボタンを押したしたところ、想定通り、Subscription onCreateTodo() だけが反応しました。

f:id:thinkAmi:20190726215411p:plain:w450

 
上記を展開した内容はこちら。

f:id:thinkAmi:20190726215515p:plain:w450


同じ内容で更新時

同じ内容のまま、再度 Mutation createTodo() の実行ボタンを押したところ、Subscription onCreateTodo() が再度反応しました。

f:id:thinkAmi:20190726215733p:plain:w450

 
これより、特に設定をしなければ、同じ内容で更新した場合もSubscriptionで通知を受け取ることができるようです。


参考:createTodoは、同じキーで呼び出すとエラーにしたい

上記で見た通り、Mutation createTodo はDynamoDBに存在するキーで実行してもエラーになりません。

ただ、新規登録用のMutationなど、DynamoDBに存在するキーで実行した時はエラーにしたい場合、リゾルバーのリクエストテンプレートに condition を追加して制御します。

今回は attribute_not_exists を使って制御します。
https://docs.aws.amazon.com/ja_jp/amazondynamodb/latest/developerguide/Expressions.OperatorsAndFunctions.html#Expressions.OperatorsAndFunctions.Functions

{
  "version": "2017-02-28",
  "operation": "PutItem",
  "key": {
    "title": { "S" : "${context.args.input.title}" }
  },
  "attributeValues": $util.dynamodb.toMapValuesJson($context.args.input),
## 以降を追加
  "condition": {
      "expression": "attribute_not_exists(#title)",
      "expressionNames": {
          "#title": "title"
    }
  }
}

 
また、DynamoDBの状態は以下とします。

f:id:thinkAmi:20190726220957p:plain:w300

 
この時に、

  • title = "foo"
  • content = "ham"

にて、Mutation createTodo するとエラー DynamoDB:ConditionalCheckFailedException になります。

f:id:thinkAmi:20190726221157p:plain:w450

 
ただし、

  • title = "foo"
  • content = "bar"

の場合には、エラーとはなりません。

f:id:thinkAmi:20190726221316p:plain:w450

 
もう少し考える必要がありそうなものの、今回はこれくらいにします。


ソースコード

Githubに上げました。ディレクトsubscription_for_same_update の中が今回のファイルです。
https://github.com/thinkAmi-sandbox/AWS_AppSync_Amplify-sample

AWS Amplify CLIで、.graphqlconfig.ymlを使って、schema.jsonやqueries.jsonなどの保存場所を変更する

Amplify CLIamplify push することで、必要に応じてAppSyncのスキーマファイル ( <project_root>/amplify/backend/api/"api_name"/schema.graphql ) を元に、Amplify Framework向けのソースコードを生成してくれます。

$ amplify push

Current Environment: dev

| Category | Resource name    | Operation | Provider plugin   |
| -------- | ---------------- | --------- | ----------------- |
| Api      | graphqlconfigApi | Create    | awscloudformation |
? Are you sure you want to continue? Yes

GraphQL schema compiled successfully.

? Do you want to generate code for your newly created GraphQL API Yes
? Choose the code generation language target javascript
? Enter the file name pattern of graphql queries, mutations and subscriptions src/graphql/**/*.js

# 自動生成するか
? Do you want to generate/update all possible GraphQL operations - queries, mutations and subscriptions Yes

? Enter maximum statement depth [increase from default if your schema is deeply nested] 2

...
✔ Downloaded the schema
✔ Generated GraphQL operations successfully and saved at src/graphql
✔ All resources are updated in the cloud

 
デフォルトでは、 src/graphql ディレクトリに作成されます。

ただ、amplify push後に、自動生成ファイルの保存先を変更しようと思ったため、その時のことをメモします。


環境

  • Amplify CLI 1.8.5


.graphqlconfig.ymlを使った修正

.graphqlconfig.yml ファイルについて、公式ドキュメントでは

When a project is configured to generate code with codegen, it stores all the configuration .graphqlconfig.yml file in the root folder of your project.

https://aws-amplify.github.io/docs/cli-toolchain/graphql#codegen

と記載されています。

ただ、どの項目を修正することで保管場所が変更になるか分からなかったため、いろいろと試してみました。


queries.json/mutations.json/subscriptions.jsonの移動

GraphQLに対応したファイル

を移動するには、項目 docsFilePath を修正します。

試しに、docsFilePathsrc_2nd/graphql へと変更し、 schema.graphql を修正した後、 amplify push してみました。

$ amplify push

Current Environment: dev

| Category | Resource name    | Operation | Provider plugin   |
| -------- | ---------------- | --------- | ----------------- |
| Api      | graphqlconfigApi | Update    | awscloudformation |
? Are you sure you want to continue? Yes

GraphQL schema compiled successfully.

? Do you want to update code for your updated GraphQL API Yes
? Do you want to generate GraphQL statements (queries, mutations and subscription) based on your schema types? This will overwrite your current graphql queries, mutations and subs
criptions Yes

...
✔ Downloaded the schema
✔ Generated GraphQL operations successfully and saved at src_2nd/graphql
✔ All resources are updated in the cloud

 
すると、

の3ファイルが src_2nd/graphql の中に作成されました。
https://github.com/thinkAmi-sandbox/AWS_AppSync_Amplify-sample/commit/d4658252211362d35296110fdef8b19b507d4e08#diff-65fd0b65d8da646fd955c3e7deaee9b8


shema.jsonの移動

shema.json の場合は、項目 schemaPath を修正します。あとは amplify push することで、新しい場所に作成されます。
https://github.com/thinkAmi-sandbox/AWS_AppSync_Amplify-sample/commit/6efb091d1a9d2891cccefe56565c6e05a99019c4#diff-65fd0b65d8da646fd955c3e7deaee9b8

 
ちなみに、 Amplify CLIのバージョンが古い場合はschema.jsonの移動はできません。

 
もし移動したい場合は、最新のAmplify CLIにアップデートする必要があります(手元だと、1.8.5で移動可能でした)。


ソースコード

GitHubに上げました。 graphqlconfig_yml ディレクトリの中が今回のファイルです。
https://github.com/thinkAmi-sandbox/AWS_AppSync_Amplify-sample
AWS AppSync + Amplifyで、Subscriptionに引数を追加し、一部のみ通知を受け取ってみた

AWS AppSyncでは、Subscriptionを使うことでMutationに対する通知を受け取ることができます。
リアルタイムデータ - AWS AppSync

また、AWS AppSyncにAWS Amplifyを組み合わせた場合でも、Amplify FrameworkのSubscriptionが使えます。
Subscription | AWS Amplify | API

 
ドキュメントを読んでいたところ、Subscriptionに引数を追加することで、一部のMutationに対してのみ通知を受け取ることもできそうでした。

そこで、AWS AppSync + Amplifyで試してみたため、その時のメモを残します。

 
目次


環境


Schemaと確認内容

今回用意したAmplifyの schema.graphql はこちらです。

type Blog
        @model(queries: {get: "getBlog"}, mutations: {create: "createBlog"},
            subscriptions: { onCreate: [
                "none",
                "titleOnly(title: String!)",
                "all(title: String!, content: String)",
            ]})
        @key(fields: ["title"]) {
    title: String!
    content: String
}

 
これをデプロイすると、AppSync Console上のSchemaは以下のような感じになります。

type Blog {
    title: String!
    content: String
}

input CreateBlogInput {
    title: String!
    content: String
}

type Mutation {
    createBlog(input: CreateBlogInput!): Blog
}

type Query {
    getBlog(title: String!): Blog
}

type Subscription {
    none: Blog
        @aws_subscribe(mutations: ["createBlog"])
    titleOnly(title: String!): Blog
        @aws_subscribe(mutations: ["createBlog"])
    all(title: String!, content: String): Blog
        @aws_subscribe(mutations: ["createBlog"])
}

 
今回は、このSchemaに対し、3つのSubscription

  • none (引数なし)
  • titleOnly (キーtitleのみの引数)
  • all (キーtitle、およびそれ以外の項目(content)も引数に含む)

を実行した後にMutation createBlog を実行することで、各Subscriptionがどのように動作するかを確認します。

 
動作確認用の環境として、以下の index.html と src/app.js を用意しました。

index.html

<!DOCTYPE html>
<html lang="en">
<head>
  <meta charset="utf-8">
  <title>Amplify Framework</title>
  <meta name="viewport" content="width=device-width, initial-scale=1">
</head>
<body>
<div class="app">
  <div>フィルターなし
    <button id="none">Non Filter</button>
  </div>
  <div>タイトルだけ (title=foo)
    <button id="title_only">Title Only</button>
  </div>
  <div>すべて (title=foo, content=bar)
    <button id="all">All Filter</button>
  </div>


  <div>データ作成
    <label for="title">タイトル</label>
    <input type="text" id="title" placeholder="my title" />
    <label for="content">内容</label>
    <input type="text" id="content" placeholder="my content" />
  </div>

  <div>
    <button id="create">Create</button>
  </div>


</div>
<script src="main.bundle.js"></script>
</body>
</html>


app.js

subscriptionを実行する時の引数は、それぞれ以下を指定しました。

subscriptionsのメソッド 引数
none なし
titleOnly title = 'foo'
all title = 'foo' , content = 'bar'

また、一度通知を受け取ったら再度受け取らないよう、 unsubscribe() メソッドを使って通知を中止しています。
https://aws-amplify.github.io/docs/js/api#subscriptions


import Amplify, { API } from 'aws-amplify';
import awsconfig from './aws-exports';
import * as mutations from "./graphql/mutations";
import * as subscriptions from "./graphql/subscriptions";


// データ作成
const creteButton = document.getElementById('create');
creteButton.addEventListener('click', () => {
  Amplify.configure(awsconfig);
  API.graphql(
    {
      query: mutations.createBlog,
      authMode: 'API_KEY',
      variables: {
        input: {
          title: document.getElementById('title').value,
          content: document.getElementById('content').value,
        }
      }
    }
  ).then((data) => {
    console.log('created: target data.');
    console.log(data);
  })
    .catch((e) => {
      console.log('mutation error');
      console.log(e)
    });
});


// --------------------------
// Subscriptions
// --------------------------

// non filter
const nonFilterButton = document.getElementById('none');
nonFilterButton.addEventListener('click', () => {
  Amplify.configure(awsconfig);

  console.log('subscribe(none): start...');

  const client = API.graphql(
    {
      query: subscriptions.none,
      authMode: 'API_KEY',
    }
  ).subscribe({
    next: (data) => {
      console.log('subscribed: none');
      console.log(data);
      // 一回通知を受け取ったら、それ以降は受け取らないようにする
      client.unsubscribe();
      console.log('finish: none');
    },
    error: (err) => {
      console.log(err);
      client.unsubscribe();
      console.log('sub error (none)');
    },
    close: () => console.log('sub done')
  })
});


// title filter
const titleFilterButton = document.getElementById('title_only');
titleFilterButton.addEventListener('click', () => {
  Amplify.configure(awsconfig);

  console.log('subscribe(title): start...');

  const client = API.graphql(
    {
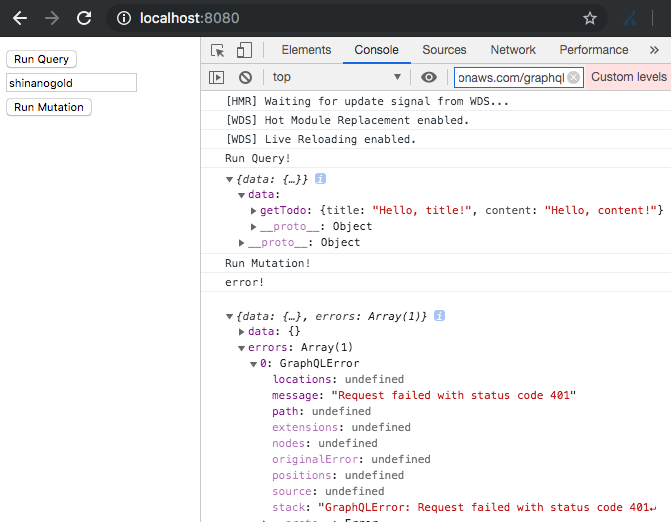
      query: subscriptions.titleOnly,
      authMode: 'API_KEY',
      variables: {
        title: "foo"
      }
    }
  ).subscribe({
    next: (data) => {
      console.log('subscribed: title');
      console.log(data);
      client.unsubscribe();
      console.log('finish: title');
    },
    error: (err) => {
      console.log(err);
      client.unsubscribe();
      console.log('sub error (title)');
    },
    close: () => console.log('sub done')
  })
});


const allButton = document.getElementById('all');
allButton.addEventListener('click', () => {
  Amplify.configure(awsconfig);

  console.log('subscribe(all): start...');

  const client = API.graphql(
    {
      query: subscriptions.all,
      authMode: 'API_KEY',
      variables: {
        title: "foo",
        content: "bar"
      }
    }
  ).subscribe({
    next: (data) => {
      console.log('subscribed: all');
      console.log(data);
      client.unsubscribe();
      console.log('finish: all');
    },
    error: (err) => {
      console.log(err);
      client.unsubscribe();
      console.log('sub error (all)');
    },
    close: () => console.log('sub done')
  })
});


動作確認

どのSubscriptionの引数にも一致しないtitleのMutationを実行

title = 'ham' , content = 'spam' のMutationを実行した時は

  • 引数なしの none()

のSubscriptionで通知を受け取りました。

f:id:thinkAmi:20190721204206p:plain:w450


一部の引数ありのSubscriptionに一致する、titleが "foo" のMutationを実行

title = 'foo' , content = 'spam' のMutationを実行した時は、

  • 引数なしの none()
  • 引数 title = 'foo' を設定した titleOnly()

の2つのSubscriptionで通知を受け取りました。

f:id:thinkAmi:20190721204836p:plain:w450


引数ありのSubscriptionすべてに一致する、titleが "foo" & contentが "bar" のMutationを実行

title = 'foo' , content = 'bar' のMutationを実行した時は、すべてのSubscriptionで通知を受け取りました。

f:id:thinkAmi:20190721205009p:plain:w450


まとめ

以上より、Mutationでの更新内容とSubscriptionの引数値がすべて一致した場合に、通知を受け取れるようでした。

例えば

const client = API.graphql(
  {
    query: subscriptions.all,
    authMode: 'API_KEY',
    variables: {
      title: "foo",
      content: "bar"
    }
  }
)

は、title == "foo" && content == "bar" のMutationのみ通知を受け取るようです。


ソースコード

Githubに上げました。 filter_subscription ディレクトリ以下が今回のファイルです。
https://github.com/thinkAmi-sandbox/AWS_AppSync_Amplify-sample
AWS AppSync + Amplifyで、AWS_IAM認証を使って、認証されていないユーザーに対してQueryを許可してみた

AWS AppSyncを使ってGraphQL APIを公開する場合、 Default authorization mode が必須なため、何らかの方法での認証を行う必要があります。
セキュリティ - AWS AppSync

認証されていないユーザーでもAPIを使えるようにしたいと考えた場合、簡単なのはAPI_KEY認証です。

ただし、APIで共通のAPIキーを使い、またAPIキーの有効期限があるなどの問題があり、ドキュメントにも

API キーは、最大 365 日間有効に設定可能で、該当日からさらに最大 365 日、既存の有効期限を延長できます。API キーは、パブリック API の公開が安全であるユースケース、または開発目的での使用が推奨されます。

と書かれています。

 
他の認証方法のうち、OPENID_CONNECT認証とAMAZON_COGNITO_USER_POOLS認証については、何らかの形でログインが必要になります。

残るはAWS_IAM認証ですが、

  • 認証されていないユーザーがアクセスする場合、Amazon CognitoのIDプールの 認証されていないロール が適用される
  • Amazon Cognitoには、 認証されていない ID に対してアクセスを有効にする という設定がある

ことから、これを使えばよいのではと考えました。

 
そこで、AWS_IAM認証を使って、認証されていないユーザーに対してQueryを許可してみた時のメモを残します。

 
なお、記載に誤りがありましたら、ご指摘ください。

 
ちなみに、現在のAmplify CLI (1.8.2)でAppSync APIを作成する場合、AWS_IAM認証の設定を行えません。
Add AWS_IAM via Identity Pool as an authorization option when adding a GraphQL API · Issue #1386 · aws-amplify/amplify-cli

そのため、Amplify CLIで可能な限り作業しつつ、足りないことはAWSの各Consoleで設定する形にします。

 
目次


環境

  • @aws-amplify/cli 1.8.2
  • 使用するAmplifyモジュール

 
また、今回Queryを実行する対象のDynamoDBテーブル Todo は以下とします。

項目 備考
title String 必須
content String


Amplifyモジュールの追加

Amplify CLIを使って、必要なモジュールを追加していきます。


amplify init
$ amplify init
Note: It is recommended to run this command from the root of your app directory
? Enter a name for the project unauthaccesswithIAM
? Enter a name for the environment dev
? Choose your default editor: Visual Studio Code
? Choose the type of app that you're building javascript
Please tell us about your project
? What javascript framework are you using none
? Source Directory Path:  src
? Distribution Directory Path: dist
? Build Command:  npm run-script build
? Start Command: npm run-script start
Using default provider  awscloudformation

For more information on AWS Profiles, see:
https://docs.aws.amazon.com/cli/latest/userguide/cli-multiple-profiles.html

? Do you want to use an AWS profile? Yes
? Please choose the profile you want to use default


Authモジュールの追加

ポイントは、Allow unauthenticated logins? (Provides scoped down permissions that you can control via AWS IAM)」を Yes とすることです。これにより、IDプールの 認証されていない ID に対してアクセスを有効にする がチェックされます。

$ amplify auth add
Using service: Cognito, provided by: awscloudformation
 
 The current configured provider is Amazon Cognito. 
 
 Do you want to use the default authentication and security configuration? Manual configuration
 Select the authentication/authorization services that you want to use: User Sign-Up, Sign-In, connected with AWS IAM controls (Enables per-user Storage features for images or oth
er content, Analytics, and more)
 Please provide a friendly name for your resource that will be used to label this category in the project: UnauthDynamoDBResource
 Please enter a name for your identity pool. UnauthDynamoDBRIdentityPool

 # 認証されていないIDに対してアクセスを有効にするにチェックを入れる
 Allow unauthenticated logins? (Provides scoped down permissions that you can control via AWS IAM) Yes

 Do you want to enable 3rd party authentication providers in your identity pool? No
 Please provide a name for your user pool: UnauthDynamoDBRUserPool
 Warning: you will not be able to edit these selections. 
 How do you want users to be able to sign in? Username
 Multifactor authentication (MFA) user login options: OFF
 Email based user registration/forgot password: Enabled (Requires per-user email entry at registration)
 Please specify an email verification subject: Your verification code
 Please specify an email verification message: Your verification code is {####}
 Do you want to override the default password policy for this User Pool? No
 Warning: you will not be able to edit these selections. 
 What attributes are required for signing up? (Press <space> to select, <a> to toggle all, <i> to invert selection)Email
 Specify the app's refresh token expiration period (in days): 30
 Do you want to specify the user attributes this app can read and write? No
 Do you want to enable any of the following capabilities? (Press <space> to select, <a> to toggle all, <i> to invert selection)
 Do you want to use an OAuth flow? No
? Do you want to configure Lambda Triggers for Cognito? No


APIモジュールの追加

今回は、Amplify CLIの実行後に、その内容を修正・追加する形をとります。

なお、前述の通り 「Choose an authorization type for the API」は

  • API_KEY認証
  • AMAZON_COGNITO_USER_POOLS認証

のどちらかしか選択できないため、ひとまず動作確認が楽な API key を選んでおきます。

$ amplify api add
? Please select from one of the below mentioned services GraphQL
? Provide API name: UnauthDynamoDBAPI

# API_KEY認証にする
? Choose an authorization type for the API API key

? Do you have an annotated GraphQL schema? No
? Do you want a guided schema creation? No
? Provide a custom type name Todo

 
なお、<root>/amplify/backend/api/UnauthDynamoDBAPI/build ディレクトリにある

  • stacks/Todo.json
  • resolvers/

などは、amplify push すると上書きされてしまうため、どこか別のところに保存しておくと参照できるので便利です。


schema.graphqlの修正

Amplify CLIで作成されたschema.graphqlでは、@model ディレクティブがあるためにQuery/Mutation/Subscriptionができてしまいます。

そのため、今回必要なものだけに修正します。Queryの他に、きちんとアクセス制限されるかを確認するためにMutationも用意します。

type Todo {
    title: String!
    content: String
}

input CreateTodoInput {
    title: String!
    content: String
}


type Query {
    getTodo(title: String!): Todo
}

type Mutation {
    createTodo(input: CreateTodoInput!): Todo
}


stacks/Todo.jsonの修正

こちらも今回不要なものがいくつもあるため、CloudFormationのドキュメントを参照しつつ、修正を加えます。

AmplifyにおけるCloudFormationの設定は、今のところJSONしか対応していないため、行数が多くなってしまうのが残念です。
Cloudformation template format. · Issue #1286 · aws-amplify/amplify-cli

# YAMLで書いた時のエラー
Yaml is not yet supported. Please convert the CloudFormation stack ExistsDynamoDB.yaml to json.


Parametersまで

必要なパラメータだけに絞ります。

なお、AppSyncAPIのIDは、 AppSyncApiId というパラメータ名で受け取れます。
How to resolve GetAttGraphQLAPIApiId in CustomResources.json · Issue #1109 · aws-amplify/amplify-cli

{
    "AWSTemplateFormatVersion": "2010-09-09",
    "Description": "Todo stack",
    "Metadata": {},
    "Parameters": {
        "AppSyncApiId": {
            "Type": "String",
            "Description": "The id of the AppSync API associated with this project."
        },
        "env": {
            "Type": "String",
            "Description": "The environment name. e.g. Dev, Test, or Production",
            "Default": "NONE"
        },
        "DynamoDBBillingMode": {
            "Type": "String",
            "Description": "Configure @model types to create DynamoDB tables with PAY_PER_REQUEST or PROVISIONED billing modes.",
            "Default": "PAY_PER_REQUEST",
            "AllowedValues": [
                "PAY_PER_REQUEST",
                "PROVISIONED"
            ]
        },
        "S3DeploymentBucket": {
            "Type": "String",
            "Description": "The S3 bucket containing all deployment assets for the project."
        },
        "S3DeploymentRootKey": {
            "Type": "String",
            "Description": "An S3 key relative to the S3DeploymentBucket that points to the root of the deployment directory."
        }
    },
    "Resources": {
...


DynamoDBテーブルの作成

まずは、今回使用するDynamoDBテーブルの作成をResourcesに記述します。

 
今回は、必須設定の

  • TableName
  • KeySchema
  • AttributeDefinitions
  • BillingMode

のみ行い、後はデフォルトのままです。

"TodoTable": {
    "Type": "AWS::DynamoDB::Table",
    "Properties": {
        "TableName": {
            "Fn::Join": [
                "-",
                [
                    "TodoUnauth",
                    {
                        "Ref": "env"
                    }
                ]
            ]
        },
        "KeySchema": [
            {
                "AttributeName": "title",
                "KeyType": "HASH"
            }
        ],
        "AttributeDefinitions": [
            {
                "AttributeName": "title",
                "AttributeType": "S"
            }
        ],
        "BillingMode": {
            "Fn::If": [
                "ShouldUsePayPerRequestBilling",
                "PAY_PER_REQUEST",
                {
                    "Ref": "AWS::NoValue"
                }
            ]
        }
    }
},

 
また、 Conditions に、 ShouldUsePayPerRequestBilling の設定をします。

    },  // Resources の閉じカッコ
    "Conditions": {
        "ShouldUsePayPerRequestBilling": {
            "Fn::Equals": [
                {
                    "Ref": "DynamoDBBillingMode"
                },
                "PAY_PER_REQUEST"
            ]
        }
    }
}


DynamoDBを操作するIAMロールを作成

AppSyncのDataSourceを指定する場合、 SerciceRoleArn (データソースがリソースへの接続に使用するIAMロール) が必要になるため、IAMロールを作成します。

 
ポイントとしては、AppSyncでの利用で誤った操作をされないよう、PoliciesのActionは dynamodb:GetItem だけ許可しておきます。

また、AppSyncで利用するためのAssumeRole設定を、AssumeRolePolicyDocumentに記載します。
IAMロール徹底理解 〜 AssumeRoleの正体 | DevelopersIO

"AssumeRolePolicyDocument": {
    "Version": "2012-10-17",
    "Statement": [
        {
            "Effect": "Allow",
            "Principal": {
                "Service": "appsync.amazonaws.com"
            },
            "Action": "sts:AssumeRole"
        }
    ]
},

 
全体は以下です。

"TodoIAMRole": {
    "Type": "AWS::IAM::Role",
    "Properties": {
        "RoleName": {
            "Fn::Join": [
                "-",
                [
                    "TodoTableUnauthAccessRole",
                    {
                        "Ref": "env"
                    }
                ]
            ]
        },
        "AssumeRolePolicyDocument": {
            "Version": "2012-10-17",
            "Statement": [
                {
                    "Effect": "Allow",
                    "Principal": {
                        "Service": "appsync.amazonaws.com"
                    },
                    "Action": "sts:AssumeRole"
                }
            ]
        },
        "Policies": [
            {
                "PolicyName": "DynamoDBAccess",
                "PolicyDocument": {
                    "Version": "2012-10-17",
                    "Statement": [
                        {
                            "Effect": "Allow",
                            "Action": [
                                "dynamodb:GetItem"
                            ],
                            "Resource": [
                                {
                                    "Fn::Sub": [
                                        "arn:aws:dynamodb:${AWS::Region}:${AWS::AccountId}:table/${tablename}",
                                        {
                                            "tablename": {
                                                "Ref": "TodoTable"
                                            }
                                        }
                                    ]
                                },
                                {
                                    "Fn::Sub": [
                                        "arn:aws:dynamodb:${AWS::Region}:${AWS::AccountId}:table/${tablename}/*",
                                        {
                                            "tablename": {
                                                "Ref": "TodoTable"
                                            }
                                        }
                                    ]
                                }
                            ]
                        }
                    ]
                }
            }
        ]
    }
},


AppSyncのDataSourceを指定

ここまでで、DynamoDBテーブル & 操作するIAMロールができましたので、次はAppSyncまわりの設定です。

まずはDataSourceを設定します。
AWS::AppSync::DataSource - AWS CloudFormation

 
ポイントとしては ServiceRoleArn に、先ほど作成した TodoIAMRoleArn を指定することです。

"ServiceRoleArn": {
    "Fn::GetAtt": ["TodoIAMRole", "Arn"]
},

 
全体です。

"TodoDataSource": {
    "Type": "AWS::AppSync::DataSource",
    "Properties": {
        "ApiId": {"Ref": "AppSyncApiId"},
        "Name": "TodoTable",
        "Type": "AMAZON_DYNAMODB",
        "ServiceRoleArn": {
            "Fn::GetAtt": ["TodoIAMRole", "Arn"]
        },
        "DynamoDBConfig": {
            "AwsRegion": {
                "Ref": "AWS::Region"
            },
            "TableName": {"Ref": "TodoTable"}
        }
    }
},


ゾルバーの設定

必要なのはQueryリゾルバーだけですが、今回AppSync Consoleからも確認できるようにMutaitionリゾルバーも用意します。
AWS::AppSync::Resolver - AWS CloudFormation

 
ポイントは

  • DataSourceNameに、上記で作成したDataSourceのNameを指定
    • "Fn::GetAtt": ["TodoDataSource", "Name"]
  • FieldNameは、GraphQLのQuery/Mutationの名前と合わせる

あたりです。

"GetTodoResolver": {
    "Type": "AWS::AppSync::Resolver",
    "Properties": {
        "ApiId": {"Ref": "AppSyncApiId"},
        "DataSourceName": {
            "Fn::GetAtt": [
                "TodoDataSource",
                "Name"
            ]
        },
        "FieldName": "getTodo",
        "TypeName": "Query",
        "RequestMappingTemplateS3Location": {
            "Fn::Sub": [
                "s3://${S3DeploymentBucket}/${S3DeploymentRootKey}/resolvers/${ResolverFileName}",
                {
                    "S3DeploymentBucket": {
                        "Ref": "S3DeploymentBucket"
                    },
                    "S3DeploymentRootKey": {
                        "Ref": "S3DeploymentRootKey"
                    },
                    "ResolverFileName": {
                        "Fn::Join": [
                            ".",
                            [
                                "Query",
                                "getTodo",
                                "req",
                                "vtl"
                            ]
                        ]
                    }
                }
            ]
        },
        "ResponseMappingTemplateS3Location": {
            "Fn::Sub": [
                "s3://${S3DeploymentBucket}/${S3DeploymentRootKey}/resolvers/${ResolverFileName}",
                {
                    "S3DeploymentBucket": {
                        "Ref": "S3DeploymentBucket"
                    },
                    "S3DeploymentRootKey": {
                        "Ref": "S3DeploymentRootKey"
                    },
                    "ResolverFileName": {
                        "Fn::Join": [
                            ".",
                            [
                                "Query",
                                "getTodo",
                                "res",
                                "vtl"
                            ]
                        ]
                    }
                }
            ]
        }
    }
},

"CreateTodoResolver": {
    "Type": "AWS::AppSync::Resolver",
    "Properties": {
        "ApiId": {"Ref": "AppSyncApiId"},
        "DataSourceName": {
            "Fn::GetAtt": [
                "TodoDataSource",
                "Name"
            ]
        },
        "FieldName": "createTodo",
        "TypeName": "Mutation",
        "RequestMappingTemplateS3Location": {
            "Fn::Sub": [
                "s3://${S3DeploymentBucket}/${S3DeploymentRootKey}/resolvers/${ResolverFileName}",
                {
                    "S3DeploymentBucket": {
                        "Ref": "S3DeploymentBucket"
                    },
                    "S3DeploymentRootKey": {
                        "Ref": "S3DeploymentRootKey"
                    },
                    "ResolverFileName": {
                        "Fn::Join": [
                            ".",
                            [
                                "Mutation",
                                "createTodo",
                                "req",
                                "vtl"
                            ]
                        ]
                    }
                }
            ]
        },
        "ResponseMappingTemplateS3Location": {
            "Fn::Sub": [
                "s3://${S3DeploymentBucket}/${S3DeploymentRootKey}/resolvers/${ResolverFileName}",
                {
                    "S3DeploymentBucket": {
                        "Ref": "S3DeploymentBucket"
                    },
                    "S3DeploymentRootKey": {
                        "Ref": "S3DeploymentRootKey"
                    },
                    "ResolverFileName": {
                        "Fn::Join": [
                            ".",
                            [
                                "Mutation",
                                "createTodo",
                                "res",
                                "vtl"
                            ]
                        ]
                    }
                }
            ]
        }
    }
}


IDプールの「認証されていないロール」にアタッチするポリシーを作成

ここまででDynamoDBとAppSyncの設定が終わりました。

最後に、IDプールの 認証されていないロール にアタッチする管理ポリシーを作成します。このポリシーは、後で「認証されていないロール」に手動でアタッチします。Amplify CLIAWS_IAM認証に対応していないためです。

 
ポイントとしては、Statementで

を行うことです。

"UnauthAccessPolicy": {
    "Type": "AWS::IAM::ManagedPolicy",
    "Properties": {
        "PolicyDocument": {
            "Version": "2012-10-17",
            "Statement": [
                {
                    "Effect": "Allow",
                    "Action": [
                        "appsync:GraphQL"
                    ],
                    "Resource": [
                        {
                            "Fn::Sub": [
                                "arn:aws:appsync:${AWS::Region}:${AWS::AccountId}:apis/${apiID}/types/Query/*",
                                {
                                    "apiID": {
                                        "Ref": "AppSyncApiId"
                                    }
                                }
                            ]
                        }
                    ]
                }
            ]
        },
        "ManagedPolicyName": {
            "Fn::Sub": [
                "MyUnauthAccessPolicy-${apiID}",
                {
                    "apiID": {
                        "Ref": "AppSyncApiId"
                    }
                }
            ]
        }
    }
},


リクエスト/レスポンスマッピングテンプレートの作成

ゾルバで指定した、リクエスト/レスポンスマッピングテンプレートを <root>/amplify/backend/api/UnauthDynamoDBAPI/resolvers ディレクトリに作成します。


Query.getTodo.req.vtl

operationをTodoIAMRoleで指定した GetItem にして、リクエストテンプレートを作成します。

{
  "version": "2017-02-28",
  "operation": "GetItem",
  "key": {
    "title": $util.dynamodb.toDynamoDBJson($ctx.args.title)
  }
}


Query.getTodo.res.vtl

結果をそのまま返します。

$util.toJson($context.result)


Mutation用のマッピングテンプレート

今回の動作確認用のMutation用マッピングテンプレートも用意します。

Mutation.createTodo.req.vtl

## [Start] Prepare DynamoDB PutItem Request. **
$util.qr($context.args.input.put("createdAt", $util.defaultIfNull($ctx.args.input.createdAt, $util.time.nowISO8601())))
$util.qr($context.args.input.put("updatedAt", $util.defaultIfNull($ctx.args.input.updatedAt, $util.time.nowISO8601())))
$util.qr($context.args.input.put("__typename", "Todo"))
{
  "version": "2017-02-28",
  "operation": "PutItem",
  "key": {
    "title": { "S" : "${context.args.input.title}" }
  },
  "attributeValues": $util.dynamodb.toMapValuesJson($context.args.input),
  "condition": {
      "expression": "attribute_not_exists(#title)",
      "expressionNames": {
          "#title": "title"
    }
  }
}
## [End] Prepare DynamoDB PutItem Request. **

 
Mutation.createTodo.res.vtl

$util.toJson($context.result)


pushして動作確認

ここまでで設定ができたため、

$ amplify push

します。

その後、AppSync ConsoleのQueriesで、MutationとQueryが成功することを確認します。


Mutation
mutation CreateTodo($params: CreateTodoInput!) {
  createTodo(input: $params) {
    title
    content
  }
}

 
QUERY_VALUESです。

{
  "params": {
    "title": "Hello, title!",
    "content": "Hello, content!"
  }
}

 
実行すると以下が表示されます。

{
  "data": {
    "createTodo": {
      "title": "Hello, title!",
      "content": "Hello, content!"
    }
  }
}


Query

Mutationと同様です。

query GetTodo($title: String!) {
  getTodo(title: $title) {
    title
    content
  }
}

 
QUERY_VALUESです。

{
  "params": {
    "title": "Hello, title!",
    "content": "Hello, content!"
  },
  "title": "Hello, title!"
}

 
結果です。

{
  "data": {
    "createTodo": {
      "title": "Hello, title!",
      "content": "Hello, content!"
    }
  }
}


AWS_IAM認証化

ここまではAPY_KEY認証でしたので、AWS_IAM認証へと切り替えます。


AppSync Consoleでの認証切り替え

Settings にある Default authorization mode を、 AWS Identity and Access Management (IAM) へと変更し、 Save をクリックします。


IAMロールで、認証されていないロールにポリシーをアタッチ

まずは、CognitoのIDプールにて、編集画面から 認証されていないロール のロール名を確認します(今回の場合、 unauthaccess-dev-20190720202229-unauthRole )。

f:id:thinkAmi:20190721115435p:plain:w300

 
次に、IAMのロールで確認したロール名を選択し、stacks/Todo.jsonUnauthAccessPolicy セクションで作成したポリシー (MyUnauthAccessPolicy-<AppSync API ID>)をアタッチします。

f:id:thinkAmi:20190721115618p:plain:w200


動作確認

Amplify Framework JavaScriptを使って、ボタンを押したらQuery/Mutationを実行する動作確認アプリを作成します。

以下ではindex.htmlとsrc/app.jsのみ掲載します。

  • package.json
  • webpack.config.js

は、Amplify公式チュートリアルを流用したものを用意します。
Amplify JavaScript - Getting Started

index.html
<!DOCTYPE html>
<html lang="en">
<head>
  <meta charset="utf-8">
  <title>Amplify Framework</title>
  <meta name="viewport" content="width=device-width, initial-scale=1">
</head>
<body>
<div class="app">
    <button id="query">Run Query</button>
</div>
<div>
    <input type="text" id="title" placeholder="title">
    <button id="mutation">Run Mutation</button>
</div>
<script src="main.bundle.js"></script>
</body>
</html>


src/app.js
import Amplify, {API} from 'aws-amplify';
import awsconfig from './aws-exports';
import * as queries from "./graphql/queries";
import * as mutations from "./graphql/mutations";


const queryButton = document.getElementById('query');
queryButton.addEventListener('click', () => {
  console.log('Run Query!');
  Amplify.configure(awsconfig);
  API.graphql(
    {
      query: queries.getTodo,
      authMode: 'AWS_IAM',
      variables: {
        title: "Hello, title!"
      }
    }
  ).then((data) => {
    console.log(data);
  })
    .catch((e) => {
      console.log('error!');
      console.log(e)
    });
});


const mutationButton = document.getElementById('mutation');
mutationButton.addEventListener('click', () => {
  console.log('Run Mutation!');

  const title = document.getElementById('title').value;
  Amplify.configure(awsconfig);
  API.graphql(
    {
      query: mutations.createTodo,
      authMode: 'AWS_IAM',
      variables: {
        input: {
          title: title,
          content: "hello"
        }
      }
    }
  ).then((data) => {
    console.log(data);
  })
    .catch((e) => {
      console.log('error!');
      console.log(e)
    });
});


結果

$ npm start してアプリを起動後、動作を確認してみます。

すると、

  • Queryは成功
  • MutationはHTTP 401 エラー

となり、認証されていないユーザーに対してQueryのみ許可できました。

f:id:thinkAmi:20190721111936p:plain:w450


ソースコード

Githubに上げました。 unauth_access ディレクトリ以下が今回のファイルです。
https://github.com/thinkAmi-sandbox/AWS_AppSync_Amplify-sample
AWS Amplify CLIの amplify auth push の挙動について

AWS Amplify CLI のREADMEを見ると、

amplify auth push

Provisions only Auth cloud resources with the latest local developments.

https://github.com/aws-amplify/amplify-cli/tree/master/packages/amplify-category-auth

という記述がありました。

気になったので試してみたところ、思っていた挙動と違っていたのでメモを残します。

なお、手順などで勘違いしている部分があれば、ご指摘いただけるとありがたいです。

 
目次


環境


勘違いしていたこと

手元の環境で

のモジュールがあった時に amplify auth push をすると、Authモジュールだけがpushされると思っていました。

ただ、実際には、API・Authの両方がpushされました。


新規作成した時の流れ

init

特に変わりない、一般的なinitです。

$ amplify init

Note: It is recommended to run this command from the root of your app directory
? Enter a name for the project auth_before_api
? Enter a name for the environment dev
? Choose your default editor: Visual Studio Code
? Choose the type of app that you're building javascript
Please tell us about your project
? What javascript framework are you using none
? Source Directory Path:  src
? Distribution Directory Path: dist
? Build Command:  npm run-script build
? Start Command: npm run-script start

Using default provider  awscloudformation

For more information on AWS Profiles, see:
https://docs.aws.amazon.com/cli/latest/userguide/cli-multiple-profiles.html

? Do you want to use an AWS profile? Yes
? Please choose the profile you want to use default


Authモジュールの追加

APIを作る前に、Authモジュールを追加しました。

今回はデフォルト設定にしました。

$ amplify auth add
Using service: Cognito, provided by: awscloudformation
 
 The current configured provider is Amazon Cognito. 
 
 Do you want to use the default authentication and security configuration? Default configuration
 Warning: you will not be able to edit these selections. 
 How do you want users to be able to sign in? Username
 Do you want to configure advanced settings? No, I am done.


APIモジュールの追加

次にAPIモジュールを追加します。

$ amplify api add
? Please select from one of the below mentioned services GraphQL
? Provide API name: authbeforeapi
? Choose an authorization type for the API API key
? Do you have an annotated GraphQL schema? No
? Do you want a guided schema creation? No
? Provide a custom type name MyType
Creating a base schema for you...

GraphQL schema compiled successfully.


状態確認

両方ともpushされていません。

$ amplify status

Current Environment: dev

| Category | Resource name         | Operation | Provider plugin   |
| -------- | --------------------- | --------- | ----------------- |
| Auth     | authbeforeapibf6779e5 | Create    | awscloudformation |
| Api      | authbeforeapi         | Create    | awscloudformation |


amplify auth push

Authモジュールだけpushするつもりでした。

$ amplify auth push

Current Environment: dev

| Category | Resource name         | Operation | Provider plugin   |
| -------- | --------------------- | --------- | ----------------- |
| Auth     | authbeforeapibf6779e5 | Create    | awscloudformation |
? Are you sure you want to continue? Yes

GraphQL schema compiled successfully.
...

? Do you want to generate code for your newly created GraphQL API Yes
? Choose the code generation language target javascript
? Enter the file name pattern of graphql queries, mutations and subscriptions src/graphql/**/*.js
? Do you want to generate/update all possible GraphQL operations - queries, mutations and subscriptions Yes
? Enter maximum statement depth [increase from default if your schema is deeply nested] 2

 
しばらく待つと、想定していなかった

  • APIのエンドポイント
  • API Key

が作成されました。

✔ All resources are updated in the cloud

GraphQL endpoint: https://xxx.appsync-api.region.amazonaws.com/graphql
GraphQL API KEY: da2-xxx

 
状況を確認しても、両方ともpushされていました。

$ amplify status

Current Environment: dev

| Category | Resource name         | Operation | Provider plugin   |
| -------- | --------------------- | --------- | ----------------- |
| Auth     | authbeforeapibf6779e5 | No Change | awscloudformation |
| Api      | authbeforeapi         | No Change | awscloudformation |

GraphQL endpoint: https://xxx.appsync-api.region.amazonaws.com/graphql
GraphQL API KEY: da2-xxx


両方とも更新して、再度 amplify auth push した時の流れ

Authモジュールを更新します。

$ amplify auth update
Please note that certain attributes may not be overwritten if you choose to use defaults settings.

You have configured resources that might depend on this Cognito resource.  Updating this Cognito resource could have unintended side effects.

Using service: Cognito, provided by: awscloudformation
 What do you want to do? Walkthrough all the auth configurations
 Select the authentication/authorization services that you want to use: User Sign-Up & Sign-In only (Best used with a cloud API only)
 Multifactor authentication (MFA) user login options: OFF
 Email based user registration/forgot password: Enabled (Requires per-user email entry at registration)
 Please specify an email verification subject: Your verification code
 Please specify an email verification message: Your verification code is {####}
 Do you want to override the default password policy for this User Pool? No
 Specify the app's refresh token expiration period (in days): 30
 Do you want to specify the user attributes this app can read and write? No
 Do you want to enable any of the following capabilities? (Press <space> to select, <a> to toggle all, <i> to invert selection)
 Do you want to use an OAuth flow? No
? Do you want to configure Lambda Triggers for Cognito? No
Successfully updated resource authbeforeapibf6779e5 locally
...

 
続いて、APIもupdateします。

$ amplify api update
? Please select from one of the below mentioned services GraphQL
? Choose an authorization type for the API Amazon Cognito User Pool

GraphQL schema compiled successfully.

 
状態を確認します。

$ amplify status

Current Environment: dev

| Category | Resource name         | Operation | Provider plugin   |
| -------- | --------------------- | --------- | ----------------- |
| Auth     | authbeforeapibf6779e5 | Update    | awscloudformation |
| Api      | authbeforeapi         | Update    | awscloudformation |

 
Authモジュールをpushしてみます。

$ amplify auth push

Current Environment: dev

| Category | Resource name         | Operation | Provider plugin   |
| -------- | --------------------- | --------- | ----------------- |
| Auth     | authbeforeapibf6779e5 | Update    | awscloudformation |
? Are you sure you want to continue? Yes

 
APIとAuthの両方が更新されました。

$ amplify status

Current Environment: dev

| Category | Resource name         | Operation | Provider plugin   |
| -------- | --------------------- | --------- | ----------------- |
| Auth     | authbeforeapibf6779e5 | No Change | awscloudformation |
| Api      | authbeforeapi         | No Change | awscloudformation |