Python + Zeep で SOAP API クライアントを作ってみた

Python + Zeep で SOAP API クライアントを作ってみたため、その時のメモを残します。


目次


環境

 
なお、WSDLがあるSOAP APIを使うことを想定しています。

WSDLのバージョンなどはWikipediaが参考になりました。
Web Services Description Language - Wikipedia


Zeepとは

公式ドキュメントによると

A fast and modern Python SOAP client Highlights:

  • Compatible with Python 2.7, 3.3, 3.4, 3.5, 3.6 and PyPy
  • Build on top of lxml and requests
  • Support for Soap 1.1, Soap 1.2 and HTTP bindings
  • Support for WS-Addressing headers
  • Support for WSSE (UserNameToken / x.509 signing)
  • Support for tornado async transport via gen.coroutine (Python 2.7+)
  • Support for asyncio via aiohttp (Python 3.5+)
  • Experimental support for XOP messages

https://python-zeep.readthedocs.io/en/master/

とのことで、いい感じのSOAP API クライアントが作れそうでした。


使えそうな SOAP APIを探す

SOAP API サーバを自作することも考えたのですが、ゼロから作るには先が長くなりそうでした。

 
そのため、使えそうな SOAP Web API を探してみました。

有名なところではFlickrAPIがありました。
https://www.flickr.com/services/api/

ただ、WSDLがなかったため、今回は見送りました。

 
他のAPIを探したところ、以下がありました。

 
今回はWSDLを使ってリクエスト/レスポンスができればよいため、デ辞蔵Webサービス - SOAPAPI を使います。


mzeepオプションにて、WSDLを解析する

WSDLXMLで書かれていますが、開発するために読み解くのは手間がかかります。

Zeepでは、 python -mzeep <WSDLのパス> で、WSDLファイルを解析できます。

今回のWSDLファイルは上記サイトに記載されていたため、ダウンロードして実行します。

$ python -mzeep SoapServiceV11.xml > wsdl.txt

 
wsdl.txtを開くと、

Prefixes:
     xsd: http://www.w3.org/2001/XMLSchema
...

Global elements:
     ns0:ArrayOfDicInfo(ns0:ArrayOfDicInfo)
...

Global types:
     xsd:anyType
     ns0:ArrayOfDicInfo(DicInfo: ns0:DicInfo[])
...
Bindings:
     Soap11Binding: {http://MyDictionary.jp/SOAPServiceV11}SOAPServiceV11Soap
...

Service: SOAPServiceV11
     Port: SOAPServiceV11Soap (Soap11Binding: {http://MyDictionary.jp/SOAPServiceV11}SOAPServiceV11Soap)
         Operations:
            GetDicItem(AuthTicket: xsd:string, DicID: ns1:guid, ItemID: xsd:string, LocID: xsd:string, ContentProfile: ns0:ContentProfile, QueryListForHighLight: ns0:ArrayOfQuery) -> GetDicItemResult: ns0:DicItem
...

と、各種情報が分かりやすくなりました。


型情報を見やすくする

mzeepオプションでだいぶ分かりやすくなりました。

ただ、型情報が1行で表示されるため、複数の項目を持つ型の場合、見づらいことに気づきました。

そのため、

import pathlib


read_file = pathlib.Path('./wsdl.txt')
with read_file.open(mode='r') as r:
    f = r.read()

formatted = f.split(',')

write_file = pathlib.Path('./formatted.txt')
with write_file.open(mode='w') as w:
    for f in formatted:
        w.write(f'{f.strip()}\n')

のようなスクリプトを作成し、フォーマットしてみました。

実行前

ns0:DicInfo(DicID: ns1:guid, FullName: xsd:string, ShortName: xsd:string, Publisher: xsd:string, Abbrev: xsd:string, StartItemID: xsd:string, ScopeList: ns0:ArrayOfScope, SearchOptionList: ns0:ArrayOfSearchOption, DefSearchOptionIndex: xsd:int, ItemMapList: ns0:ArrayOfString)

実行後

ns0:DicInfo(DicID: ns1:guid
FullName: xsd:string
ShortName: xsd:string
Publisher: xsd:string
Abbrev: xsd:string
StartItemID: xsd:string
ScopeList: ns0:ArrayOfScope
SearchOptionList: ns0:ArrayOfSearchOption
DefSearchOptionIndex: xsd:int
ItemMapList: ns0:ArrayOfString)

 
いろいろと手を加えたいところですが、今はこのくらいで十分なので、良しとします。


ZeepでAPIクライアントを作ってみる

辞書検索サービスの使い方にあるように、まずは

GetDicListで呼び出し可能な辞書の一覧を取得

をZeepを使って作ってみます。


clientの生成

公式ドキュメントの「A simple use-case」に従い、今回のSOAPクライアントを生成してみます。
https://python-zeep.readthedocs.io/en/master/#a-simple-use-case

import pathlib
from zeep import Client

WSDL = pathlib.Path.cwd().joinpath('SoapServiceV11.xml')

client = Client(str(WSDL))


SOAP APIのメソッドを呼び出す (client.get_type()を使う)

クライアントができたため、次は SOAP API のメソッドを呼び出してみます。

今回使う GetDicList メソッドでは、引数 AuthTicket を持つことが分かっています。

そのため、引数を渡すような実装方法を見たところ、公式ドキュメントの「Creating objects - Datastructures」に記載がありました。
https://python-zeep.readthedocs.io/en/master/datastructures.html#creating-objects

 
引数 AuthTicket の型は xsd:string ですので、 client.get_type('xsd:string') で型用のオブジェクトを生成しておきます。

xsd_string = client.get_type('xsd:string')

 
あとは、Zeepが client.serviceSOAP APIのメソッドをいい感じに生成・実行してくれます。

response = client.service.GetDicList(AuthTicket=xsd_string(''))
print(response)

 
ここまでのコード全体は以下です。

import pathlib
from zeep import Client

WSDL = pathlib.Path.cwd().joinpath('SoapServiceV11.xml')

client = Client(str(WSDL))
xsd_string = client.get_type('xsd:string')

response = client.service.GetDicList(AuthTicket=xsd_string(''))
print(response)

 
実行結果です。いい感じの結果が返ってきました。

$ python run_GetDicList.py 
[{
    'DicID': 'xxxx',
    'FullName': 'Edict和英辞典',
    'ShortName': 'Edict和英辞典',
...


SOAP APIのメソッドを呼び出す (client.get_type()を使わない)

上記で実装ができていましたが、型オブジェクトを生成するために

xsd_string = client.get_type('xsd:string')

としているのが手間でした。

 
よく見ると、公式ドキュメントの「Creating objects - Datastructures」には続きがあり、

However instead of creating an object from a type defined in the XSD you can also pass in a dictionary. Zeep will automatically convert this dict to the required object (and nested child objects) during the call.

とのことでした。

 
そのため、先ほどのコードは

client = Client(str(WSDL))

response = client.service.GetDicList(AuthTicket='')
print(response)

でもOKです。

 
実行結果も同じでした。

$ python run_GetDicList.py 
[{
    'DicID': 'xxxx',
    'FullName': 'Edict和英辞典',
    'ShortName': 'Edict和英辞典',
...


引数の型が複雑な SOAP API を呼び出す (get_type()を使う)

先ほどの GetDicList APIは、型が xsd:string と単純なものでした。

引数の型が複雑なAPIを探したところ、 SearchDicItem がありました。

 
そこで、まずは get_type() を使う書き方で実装してみます。

import pathlib
from zeep import Client

WSDL = pathlib.Path.cwd().joinpath('SoapServiceV11.xml')


def get_guid_list_from_api():
    client = Client(str(WSDL))

    response = client.service.GetDicList(AuthTicket='')
    return [response[0]['DicID'], response[1]['DicID']]


def call_api_with_get_type():
    def create_query(word):
        ns0_merge_option = client.get_type('ns0:MergeOption')
        ns0_match_option = client.get_type('ns0:MatchOption')

        query = client.get_type('ns0:Query')(
            Words=xsd_string(word),
            ScopeID=xsd_string('HEADWORD'),
            MatchOption=ns0_match_option('EXACT'),
            MergeOption=ns0_merge_option('OR')
        )
        return query

    client = Client(str(WSDL))
    xsd_string = client.get_type('xsd:string')
    xsd_unsigned_int = client.get_type('xsd:unsignedInt')
    ns1_guid = client.get_type('ns1:guid')

    guid_list = get_guid_list_from_api()
    guids = client.get_type('ns0:ArrayOfGuid')([
        ns1_guid(guid_list[0]),
        ns1_guid(guid_list[1]),
    ])
    queries = client.get_type('ns0:ArrayOfQuery')([
        create_query('apple'),
        create_query('america'),
    ])

    response = client.service.SearchDicItem(
        AuthTicket=xsd_string(''),
        DicIDList=guids,
        QueryList=queries,
        SortOrderID=xsd_string(''),
        ItemStartIndex=xsd_unsigned_int('0'),
        ItemCount=xsd_unsigned_int('2'),
        CompleteItemCount=xsd_unsigned_int('2'),
    )

    for r in response['ItemList']['DicItem']:
        print(r['Title']['_value_1'].text)
        print(dir(r['Title']['_value_1']))
        print('=' * 5)

 
ここで、ネスト & 配列を持つ引数 QueryList について取り上げてみます。

まず、配列の要素である ns0:Query 型のオブジェクトを作ります。

def create_query(word):
    ns0_merge_option = client.get_type('ns0:MergeOption')
    ns0_match_option = client.get_type('ns0:MatchOption')

    query = client.get_type('ns0:Query')(
        Words=xsd_string(word),
        ScopeID=xsd_string('HEADWORD'),
        MatchOption=ns0_match_option('EXACT'),
        MergeOption=ns0_merge_option('OR')
    )
    return query

 
次に、配列となる ns0:ArrayOfQuery を生成します。

queries = client.get_type('ns0:ArrayOfQuery')([
    create_query('apple'),
    create_query('america'),
])

 
最後に、SOAP APIの引数として渡します。

response = client.service.SearchDicItem(
    QueryList=queries,
    ...
)

 
実行結果は以下の通りです。

レスポンスが返ってきているので、WSDLでのやり取りは成功しているんだろうな程度にしておき、深入りはしないようにします。

$ python run_SearchDicItem.py 
apple
['__bool__', '__class__', '__contains__', ...]
=====
America
...


引数の型が複雑な SOAP API を呼び出す (get_type()を使わない)

上記の通り、 client.get_type() を使って実現できましたが、それぞれの型を get_type() で生成しておかなければならないため、いろいろと手間に感じました。

そこで、先ほどと同じように client.get_type() を使わないやり方で実装してみます。

# importや get_guid_list_from_api() は省略

def call_api_without_get_type():
    def create_query(word):
        return {
            'Words': word,
            'ScopeID': 'HEADWORD',
            'MatchOption': 'EXACT',
            'MergeOption': 'OR',
        }

    client = Client(str(WSDL))
    guids = {'guid': get_guid_list_from_api()}
    queries = {
        'Query': [
            create_query('apple'),
            create_query('america'),
        ]
    }

    response = client.service.SearchDicItem(
        AuthTicket='',
        DicIDList=guids,
        QueryList=queries,
        SortOrderID='',
        ItemStartIndex=0,
        ItemCount=2,
        CompleteItemCount=2,
    )

    for r in response['ItemList']['DicItem']:
        print(r['Title']['_value_1'].text)
        print(dir(r['Title']['_value_1']))
        print('=' * 5)

 
では、複雑な型を持つ引数 QueryList について、 get_type() を使う場合との差分を見ていきます。

def create_query(word):
    ns0_merge_option = client.get_type('ns0:MergeOption')
    ns0_match_option = client.get_type('ns0:MatchOption')

    query = client.get_type('ns0:Query')(
        Words=xsd_string(word),
        ScopeID=xsd_string('HEADWORD'),
        MatchOption=ns0_match_option('EXACT'),
        MergeOption=ns0_merge_option('OR')
    )
    return query

queries = client.get_type('ns0:ArrayOfQuery')([
    create_query('apple'),
    create_query('america'),
])

def create_query(word):
    return {
        'Words': word,
        'ScopeID': 'HEADWORD',
        'MatchOption': 'EXACT',
        'MergeOption': 'OR',
    }

queries = {
    'Query': [
        create_query('apple'),
        create_query('america'),
    ]
}

となりました。

ポイントは

  1. create_query() のような dict を用意 (これがArrayOfQueryの要素)
  2. keyに Query を、valueに 1. で作成した要素を持つdictを用意し、それを配列の要素とすることで、ArrayOfQuery になる

です。

get_type() を使うよりも、かなり簡潔になり、見やすくなりました。

 
以上より、Zeepによる SOAP APIのリクエスト/レスポンスができました。


ソースコード

GitHubに上げました。 dejizo_client ディレクトリ以下が今回のファイルです。
https://github.com/thinkAmi-sandbox/python_zeep-sample
なお、WSDLファイルをリポジトリに含めていません。含めてよいか分からなかったためです。

pytestのkオプションは、マーカー名でマッチしているものもテスト対象だった

pytestでテストを実行する時、今までは

  • -m オプションは、マーカー(@pytest.marker.xxx)に一致するもの
  • -k オプションは、テストクラス名やテストメソッド名でマッチするもの

を対象のテストコードとして実行するものと考えていました。

 
ただ、最近 -k オプションは、マーカー名でマッチするものもテスト対象になることを知ったため、挙動を調べてみました。

 
目次


環境


テストコード例

以下のテストコードに対し、 foo という文字列で -m オプションと -k オプションを実行してみます。

import pytest


@pytest.mark.foo
class TestHam:
    """クラスにマーカーあり"""
    def test_spam_method(self):
        assert True

    def test_egg_method(self):
        assert True


class TestHoge:
    @pytest.mark.foo
    def test_spam_method(self):
        """このテストメソッドだけマーカーあり"""
        assert True

    def test_egg_method(self):
        assert True


class TestHogefoo:
    """テストクラス名に foo が含まれる"""
    def test_spam_method(self):
        assert True

    def test_egg_method(self):
        assert True


@pytest.mark.foo
def test_bar_function():
    """テスト関数にマーカーあり"""
    assert True


def test_foo_function():
    """テスト関数に foo が含まれる"""
    assert True


def test_baz_function():
    assert True


mオプションの場合

mオプションの場合

  • マーカーがあるテストクラスのテストメソッド:2件
  • テストクラスのうち、マーカーがあるテストメソッド:1件
  • マーカーがあるテスト関数:1件

の合計4テストが実行されると考えていました。

 
実行すると、想定通り、対象は4テストでした。

$ pytest -m foo -v
...
collected 9 items / 5 deselected                                                                                                                                                  

test_k_option_marker.py::TestHam::test_spam_method PASSED
test_k_option_marker.py::TestHam::test_egg_method PASSED
test_k_option_marker.py::TestHoge::test_spam_method PASSED
test_k_option_marker.py::test_bar_function PASSED

==== 4 passed, 5 deselected in 0.03 seconds 


kオプションの場合

kオプションの場合、

  • foo が含まれるテストクラスのテストコード:2件
  • foo が含まれるテスト関数:1件

の合計3テストが実行されると考えていました。

 
実行すると、対象は7テストでした。

$ pytest -k foo -v
...
collected 9 items / 2 deselected                                                                                                                                                  

test_k_option_marker.py::TestHam::test_spam_method PASSED
test_k_option_marker.py::TestHam::test_egg_method PASSED
test_k_option_marker.py::TestHoge::test_spam_method PASSED
test_k_option_marker.py::TestHogefoo::test_spam_method PASSED
test_k_option_marker.py::TestHogefoo::test_egg_method PASSED
test_k_option_marker.py::test_bar_function PASSED
test_k_option_marker.py::test_foo_function PASSED

==== 7 passed, 2 deselected in 0.05 seconds

 
よく見ると、mオプションで対象だった

  • マーカーがあるテストクラスのテストメソッド:2件
    • test_k_option_marker.py::TestHam::test_spam_method
    • test_k_option_marker.py::TestHam::test_egg_method
  • テストクラスのうち、マーカーがあるテストメソッド:1件
    • test_k_option_marker.py::TestHoge::test_spam_method
  • マーカーがあるテスト関数:1件
    • test_k_option_marker.py::test_bar_function

も実行されていました。

 
なお、kオプションは部分一致なので、 -k oo としても同じ結果になりました。

$ pytest -k oo -v
...
==== 7 passed, 2 deselected

 
ドキュメントでは -k オプションがマーカーも対象にしているとは明示されていなかったため、新たな発見でした。


ソースコード

GitHubにあげました。 e.g._k_option_and_marker ディレクトリ以下が、今回のテストコードです。
https://github.com/thinkAmi-sandbox/python_pytest-sample

Werkzeugでレスポンスボディを後から差し替えてみた

Werkzeugでは werkzeug.wrappers.Response を使ってレスポンスオブジェクトを生成する際、 Response('Hello world') のようにコンストラクタの引数にレスポンスボディを渡します。

ただ、Responseオブジェクト生成後にレスポンスボディを修正する方法を知りたかったため、いろいろ試した時のメモです。

 
目次


環境

  • Python 3.6.6
  • Werkzeug 0.14.1


コンストラクタでレスポンスボディを指定

以下のWerkzeugアプリの中の index_handler() メソッドにて、コンストラクタでレスポンスボディを指定しています。

ルーティングにいろいろと書かれていますが、後から追加しますので、今は置いておきます。

from werkzeug.exceptions import HTTPException
from werkzeug.routing import Map, Rule
from werkzeug.wrappers import Request, Response


class Application:
    def __init__(self):
        self.url_map = Map([
            Rule('/', endpoint='index', methods=['GET']),
            Rule('/response', endpoint='response', methods=['GET']),
            Rule('/data', endpoint='data', methods=['GET']),
            Rule('/set_data', endpoint='set_data', methods=['GET']),
        ])

    def dispatch_request(self, request):
        adapter = self.url_map.bind_to_environ(request.environ)
        try:
            endpoint, values = adapter.match()
            return getattr(self, f'{endpoint}_handler')(request, **values)
        except HTTPException as e:
            return e

    def index_handler(self, request):
        return Response('Hello world')

    def wsgi_app(self, environ, start_response):
        request = Request(environ)
        response = self.dispatch_request(request)
        return response(environ, start_response)

    def __call__(self, environ, start_response):
        return self.wsgi_app(environ, start_response)


if __name__ == '__main__':
    from werkzeug.serving import run_simple
    app = Application()
    run_simple('0.0.0.0', 5000, app, use_debugger=True, use_reloader=True)

 
起動して localhost:5000/curlでアクセスすると

$ curl --include http://localhost:5000/
HTTP/1.0 200 OK
Content-Type: text/plain; charset=utf-8
Content-Length: 12
Server: Werkzeug/0.14.1 Python/3.6.6
Date: Mon, 15 Oct 2018 13:19:56 GMT

Hello world

Hello worldが返ってきます。


response属性で差し替えるのはNG

Werkzeugのドキュメントを見ると response 属性があります。
http://werkzeug.pocoo.org/docs/0.14/wrappers/#werkzeug.wrappers.BaseResponse.response

これを

def response_handler(self, request):
    response = Response('Hello world\n')
    response.response = 'update response body\n'
    return response

のようにして使えば、一見レスポンスを差し替えられそうです。

ただ、実際には

$ curl --include http://localhost:5000/response
HTTP/1.0 200 OK
Content-Type: text/plain; charset=utf-8
Content-Length: 12
Server: Werkzeug/0.14.1 Python/3.6.6
Date: Mon, 15 Oct 2018 13:22:44 GMT

update respo

と、Content-LengthヘッダがHello worldの時に計算した時のままなため、レスポンスボディが欠けています。

また、サーバのログを見ると

Warning: response iterable was set to a string.  This appears to work but means that the server will send the data to the client char, by char.  This is almost never intended behavior, use response.data to assign strings to the response object.
  _warn_if_string(self.response)

が残されており、response属性を使うのはダメそうです。


dataプロパティも不適切

次に、エラーメッセージにある data プロパティを使ってみます。

def data_handler(self, request):
    response = Response('Hello world\n')
    response.data = 'update response body\n'
    return response

 
curlでアクセスしてみます。

$ curl --include http://localhost:5000/data
HTTP/1.0 200 OK
Content-Type: text/plain; charset=utf-8
Content-Length: 21
Server: Werkzeug/0.14.1 Python/3.6.6
Date: Mon, 15 Oct 2018 13:25:52 GMT

update response body

Content-Lengthが再計算され、レスポンスボディの欠けもありません。

また、サーバのログにも先ほどのエラーは出力されていません。

 
ただ、ドキュメントを見ると、

A descriptor that calls get_data() and set_data(). This should not be used and will eventually get deprecated.

http://werkzeug.pocoo.org/docs/0.14/wrappers/#werkzeug.wrappers.BaseResponse.data

とあるため、dataプロパティを使うのもよくなさそうです。


set_data() メソッドを使うのが良さそう

最後に set_data() メソッドを使います。

ドキュメントにも

Sets a new string as response. The value set must either by a unicode or bytestring. If a unicode string is set it’s encoded automatically to the charset of the response (utf-8 by default).

http://werkzeug.pocoo.org/docs/0.14/wrappers/#werkzeug.wrappers.BaseResponse.set_data

と書かれており、これを使うのが良さそうです。

def set_data_handler(self, request):
    response = Response('Hello world\n')
    response.set_data('update response body\n')
    return response

と実装します。

curlでアクセスしてみます。

$ curl --include http://localhost:5000/set_data
HTTP/1.0 200 OK
Content-Type: text/plain; charset=utf-8
Content-Length: 21
Server: Werkzeug/0.14.1 Python/3.6.6
Date: Mon, 15 Oct 2018 13:30:48 GMT

update response body

とレスポンスが返り、サーバのログにもエラーが出ていませんでした。


ソースコード

GitHubに上げました。 response_body ディレクトリ以下が今回のコードです。
werkzeug-sample/response_body at master · thinkAmi-sandbox/werkzeug-sample

RedisをJSONに差し替えて、Werkzeugの公式チュートリアルを写経してみた

前回・前々回と、Werkzeugをさわってみました。

 
今回は、公式のチュートリアルを写経した時のメモを残します。

公式チュートリアル
Werkzeug Tutorial — Werkzeug Documentation (0.14)

 
目次


環境

  • Python 3.6.6
  • Werkzeug 0.14.1


感想

WerkzeugにはWSGIまわりのいろいろな機能がありますが、それを組み合わせてみようと思った時、どう組み合わせるのが良いか分かりませんでした。

そんな中、公式チュートリアルでは

などが一通り書かれていて、とても参考になりました。

 
ただ、少し敷居が高いと感じたのは、データストアとしてRedisを使っている部分でした。

Redisをインストールしてもよかったのですが、

と感じました。

 
チュートリアルでのRedisの使われ方を見ると、Pythonのdictでも代替できそうだったので

のどちらかで書こうと考えました。

そこで今回は、データがそのまま見えるJSONで書いてみました。

 
JSONを使った場合のソースコードは、最終的にはこんな感じになりました。

import json
import pathlib
import urllib.parse
from datetime import datetime

from jinja2 import Environment, FileSystemLoader
from werkzeug.exceptions import HTTPException, NotFound
from werkzeug.routing import Map, Rule
from werkzeug.utils import redirect
from werkzeug.wrappers import Request, Response
from werkzeug.wsgi import SharedDataMiddleware


class Shortly:
    """WSGIアプリケーション

    公式チュートリアルではRedisを使っていたが、ここではJSONで代用
    """
    JSON_PATH = pathlib.Path('./shortly.json')

    def __init__(self):
        template_path = pathlib.Path('./templates')
        self.jinja_env = Environment(loader=FileSystemLoader(str(template_path)),
                                     autoescape=True)

        # ルーティング
        self.url_map = Map([
            # endpointの方は、URLの逆引きの時に使う:チュートリアルでは取り扱わない
            Rule('/', endpoint='new_url'),
            Rule('/<short_id>', endpoint='follow_short_link'),
            Rule('/<short_id>+', endpoint='short_link_details'),
        ])

    def dispatch_request(self, request):
        adapter = self.url_map.bind_to_environ(request.environ)
        try:
            endpoint, values = adapter.match()
            # このチュートリアルでは、on_<endpoint>という名称のメソッドを呼び出す
            return getattr(self, f'on_{endpoint}')(request, **values)
        except HTTPException as e:
            # except HTTPException, e はPython2の古い書き方
            return e

    def render_template(self, template_name, **context):
        t = self.jinja_env.get_template(template_name)
        return Response(t.render(context), mimetype='text/html')

    def insert_url(self, url):
        json_data = {}
        if self.JSON_PATH.exists():
            with self.JSON_PATH.open('r') as f:
                json_data = json.load(f)
            short_id = json_data.get(f'reverse-url:{url}')
            if short_id is not None:
                return short_id

        now = datetime.now()
        stamp = datetime.strftime(now, '%Y%m%d%H%M%S')
        short_id = base36_encode(int(stamp))
        json_data[f'url-target:{short_id}'] = url
        json_data[f'reverse-url:{url}'] = short_id
        with self.JSON_PATH.open('w') as f:
            json.dump(json_data, f)
        return short_id

    def on_new_url(self, request):
        error = None
        url = ''
        if request.method == 'POST':
            url = request.form['url']
            if not is_valid_url(url):
                error = 'Please enter a valid URL'
            else:
                short_id = self.insert_url(url)
                return redirect(f'/{short_id}+')
        return self.render_template('new_url.html', error=error, url=url)

    def on_follow_short_link(self, request, short_id):
        with self.JSON_PATH.open('r') as f:
            json_data = json.load(f)
        link_target = json_data.get(f'url-target:{short_id}')
        if link_target is None:
            raise NotFound()
        return redirect(link_target)

    def on_short_link_details(self, request, short_id):
        with self.JSON_PATH.open('r') as f:
            json_data = json.load(f)
        link_target = json_data.get(f'url-target:{short_id}')
        if link_target is None:
            raise NotFound()
        return self.render_template('short_link_details.html',
                                    link_target=link_target,
                                    short_id=short_id,
                                    )

    def wsgi_app(self, environ, start_response):
        request = Request(environ)
        response = self.dispatch_request(request)
        return response(environ, start_response)

    def __call__(self, environ, start_response):
        """WSGIアプリを直接dispatchすることで、wsgi_app()をWSGIミドルウェアっぽく使える"""
        return self.wsgi_app(environ, start_response)


def is_valid_url(url):
    parts = urllib.parse.urlparse(url)
    return parts.scheme in ('http', 'https')


def base36_encode(number):
    assert number >= 0, 'positive integer required'
    if number == 0:
        return '0'
    base36 = []
    while number != 0:
        number, i = divmod(number, 36)
        base36.append('0123456789abcdefghijklmnopqrstuvwxyz'[i])
    return ''.join(reversed(base36))


def create_app(with_static=True):
    app = Shortly()

    if with_static:
        app.wsgi_app = SharedDataMiddleware(
            app.wsgi_app,
            {'/static': str(pathlib.Path('./static'))}
        )
    return app


if __name__ == '__main__':
    from werkzeug.serving import run_simple
    a = create_app()
    run_simple('127.0.0.1', 5000, a, use_debugger=True, use_reloader=True)


チュートリアル

Werkzeugのチュートリアルを写経した後ですが、GitHubリポジトリを見るといくつかサンプルが入っていました。
https://github.com/pallets/werkzeug/tree/master/examples

このあたりを眺めれば、他の使用方法がいろいろと分かりそうでした。


ソースコード

GitHubに上げました。以下のディレクトリの中に写経したときのものがいろいろと入っています。
syakyo/official_werkzeug at master · thinkAmi-sandbox/syakyo

WerkzeugでJSON等のいろいろなレスポンスを作ってみた

前回、Werkzeugでいろいろと試してみました。
Werkzeugでリクエスト・レスポンス・Cookieを試してみた - メモ的な思考的な

 
今回は、WerkzeugでいろいろなHTTPレスポンスを作ってみました。

 
目次


環境

  • Python 3.6.6
  • Werkzeug 0.14.1

 
なお、アプリの構成は前回作成した BaseStructure クラスをベースにしています。


特定のHTTPメソッドのみレスポンスを許可

Rule オブジェクトを生成する時の引数 methods にHTTPメソッドを指定することで、そのHTTPメソッドのみレスポンスを返せます。
http://werkzeug.pocoo.org/docs/0.14/routing/#werkzeug.routing.Rule


class Application:
    def __init__(self):
        self.url_map = Map([
            ...
            Rule('/get-only', endpoint='get_only', methods=['GET']),
            Rule('/post-only', endpoint='post_only', methods=['POST']),
        ])

    def get_only_handler(self, request):
        return Response('GET Only!\n')

    def post_only_handler(self, request):
        return Response(f'POST Only: {request.form.get("foo")}\n')

 
curlで動作確認します。

GETでアクセスした場合です。

# GETだけレスポンス可能なURL
$ curl --include localhost:5000/get-only
HTTP/1.0 200 OK
Content-Type: text/plain; charset=utf-8
...
GET Only!

# POSTだけレスポンス可能なURL
$ curl --include 'localhost:5000/post-only'
HTTP/1.0 405 METHOD NOT ALLOWED
Content-Type: text/html
Allow: POST

 
POSTでアクセスした場合です。

# GETだけレスポンス可能なURL
$ curl -w '\n' --include -X POST 'localhost:5000/get-only' --data 'foo=1'
HTTP/1.0 405 METHOD NOT ALLOWED
Content-Type: text/html
Allow: HEAD, GET

# POSTだけレスポンス可能なURL
$ curl -w '\n' --include -X POST 'localhost:5000/post-only' --data 'foo=1'
HTTP/1.0 200 OK
Content-Type: text/plain; charset=utf-8
...
POST Only: 1


JSONレスポンス

レスポンスオブジェクトの content_type引数に application/json をセットすることで、JSONをレスポンスできます。

class Application:
    def __init__(self):
        self.url_map = Map([
            Rule('/json', endpoint='json'),
        ])

    def json_handler(self, request):
        input_data = request.form.get('input')
        result = {
            'foo': 'abc',
            'bar': ['ham', 'spam', 'egg'],
            'result': input_data,
        }
        return Response(json.dumps(result), content_type='application/json')

 
では実際に、データをPOSTしてJSONAjaxで取得・表示するHTMLを用意して試してみます。

<!DOCTYPE html>
<html lang="en">
<head>
    <meta charset="UTF-8">
    <title>JSON response</title>
</head>
<body>
<script src="https://ajax.googleapis.com/ajax/libs/jquery/3.3.1/jquery.min.js"></script>
<p>
    <label for="id_input">POST data: </label>
    <input id="id_input" type="text">
</p>
<button id="id_get_json">Go</button>
<p>foo: <span id="id_foo"></span></p>
bar:
<ul id="id_bar">
</ul>
<p>input data: <span id="id_input_result"></span></p>
<script>
    $(function () {
        $('#id_get_json').on('click', function () {
            $.ajax({
                url: '/json',
                type: 'POST',
                dataType: 'json',
                data: {'input': $('#id_input').val()}
            }).done((data) => {
                $('#id_foo').html(data['foo']);
                data['bar'].forEach((currentValue, index) => {
                    $('#id_bar').append(`<li>No. ${index}: ${currentValue} </li>`)
                });
                $('#id_input_result').html(data['result']);
            }).fail((data) => { console.log('fail!') })
        })
    })
</script>
</body>
</html>

 
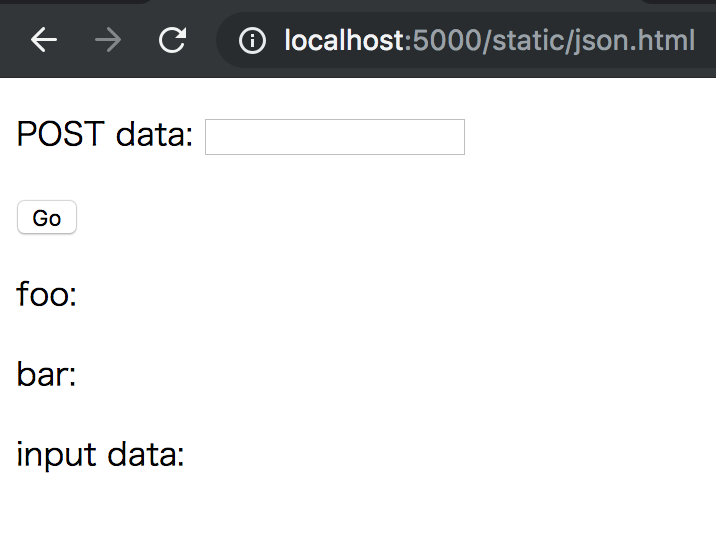
ブラウザで見るとこのような感じです。

f:id:thinkAmi:20181002215447p:plain:w200

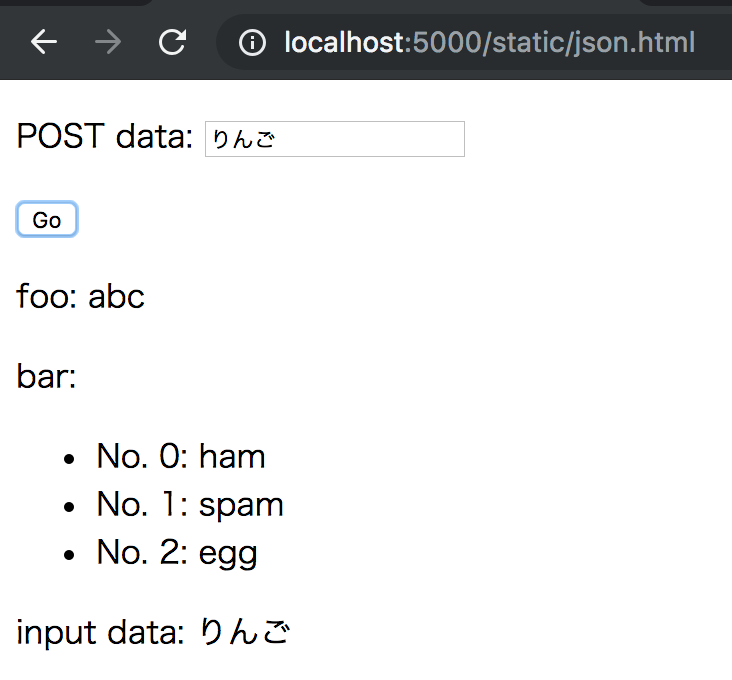
データを入力し、GoボタンでAjaxのPOSTを実行すると、以下のように表示が切り替わります。

f:id:thinkAmi:20181002215457p:plain:w200


ファイルをアップロード

ファイルをアップロードするHTMLフォームがあるとします。

<!DOCTYPE html>
<html lang="en">
<head>
    <meta charset="UTF-8">
    <title>File Upload</title>
</head>
<body>
<form action="/upload" method="post" enctype="multipart/form-data">
    <p><input type="file" name="upload_file"></p>
    <p><input type="submit"></p>
</form>
</body>
</html>

 
Werkzeugでは、Requestオブジェクトの files を使うことで、アップロードされたファイルを取得できます。
http://werkzeug.pocoo.org/docs/0.14/wrappers/#werkzeug.wrappers.BaseRequest.files

以下のコードでは、アップロードされたファイルを uploads ディレクトリに保存します。

class Application:
    def __init__(self):
        self.url_map = Map([
            Rule('/upload', endpoint='upload'),
        ])

    def upload_handler(self, request):
        f = request.files.get('upload_file')
        f.save(str(pathlib.Path(f'./uploads/{f.filename}')))
        return Response('hello upload')


ファイルをダウンロード

ファイルをダウンロードするには、 Content-Disposition ヘッダを追加します。

以下ではURLにアクセスすると foo.csv がダウンロードされます。

class Application:
    def __init__(self):
        self.url_map = Map([
            Rule('/download', endpoint='download'),
        ])

    def download_handler(self, request):
        field_names = ['No', 'Name']
        contents = [
            {'No': 1, 'Name': 'Apple'},
            {'No': 2, 'Name': 'Mandarin'},
            {'No': 3, 'Name': 'Grape'},
        ]
        stream = StringIO()
        writer = csv.DictWriter(stream, fieldnames=field_names)

        # CSVヘッダの書込
        writer.writeheader()
        # CSVデータの書込
        writer.writerows(contents)

        # ストリームからデータを取得し、レスポンスとする
        data = stream.getvalue()

        headers = Headers()
        headers.add('Content-Disposition', 'attachment', filename='foo.csv')

        return Response(
            data,
            headers=headers,
        )

参考

 
ただし、上記の方法では日本語名のファイルはダウンロードできません。

日本語ファイルをダウンロードする場合は、

  • Content-Dispositionヘッダで、 filename*=アスタリスク付きでファイル名を指定する
  • ファイル名はパーセントエンコードする
    • RFC5987に基づく方法

が必要になります。

参考

 
なお、以前、Cookieを調べた時に、いろいろなパーセントエンコードについて知りました。
Pythonで、日本語をCookie値へ設定する方法を調べてみた - メモ的な思考的な

RFC5987でのパーセントエンコードを見たところ、

pct-encoded   = "%" HEXDIG HEXDIG
              ; see [RFC3986], Section 2.1

# https://tools.ietf.org/html/rfc5987#page-3

との記述がありました。

RFC3986についてはCookieの時に調べました。RFC3986でのパーセントエンコードPythonで実現するには、 urllib.parse.quote(character, safe='~') が良さそうでした。

 
そこで、

encoded_filename = quote(request.form['filename'], safe='~')
headers.add('Content-Disposition', f"attachment; filename*=UTF-8''{encoded_filename}")

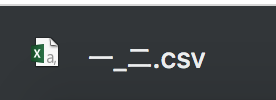
として 一~二.csv というファイル名でダウンロードしてみたところ、

f:id:thinkAmi:20181002222338p:plain:w200

というファイル名でダウンロードされました。

~ という文字がファイル名に使えなかったため、 _ へと変換されたのでしょう。
ファイルをダウンロードさせたいときのいろんな方法(Servlet, Apacheなど) - Qiita


静的ファイルっぽく見せかけた時のレスポンス

これはどちらかというとルーティングについてです。

以下は拡張子 html 付きでアクセスした場合でも、動的なレスポンスを返すようなルーティングとなっています。

class Application:
    def __init__(self):
        self.url_map = Map([
            Rule('/extension.html', endpoint='extension'),
        ])

    def extension_handler(self, request):
        return Response('extension request')

 
curlで調べてみます。

$ curl localhost:5000/extension.html
extension request


ソースコード

GitHubに上げました。
thinkAmi-sandbox/werkzeug-sample

various_responses ディレクトリ以下が今回のものであり、Werkzeugアプリは various_response_app.py になります。

Werkzeugでリクエスト・レスポンス・Cookieを試してみた

Flaskでも使われているライブラリ Werkzeug でいろいろと試した時のメモです。

 
公式ドキュメントはこちらです。以下のサンプルでも公式ドキュメントへのリンクを記載しています。
http://werkzeug.pocoo.org/docs/0.14/

 
なお、curlでの動作検証時、以下が参考になりました。
curl コマンド 使い方メモ - Qiita

 
目次


環境

  • Python 3.6.6
  • Werkzeug 0.14.1


Werkzeugを使ったアプリの構成

今回作成するWerkzeugを使ったアプリは、Werkzeugのチュートリアル Step 2: The Base Structure をベースに、 app.py というファイルに追加していきます。
http://werkzeug.pocoo.org/docs/0.14/tutorial/#step-2-the-base-structure

import os

from werkzeug.wrappers import Request, Response
from werkzeug.wsgi import SharedDataMiddleware


class BaseStructure:
    """Werkzeugのチュートリアルにあった、Werkzeugアプリの基本的な構成
    http://werkzeug.pocoo.org/docs/0.14/tutorial/#step-2-the-base-structure
    """
    def dispatch_request(self, request):
        return Response('Hello world!')

    def wsgi_app(self, environ, start_response):
        request = Request(environ)
        response = self.dispatch_request(request)
        return response(environ, start_response)

    def __call__(self, environ, start_response):
        """WSGIアプリを直接dispatchすることで、wsgi_app()をWSGIミドルウェアっぽく使える"""
        return self.wsgi_app(environ, start_response)


def create_app(with_static=True):
    application = BaseStructure()

    if with_static:
        application.wsgi_app = SharedDataMiddleware(
            application.wsgi_app,
            {'/static': os.path.join(os.path.dirname(__file__), 'static')}
        )
    return application


if __name__ == '__main__':
    from werkzeug.serving import run_simple
    app = create_app()
    run_simple('127.0.0.1', 5000, app, use_debugger=True, use_reloader=True)

 
チュートリアルでは、dispatch_request() にルーティングを記載していました。

ただ、今回はルーティングについてはふれないものの、 dispatch_request() にいろいろと実装してきます。


HTTPリクエス

WSGIアプリケーションの引数 environwerkzeug.wrappers.Request に渡してインスタンス化することで、HTTPリクエストデータが扱いやすくなります。
http://werkzeug.pocoo.org/docs/0.14/wrappers/#werkzeug.wrappers.BaseRequest

request = Request(environ)


HTTPメソッド

request.method で取得します。
http://werkzeug.pocoo.org/docs/0.14/wrappers/#werkzeug.wrappers.BaseRequest.method

body.append(f'HTTP method: {request.method}')
# => GET


HTTPヘッダ

request.headers で取得します。
http://werkzeug.pocoo.org/docs/0.14/wrappers/#werkzeug.wrappers.BaseRequest.headers

for k, v in request.headers.items():
    body.append(f'Request header: key:{k} / value: {v}')
    # => Request header: key:Host / value: localhost:5000 ...


クライアントのIPアドレスなど

request.access_routerequest.remote_addr で取得します。

body.append(f'access_route: {request.access_route}')
# => access_route: ImmutableList(['127.0.0.1'])

body.append(f'remote_addr: {request.remote_addr}')
# => remote_addr: 127.0.0.1


クエリストリングの取得

request.argsrequest.values で取得します。

POSTの時にもクエリストリングの値を取得できます。

# request.argsを使う場合
body.append(f'Query String: {request.args}')
# => [GET] $ curl http://localhost:5000?foo=bar の場合
#    ImmutableMultiDict([('foo', 'bar')])
# => [POST] $ curl -w '\n' -X POST 'localhost:5000/?ham=spam' --data 'foo=1&bar=2' の場合
#    ImmutableMultiDict([('ham', 'spam')])

# request.valuesを使う場合
body.append(f'request.values: {request.values}')
# => [GET] $ curl http://localhost:5000?foo=bar の場合
#    CombinedMultiDict([ImmutableMultiDict([('foo', 'bar')]),
#                       ImmutableMultiDict([])

 
なお、POSTの時にもクエリストリングがあるのかどうかは、RFC的な規定は見つけられませんでした。ご存知の方は教えていただけますとありがたいです。
参考:http - Is it valid to combine a form POST with a query string? - Stack Overflow


POSTデータの取得

request.formrequest.values で取得します。

なお、GETの時は、request.formは ImmutableMultiDict([]) になるようです。

また、POSTの場合でクエリストリング & POSTデータがある場合は、CombinedMultiDict内のImmutableMultiDictに、両方のエントリが含まれます。

順番は、クエリストリング > POSTデータ、で良さそうです。

# request.formを使う場合
body.append(f'Form: {request.form}')
# => [GET] $ curl http://localhost:5000?foo=bar の場合
#    ImmutableMultiDict([])
# => [POST] $ curl -w '\n' -X POST 'localhost:5000/?ham=spam' --data 'foo=1&bar=2' の場合
#    ImmutableMultiDict([('foo', '1'), ('bar', '2')])

# request.valuesを使う場合
body.append(f'request.values: {request.values}')
# => [POST] $ curl -w '\n' -X POST 'localhost:5000/?ham=spam' --data 'foo=1&bar=2' の場合
#    CombinedMultiDict([ImmutableMultiDict([('ham', 'spam')]),
#                       ImmutableMultiDict([('foo', '1'), ('bar', '2')])
#                     ])


WSGI/CGI環境変数の取得

request.environ で取得します。
http://werkzeug.pocoo.org/docs/0.14/wrappers/#werkzeug.wrappers.BaseRequest.environ

結果は dict 型であり、この中に WSGI/CGI の両方の環境変数が含まれるようです。

body.append(f'environ: {type(request.environ)} / {request.environ}')
# => environ: <class 'dict'> / {'wsgi.version': (1, 0), 'wsgi.url_scheme': 'http', 'wsgi.input': <_io.BufferedReader name=6>, 'wsgi.errors': <_io.TextIOWrapper name='<stderr>' mode='w' encoding='UTF-8'>, 'wsgi.multithread': False, 'wsgi.multiprocess': False, 'wsgi.run_once': False, 'werkzeug.server.shutdown': <function WSGIRequestHandler.make_environ.<locals>.shutdown_server at 0x105f13c80>, 'SERVER_SOFTWARE': 'Werkzeug/0.14.1', 'REQUEST_METHOD': 'GET', 'SCRIPT_NAME': '', 'PATH_INFO': '/', 'QUERY_STRING': 'foo=bar', 'REMOTE_ADDR': '127.0.0.1', 'REMOTE_PORT': 55330, 'SERVER_NAME': '0.0.0.0', 'SERVER_PORT': '5000', 'SERVER_PROTOCOL': 'HTTP/1.1', 'HTTP_HOST': 'localhost:5000', 'HTTP_CONNECTION': 'keep-alive', 'HTTP_PRAGMA': 'no-cache', 'HTTP_CACHE_CONTROL': 'no-cache', 'HTTP_UPGRADE_INSECURE_REQUESTS': '1', 'HTTP_USER_AGENT': 'Mozilla/5.0 (Macintosh; Intel Mac OS X 10_11_6) AppleWebKit/537.36 (KHTML, like Gecko) Chrome/69.0.3497.100 Safari/537.36', 'HTTP_ACCEPT': 'text/html,application/xhtml+xml,application/xml;q=0.9,image/webp,image/apng,*/*;q=0.8', 'HTTP_ACCEPT_ENCODING': 'gzip, deflate, br', 'HTTP_ACCEPT_LANGUAGE': 'ja,en-US;q=0.9,en;q=0.8', 'HTTP_COOKIE': 'one_time=x; counter=8', 'werkzeug.request': <Request 'http://localhost:5000/?foo=bar' [GET]>}


HTTPレスポンス

werkzeug.wrappers.Response を使うことで、HTTPレスポンスデータとなります。
http://werkzeug.pocoo.org/docs/0.14/wrappers/#werkzeug.wrappers.BaseResponse

# msgは、HTTPレスポンスボディ
response = Response(msg)


Content-Typeをセット

response.content_type を使います。
http://werkzeug.pocoo.org/docs/0.14/wrappers/#werkzeug.wrappers.CommonRequestDescriptorsMixin.content_type

response.content_type = 'application/json'


独自HTTPヘッダをセット

独自HTTPヘッダをセットするには

の3つが使えます。

response.headers.add('X-headers-add', 'using add')
response.headers.add_header('X-headers-add_header', 'using add_header')
response.headers['X-headers-key'] = 'using key'
# => X-headers-add: using add
#    X-headers-add_header: using add_header
#    X-headers-key: using key


エラーページを表示

abort()raise InternalServerError() などが使えます。

 
なお、例外クラスを継承し、エラーページを差し替えることもできます。
http://werkzeug.pocoo.org/docs/0.14/exceptions/#custom-errors

以下の例では、InternalServerErrorを継承し、HTTP500エラー時の画面の表示を差し替えています。

class MyInternalServerError(InternalServerError):
    def get_body(self, environ=None):
        # werkzeug._compat.text_type()がprotectedなので、使っていいものか...
        return text_type(
            u'<!DOCTYPE html>'
            u'<title>My Internal Server Error</title>'
            u'<h1>Oh, my internal server error!</h1>'
        )


リダイレクト

werkzeug.utils.redirect() が使えます。
http://werkzeug.pocoo.org/docs/0.14/utils/#werkzeug.utils.redirect

return redirect('https://www.google.co.jp')

 
なお、URLに / を追加するリダイレクトのための werkzeug.utils.append_slash_redirect も用意されています。
http://werkzeug.pocoo.org/docs/0.14/utils/#werkzeug.utils.append_slash_redirect


Werkzeugではリクエスト時のCookieとレスポンス時のCookieが分かれています。


リクエスCookieの取得

request.cookies ですべてのCookieを取得します。
http://werkzeug.pocoo.org/docs/0.14/wrappers/#werkzeug.wrappers.BaseRequest.cookies

Cookieのキーを指定して値を取得するには、以下となります。

counter = request.cookies.get('counter', 0)


レスポンスCookieの設定

レスポンスオブジェクトを生成した後、 response.set_cookie() にてCookieをセットします。
http://werkzeug.pocoo.org/docs/0.14/wrappers/#werkzeug.wrappers.BaseResponse.set_cookie

response = Response(msg)
response.set_cookie('counter', str(int(counter) + 1))

 
なお、 response.delete_cookie()Cookieを削除できます。
http://werkzeug.pocoo.org/docs/0.14/wrappers/#werkzeug.wrappers.BaseResponse.delete_cookie

delete_cookie() を呼ぶと

Set-Cookie: one_time=; Expires=Thu, 01-Jan-1970 00:00:00 GMT; Max-Age=0; Path=/

のようなHTTPレスポンスヘッダが追加されます。

Cookieを削除しない限り、リクエストオブジェクトからレスポンスオブジェクトにCookieを移し替えなくても、次回のリクエスト時も同じキー・値でCookieがやってきます。


同じCookieキー名での設定に注意

例えば、

response.set_cookie('same_cookie', '1st', httponly=True)
response.set_cookie('same_cookie', '2nd', secure=True)

のように、同じCookieキー名 (same_cookie) でCookieをセットしたとします。

 
この場合、HTTPレスポンスヘッダは

Set-Cookie: same_cookie=1st; HttpOnly; Path=/
Set-Cookie: same_cookie=2nd; Secure; Path=/

となります。

ただし、リロードするなどして再度アクセスすると、HTTPリクエスト時のCookieヘッダは

Cookie: one_time=x; same_cookie=1st; counter=2

と、片方のものしかセットされていません。

 
CookieのRFC6265を見ると、

(原文)

Servers SHOULD NOT include more than one Set-Cookie header field in the same response with the same cookie-name. (See Section 5.2 for how user agents handle this case.)

https://tools.ietf.org/html/rfc6265#section-4.1

(日本語訳)

サーバは、同じ応答内に同じ cookie-name の複数の Set-Cookie ヘッダを内包するべきでない。 (UA がこの場合をどう扱うかについては、 5.2 節を見よ。)

https://triple-underscore.github.io/http-cookie-ja.html#section-4.1

とあります。

これらより、同じCookieキー名を設定すべきではなく、挙動もおかしくなるため、注意が必要です。


その他

開発WSGIサーバを外部アクセス可能にする

werkzeug.serving.run_simple() で開発WSGIサーバを起動できます。
http://werkzeug.pocoo.org/docs/0.14/serving/#werkzeug.serving.run_simple

なお、Flask同様、引数hostに 0.0.0.0 を指定することで、開発WSGIサーバを外部アクセス可能にします。
Flaskのサーバーはデフォルトだと公開されてない - Qiita


favicon.ico のリクエストを処理する

Cookie

counter = request.cookies.get('counter', 0)
response.set_cookie('counter', str(int(counter) + 1))

と実装し、ブラウザで表示した後、リロードしたところ、HTTPレスポンスヘッダが

Set-Cookie: counter=3; Path=/

となっていました。counter=2を想定していたのに、counter=3となっていました。

 
原因は、ブラウザでアクセスした時、1回で

の2リクエストが飛んでいたせいでした。

今回のアプリはルーティングがないため、favicon.icoのリクエストでも dispatch_request() が処理されてしまったようです。

 
対応としては、開発環境の場合は werkzeug.wsgi.SharedDataMiddleware が使えます *1

create_app()関数の中で、SharedDataMiddlewareを使います。

なお、Werkzeugのチュートリアルなどではディレクトリを指定していますが、以下のようにファイル自体を指定することも可能です。

def create_app(with_static=True):
    application = Application()

    # WSGIミドルウェアの設定ポイント
    if with_static:
        application.wsgi_app = SharedDataMiddleware(
            application.wsgi_app,
            {'/favicon.ico': str(pathlib.Path('./favicon.ico'))}
        )
    return application

 
次に、 app.py と同じディレクトリの中に favicon.ico を用意します。

以上で、favicon.icoへのアクセスはSharedDataMiddlewareにより処理され、dispatch_request()では処理されなくなります。


ソースコード

GitHubに上げました。base_structure ディレクトリ以下が今回のファイルです。
thinkAmi-sandbox/werkzeug-sample

*1:本番環境では何らかの形で静的ファイルを配信するはず

Ubuntu18.04 + mod_python 3.3.1で、リクエスト・レスポンス・Cookieを試してみた

Ubuntu 18.04 に mod_python をセットアップし、いろいろと試した時のメモです。
mod_python - Apache / Python Integration

なお、mod_python

なことに注意します。

 
ドキュメントは以下を参考にしました。


目次


環境

 
なお、今回のmod_python のコード例は、汎用ハンドラ(generic handler)版で書いています。publisherハンドラ版を使う場合は、記述を省略できるかもしれません。

 
また、ディレクトリ構造などは以下です。

my@my-virtual-machine:/var/www$ tree
.
├── html
│   └── index.html  # デフォルトのファイル
└── mptest
    └── mp
        ├── form.html
        ├── generic_handler.py
        ├── publisher_handler.py
        └── template.html


my@my-virtual-machine:/var/www/mptest/mp$ ls -al
合計 24
drwxr-xr-x 2 root root 4096  9月 24 09:06 .
drwxr-xr-x 3 root root 4096  9月 24 06:26 ..
-rw-r--r-- 1 root root 1238  9月 24 08:11 form.html
-rw-r--r-- 1 root root 3125  9月 24 08:59 generic_handler.py
-rw-r--r-- 1 root root  215  9月 24 06:37 publisher_handler.py
-rw-r--r-- 1 root root  232  9月 24 08:36 template.html


mod_pythonHello world する (publisher/汎用ハンドラ)

Ubuntu 18.04 に mod_python をセットアップし、 Hello world するまでの流れです。

以下を参考に、Apacheのセットアップを行っていきます。

なお、Apacheの設定は「動けばいい」くらいの適当さです。

 
Macからsshできるようにします。今回、最小パッケージでインストールしたため、openssh-serverをインストールします。

$ sudo apt install openssh-server

 
Pythonのバージョンを確認したところ、Python自体がなかったため、追加で Python2.7 をインストールします。

# Pythonのバージョン確認
$ python --version

Command 'python' not found, but can be installed with:

sudo apt install python3       
sudo apt install python        
sudo apt install python-minimal

You also have python3 installed, you can run 'python3' instead.

# Python2.7系をインストール
my@my-virtual-machine:~$ sudo apt install python

$ python --version
Python 2.7.15rc1

# Pythonの場所を確認
$ which python
/usr/bin/python

 
mod_python開発のため、PyCharm Communityをインストールします。

PyCharmのドキュメントに従い、snapパッケージでPyCharmをインストールします。

# snapパッケージを使うため、snapdをインストール
$ sudo apt install -y snapd

$ sudo snap install pycharm-community --classic
pycharm-community 2018.2.4 from 'jetbrains' installed

 
PyCharm Communityを起動します。

$ pycharm-community

 
プロジェクトを作成、システムのPythonを認識させておきます。

 
以下を参考に、Apache2とmod_pythonをインストールします。
How to install and configure mod_python in apache 2 server | BHOU STUDIO

$ sudo apt install apache2 libapache2-mod-python

 
ApacheのMPMを確認します。

$ apachectl -V
Server version: Apache/2.4.29 (Ubuntu)
...
Server MPM:     event
  threaded:     yes (fixed thread count)
    forked:     yes (variable process count)

 
event MPMでも動くと思いますが、とりあえず prefork MPM に変えてみます。

# mpm_eventを無効化
$ sudo a2dismod mpm_event

# mpm_preforkを有効化
$ sudo a2enmod mpm_prefork

# Apacheの再起動
$ sudo systemctl restart apache2

# 確認
$ apachectl -V
...
Server MPM:     prefork
  threaded:     no
    forked:     yes (variable process count)

 
Apachemod_pythonの設定を追加します。

$ cd /etc/apache2/sites-available/
$ sudo vi mod_python.conf

 
publisherハンドラを使うように設定します。

mod_python.conf

<VirtualHost *:80>
  ServerName example.com

  DocumentRoot /var/www/mptest/

  <Directory "/var/www/mptest/mp">
    AddHandler mod_python py
    PythonHandler mod_python.publisher
    PythonDebug On
  </Directory>
</VirtualHost>

 
mod_python.conf を有効化するとともに、デフォルトを無効化します。

# mod_pythonを有効化
$ sudo a2ensite mod_python.conf
Enabling site mod_python.
To activate the new configuration, you need to run:
  systemctl reload apache2

# デフォルトを無効化
$ sudo a2dissite 000-default.conf

 
Apacheをリロードします。

$ sudo systemctl reload apache2

 
実際のpublisher_handlerを作成します。

$ cd ./mptest/mp
$ sudo vi publisher_handler.py

 
中身は以下のとおりです。

publisher_handler.py

# /usr/bin/python
# -*- codeing: utf-8 -*-


def index(req):
    return 'publisher'

def hello(req):
    return 'Hello world'

 
念のため、Apacheを再起動します。

sudo systemctl restart apache2

 
動作確認です。まずは ip address show にて、UbuntuIPアドレスを確認しておきます。

$ ip address show
2: ens33: <BROADCAST,MULTICAST,UP,LOWER_UP> mtu 1500 qdisc fq_codel state UP group default qlen 1000
    link/ether 00:0c:29:5b:ce:9f brd ff:ff:ff:ff:ff:ff
    inet 192.168.69.155/24 brd 192.168.69.255 scope global dynamic noprefixroute ens33
       valid_lft 1717sec preferred_lft 1717sec
    inet6 fe80::f391:9b22:de93:f759/64 scope link noprefixroute 
       valid_lft forever preferred_lft forever

 
別のターミナルを開いて動作確認します。publisherハンドラの動作確認ができました。

$ curl http://192.168.69.156/mp/publisher_handler.py
publisher

$ curl http://192.168.69.156/mp/publisher_handler.py/index
publisher

$ curl http://192.168.69.156/mp/publisher_handler.py/hello
Hello world

 
なお、mod_pythonのハンドラは他にもあります。

 
そこで次は、汎用ハンドラ(generic handler)を使ってみます。

汎用ハンドラ用のPythonスクリプトを作成します。

generic_handler.py

# /usr/bin/python
# -*- codeing: utf-8 -*-
from mod_python import apache


def handler(req):
    req.write('Hello world')
    return apache.OK

 
mod_pythonの設定を変更します。

$ sudo vi /etc/apache2/sites-available/mod_python.conf

 
変更内容は

とします。

mod_python.conf

<VirtualHost *:80>
  ServerName example.com

  DocumentRoot /var/www/mptest/

  <Directory "/var/www/mptest/mp">
    AddHandler mod_python py

    # for generic handler
    PythonHandler generic_handler
    # for publisher handler
    # PythonHandler mod_python.publisher

    PythonDebug On
  </Directory>
</VirtualHost>

 
Apacheを再起動します。

$ sudo systemctl restart apache2

 
別のターミナルで確認します。汎用ハンドラでも動作確認できました。

$ curl http://192.168.69.156/mp/generic_handler.py
Hello world

 
引き続き、汎用ハンドラ使用時のリクエストとレスポンスをみていきます。


汎用ハンドラ使用時のリクエストとレスポンス

上記で見た通り、汎用ハンドラは

  • handler() 関数を作成
    • 引数として request オブジェクト (以降 req )が渡される
  • レスポンスボディは、 req.write() を使う
  • 処理を終了する時は、 apache.OK などを使う

な実装です。

 
また、 mod_python では、レスポンスは req オブジェクトに設定します。リクエストオブジェクトとレスポンスオブジェクトが一体化しているようです。


リクエスト時のHTTPメソッド

req.method で取得します。

req.write('request.method: {}\n'.format(req.method))
# => GET


リクエスト時のHTTPヘッダ

req.headers_in に含まれます。

headers_inは dict like object なので、items()などで取得できます。

for k, v in req.headers_in.items():
    req.write('headers_in:  key -> {} / value -> {}\n'.format(k, v))

# => headers_in:  key -> Host / value -> 192.168.69.156
# => headers_in:  key -> User-Agent / value -> curl/7.43.0
# => headers_in:  key -> Accept / value -> */*


クライアントのIPアドレスなど

req.get_remote_host() を使います。

引数に apache.REMOTE_NOLOOKUP を指定するとIPアドレスが取得できます。

他の値は以下の公式ドキュメントに記載されています。
https://mod-python-doc-ja.readthedocs.io/ja/latest/pythonapi.html#apache.request.get_remote_host

req.write('request.get_remote_host(): {}\n'.format(
    req.get_remote_host(apache.REMOTE_NOLOOKUP)))
# => 192.168.69.1


リクエストのあったファイル名

req.filename を使います。

req.write('request.filename: {}\n'.format(req.filename))
# => /var/www/mpytest/mp/generic_handler.py


クエリストリングの取得

req.args を使います。

req.write('request.args: {}\n'.format(req.args))

 
curlで確認します。

$ curl "http://192.168.69.156/mp/generic_handler.py?foo=1&bar=2&baz=3"
request.args: foo=1&bar=2&baz=3

 
ただ、 req.args だと文字列として取得するため、使い勝手があまり良くなさそうです。

もしクエリストリングをオブジェクトとして取得したい場合は、 req オブジェクトを mod_python.util.FieldStorage へ引数として渡せばよさそうです。
python - mod_python and getting the QUERY_STRING using env_vars() - Stack Overflow

fields = util.FieldStorage(req)
for k, v in fields.items():
    req.write('FieldStorage:  key -> {} / value -> {}\n'.format(k, v))

 
curlで確認します。

$ curl "http://192.168.69.156/mp/generic_handler.py?foo=1&bar=2&baz=3"
...
FieldStorage:  key -> foo / value -> 1
FieldStorage:  key -> bar / value -> 2
FieldStorage:  key -> baz / value -> 3

 
なお、FieldStorageも dict like object です。

そのため、

  • fields.get('psp', None)
  • if '404' in fields

などが使えます。


POSTデータの取得

以下のようなフォームがあったとします。

form.html

<!DOCTYPE html>
<html lang="en">
<head>
    <meta charset="UTF-8">
    <title>Input Form</title>
</head>
<body>
<form action="/mp/generic_handler.py" method="post" name="myform">
    <!-- input -->
    <label for="id_subject">Subject</label>
    <input type="text" name="subject" id="id_subject">

    <!-- radio button -->
    <p>
        <label for="id_apple">Apple</label>
        <input id="id_apple" type="radio" name="fruit" value="apple">
        <label for="id_mandarin">Mandarin</label>
        <input id="id_mandarin" type="radio" name="fruit" value="mandarin">
    </p>

    <!-- select -->
    <p>
        <label for="id_quantity">Quantity</label>
        <select id="id_quantity" name="quantity">
            <option id="id_select_1" name="select_1" value="one">1</option>
            <option id="id_select_2" name="select_2" value="two">2</option>
        </select>
    </p>

    <!-- checkbox -->
    <p>
        <label for="id_takeout">Takeout?</label>
        <input type="checkbox" id="id_takeout" name="takeout" value="takeout_yes">
    </p>

    <!-- hidden -->
    <input type="hidden" id="id_hidden_value" name="hidden_valude" value="Oh, hidden value">
    
    <p><input type="submit"></p>
</form>

</body>
</html>

 
POSTされたデータを取得するには、FieldStorageを使います。クエリストリングと同じです。

fields = util.FieldStorage(req)

for k, v in fields.items():
    req.write('FieldStorage:  key -> {} / value -> {}\n'.format(k, v))

 
ブラウザからフォームを送信してみます。hiddenも含め、値を取得できています。

# http://192.168.69.156/mp/form.html にアクセスし、入力した結果
request.method: POST
...
FieldStorage:  key -> subject / value -> web subject
FieldStorage:  key -> fruit / value -> mandarin
FieldStorage:  key -> quantity / value -> one
FieldStorage:  key -> takeout / value -> takeout_yes
FieldStorage:  key -> hidden_valude / value -> Oh, hidden value


CGI環境変数の取得

CGI環境変数とは以下のようなものです。
CGI Programming 101: Chapter 3: CGI Environment Variables

 
mod_pythonの場合、 req.add_common_vars() 後に、 req.subprocess_env から取得します。

req.add_common_vars()
env = req.subprocess_env

# CGI環境変数 HTTP_HOST を取得
host = env.get('HTTP_HOST')
req.write('subprocess_env(HTTP_HOST): {}\n'.format(host))

 
curlで確認してみます。

$ curl "http://192.168.69.156/mp/generic_handler.py?env1=1"
subprocess_env(HTTP_HOST): 192.168.69.156

 
なお、add_common_vars()を使わないと取得できません。

env = req.subprocess_env
host = env.get('HTTP_HOST')
req.write('subprocess_env(HTTP_HOST): {}\n'.format(host))

 
curl結果です。

$ curl "http://192.168.69.156/mp/generic_handler.py?env2=1"
subprocess_env(HTTP_HOST): None

 
また、 req.add_cgi_vars() もあるようですが、mod_python 3.4.1以降でないと使えないようです。
参考:Issue 2550821: mod_python 3.4.1 - add_cgi_vars() instead of add_common_vars() - Roundup tracker

req.add_cgi_vars()
env = req.subprocess_env
req.write(env.get('HTTP_HOST', 'foo'))

 
curl結果です。mod_pythonエラーが発生しています。

$ curl "http://192.168.69.156/mp/generic_handler.py?env3=1"
MOD_PYTHON ERROR
...
Traceback (most recent call last):
...
  File "/var/www/mptest/mp/generic_handler.py", line 63, in handler
    req.add_cgi_vars()

AttributeError: 'mp_request' object has no attribute 'add_cgi_vars'


Cookieの取得・設定

mod_pythonでは、リクエスCookieとレスポンスCookieは区別せず、同一の mod_python.Cookie を使います。

 
Cookie.get_cookiesCookieを取得し、 Cookie.add_cookie()Cookieをセットします。

# Cookieの読込
cookies = Cookie.get_cookies(req)
if 'counter' in cookies:

    # 更新したいキーのCookieを取得
    c = cookies['counter']
    c.value = int(c.value) + 1
    
    # Cookieをセット
    Cookie.add_cookie(req, c)
else:
    Cookie.add_cookie(req, 'counter', '1')


レスポンスの content_type を設定

req.content_type に設定します。

# text/plainの場合
req.content_type = 'text/plain'

# text/htmlの場合
req.content_type = 'text/html'


独自のHTTPヘッダを追加

req.headers_out に設定します。

req.headers_out['X-My-header'] = 'hello world'

 
curlで確認します。

$ curl --include http://192.168.69.156/mp/generic_handler.py
HTTP/1.1 200 OK
Date: Sun, 23 Sep 2018 22:11:02 GMT
Server: Apache/2.4.29 (Ubuntu)
X-My-header: hello world


HTMLテンプレート(PSP)を使用したレスポンス

mod_pythonには、Python Server Pager (PSP)と呼ばれるHTMLテンプレートがあります。

テンプレート記法は以下に記載があります。
https://mod-python-doc-ja.readthedocs.io/ja/latest/pythonapi.html#module-psp

 
以下のテンプレート template.html を用意します。内容は以下のとおりです。

  • Python標準モジュール time を使用して、現在の日付を出力
  • Pythonから渡される変数 query_string を表示

なお、template.htmlは、generic_handler.pyと同じディレクトリに入れておきます。

template.html

<!DOCTYPE html>
<html lang="en">
<head>
    <meta charset="UTF-8">
    <title>PSP template</title>
</head>
<body>
<% import time %>
<p>Now: <%=time.strftime("%Y/%m/%d") %></p>
<p>Query String: <%=query_string %></p>
</body>
</html>

 
Python側では、以下のコードでPSPテンプレートを表示します。

# content_typeを設定し、HTMLとして表示
req.content_type = 'text/html'

# テンプレートを指定してPSPオブジェクトを生成
template = psp.PSP(req, filename='template.html')

# クエリストリング:pspの値をPSPテンプレートへと渡す
template.run({'query_string': fields.get('psp', None)})
return apache.OK

 
curlで確認します。

$ curl "http://192.168.69.156/mp/generic_handler.py?psp=use_template"
<!DOCTYPE html>
<html lang="en">
<head>
    <meta charset="UTF-8">
    <title>PSP template</title>
</head>
<body>

<p>Now: 2018/09/24</p>
<p>Query String: use_template</p>
</body>
</html>


404ページを表示

apache.OKの代わりに、 apache.HTTP_NOT_FOUND を使います。

if '404' in fields:
    return apache.HTTP_NOT_FOUND

 
curlで確認します。

$ curl "http://192.168.69.156/mp/generic_handler.py?404=1"
<!DOCTYPE HTML PUBLIC "-//IETF//DTD HTML 2.0//EN">
<html><head>
<title>404 Not Found</title>
</head><body>
<h1>Not Found</h1>
<p>The requested URL /mp/generic_handler.py was not found on this server.</p>
<hr>
<address>Apache/2.4.29 (Ubuntu) Server at 192.168.69.156 Port 80</address>
</body></html>


エラーページを表示

apache.OKの代わりに、 apache.SERVER_RETURN を使います。

if 'error' in fields:
    return apache.SERVER_RETURN

 
curlで確認します。

$ curl "http://192.168.69.156/mp/generic_handler.py?error=1"

<pre>
MOD_PYTHON ERROR
...


リダイレクト

mod_python.util.redirect() を使います。

if 'redirect' in fields:
    util.redirect(req, 'https://www.google.co.jp')

 
curlで確認します。

$ curl "http://192.168.69.156/mp/generic_handler.py?redirect=1"
<p>The document has moved <a href="https://www.google.co.jp">here</a></p>

# リダイレクトを追跡
$ curl -L --include "http://192.168.69.156/mp/generic_handler.py?redirect=1"
HTTP/1.1 302 Found
...
Location: https://www.google.co.jp

HTTP/1.1 200 OK
...
Server: gws
...
Set-Cookie: 1P_JAR=2018-09-23-23; expires=Tue, 23-Oct-2018 23:43:13 GMT; path=/; domain=.google.co.jp


req.write()使用上の注意

req.write()でレスポンスボディを設定します。

ただ、req.write()後にHTTPヘッダ系を修正しても反映されません。Cookieも同様ですので、注意が必要です。

if 'note' in fields:
    req.write('set after body\n')
    Cookie.add_cookie(req, 'after_write', 'yes')
    req.headers_out['X-After-Write'] = 'oh'
    return apache.OK

 
curlで確認します。

  • HTTPヘッダ:X-After-Write
  • Cookie:after_write

が設定されていません。

$ curl --include "http://192.168.69.156/mp/generic_handler.py?note=1"
HTTP/1.1 200 OK
Date: Sun, 23 Sep 2018 23:56:38 GMT
Server: Apache/2.4.29 (Ubuntu)
X-My-header: hello world
Cache-Control: no-cache="set-cookie"
Set-Cookie: counter=1
Vary: Accept-Encoding
Transfer-Encoding: chunked
Content-Type: text/plain

set after body

 
試しに、req.write()前に移動してみます。

Cookie.add_cookie(req, 'after_write', 'yes')
req.headers_out['X-After-Write'] = 'oh'
req.write('set after body\n')
return apache.OK

 
curlで確認します。

  • HTTPヘッダ:X-After-Write
  • Cookie:after_write

が設定されています。

$ curl --include "http://192.168.69.156/mp/generic_handler.py?note=1"
HTTP/1.1 200 OK
Date: Sun, 23 Sep 2018 23:59:11 GMT
Server: Apache/2.4.29 (Ubuntu)
X-My-header: hello world
Cache-Control: no-cache="set-cookie"
Set-Cookie: counter=1
Set-Cookie: after_write=yes
X-After-Write: oh
Vary: Accept-Encoding
Transfer-Encoding: chunked
Content-Type: text/plain

set after body


ソースコード

GitHubに上げました。
thinkAmi-sandbox/mod_python-sample


その他参考