Robot Frameworkにて使える時間のフォーマットについて調べてみた

Robot Frameworkでは、 sleep 1 seconds のように、数値 + 単位で時間を表現できます。

ただ、サイトによって secondssが使われるなど、単位のフォーマットが異なっていました。

そこで今回、どういうフォーマットが使えるのか調べてみました。


環境


調査結果

公式サイトに記載がありました。

・days, day, d

・hours, hour, h

・minutes, minute, mins, min, m

・seconds, second, secs, sec, s

・milliseconds, millisecond, millis, ms

6.5 Time format | Robot Framework User Guide

また、 4 s4s のように、数字と単位は、離す・くっつけるのどちらでも良いようです。

 
試してみます。

なお、

とします。

*** Settings ***

Library  DateTime


*** Keywords ***
現在時刻を出力する
    [Arguments]  ${label}=start
    ${now} =  get current date
    log to console  ${now}${SPACE * 3}[${label}]


*** TestCases ***
引数の秒数のフォーマットを確認する
    log to console  ${SPACE}

    現在時刻を出力する

    sleep  1 seconds
    現在時刻を出力する  label=seconds

    sleep  1 second
    現在時刻を出力する  label=second

    sleep  1 secs
    現在時刻を出力する  label=secs

    sleep  1 sec
    現在時刻を出力する  label=sec

    sleep  1 s
    現在時刻を出力する  label=s

    sleep  1sec
    現在時刻を出力する  label=sec_without_space

    sleep  1s
    現在時刻を出力する  label=s_without_space

    sleep  1.5s
    現在時刻を出力する  label=s_with_dot

 
結果です。いずれのフォーマットでも正しく動作しているようです。

$ robot datetime_library_sample/time_format_test.robot 
...
==============================================================================
Time Format Test                                                              
==============================================================================
引数の秒数のフォーマットを確認する                                     
.2017-08-11 07:38:36.420   [start]
..2017-08-11 07:38:37.424   [seconds]
..2017-08-11 07:38:38.427   [second]
..2017-08-11 07:38:39.431   [secs]
引数の秒数のフォーマットを確認する                                    .2017-08-11 07:38:40.435   [sec]
..2017-08-11 07:38:41.438   [s]
..2017-08-11 07:38:42.441   [sec_without_space]
..2017-08-11 07:38:43.444   [s_without_space]
引数の秒数のフォーマットを確認する                                    .2017-08-11 07:38:44.947   [s_with_dot]
引数の秒数のフォーマットを確認する                                    | PASS |
...


ソースコード

GitHubに上げました。datetime_library_sampleの中にあるtime_format_test.robotファイルが今回のテストファイルです。
thinkAmi-sandbox/RobotFramework-sample

Robot Framework + Selenium2Libraryで、「Go To」を使う時はURIスキームを付ける

Selenium2Libraryでは、 Go To キーワードを使って引数のURLに移動します。
Go To | Selenium2Library

 
今までのサンプルでは、localhostへの移動はURIスキームを省略した localhost:8084 みたいな値を引数として渡していました。

 
しかし、通常のChromeとHeadlessなChromeでは挙動が異なったため、Go Toを使う時はURIスキームを付けておくべきと感じました。

その例をメモしておきます。

 
2017/9/2追記

Selenium2Libraryですが、バージョン3からは SeleniumLibrary へと名称が変更されています。詳しくはこちらに書きました。
RobotFrameworkのSelenium2Libraryの名前が、SeleniumLibraryへと変更されてた - メモ的な思考的な

なお、本文はSelenium2Libraryのままにしてあります。

2017/9/2追記ここまで

 
目次


環境

  • Mac OS X 10.11.6
  • Python 3.6.2
  • Google Chrome 60.0.3112.78 (stable)
  • ChromeDriver 2.31 (stable)
  • RobotFramework 3.0.2
  • Selenium2Library 1.8.1dev1
    • GitHubから現在の最新版をインストール
    • PyPIにある1.8.0では、Python3系だとエラーが出てインストールできない
  • Selenium 3.4.3
  • Bottle 0.12.13
    • Webアプリ用


キーワードの用意

今回、通常のChromeとHeadlessなChromeでの挙動を比較するため、以下のキーワードを用意します。

*** Keywords ***
URIスキーム無しでlocalhostへアクセスする
    go to  localhost:8084/
    location should be  http://localhost:8084/

URIスキームありでlocalhostへアクセスする
    go to  http://localhost:8084/
    location should be  http://localhost:8084/

URIスキーム無しでGoogleへアクセスする
    go to  www.google.co.jp/
    location should be  https://wwww.google.co.jp/

URIスキームありでGoogleへアクセスする
    go to  https://www.google.co.jp/
    location should be  https://www.google.co.jp/

キーワード「${キーワード}」が失敗することを確認する
    ${エラー有無}  ${エラーメッセージ} =  run keyword and ignore error  ${キーワード}
    should be equal  ${エラー有無}  FAIL
    log to console  エラーメッセージ:\n${エラーメッセージ}\n_______________


通常のChromeの場合

通常のChromeの場合、localhostへはURIスキームの有無に関係なくアクセスできます。一方、Googleへはアクセスできません。

ノーマルなChromeでURIスキームを扱う
    create webdriver  Chrome
    log to console  ${SPACE}

    URIスキーム無しでlocalhostへアクセスする
    URIスキームありでlocalhostへアクセスする
    キーワード「URIスキーム無しでGoogleへアクセスする」が失敗することを確認する
    URIスキームありでGoogleへアクセスする

実行結果です。

ノーマルなChromeでURIスキームを扱う                                   . 
...エラーメッセージ:
WebDriverException: Message: unknown error: unhandled inspector error: {"code":-32000,"message":"Cannot navigate to invalid URL"}
  (Session info: chrome=60.0.3112.90)
  (Driver info: chromedriver=2.31.488774 (7e15618d1bf16df8bf0ecf2914ed1964a387ba0b),platform=Mac OS X 10.11.6 x86_64)
_______________


HeadlessなChrome

通常のChromeと異なり、localhostの場合にもURIスキームが必要になります。

HeadlessなChromeでURIスキームを扱う
    ${options} =  evaluate  sys.modules['selenium.webdriver'].ChromeOptions()  sys
    call method  ${options}  add_argument  --headless
    create webdriver  Chrome  chrome_options=${options}
    log to console  ${SPACE}

    キーワード「URIスキーム無しでlocalhostへアクセスする」が失敗することを確認する
    URIスキームありでlocalhostへアクセスする
    キーワード「URIスキーム無しでGoogleへアクセスする」が失敗することを確認する
    URIスキームありでGoogleへアクセスする

実行結果です。

HeadlessなChromeでURIスキームを扱う                                   ... 
.エラーメッセージ:
Location should have been 'http://localhost:8084/' but was 'data:,'
_______________
..エラーメッセージ:
WebDriverException: Message: unknown error: unhandled inspector error: {"code":-32000,"message":"Cannot navigate to invalid URL"}
  (Session info: headless chrome=60.0.3112.90)
  (Driver info: chromedriver=2.31.488774 (7e15618d1bf16df8bf0ecf2914ed1964a387ba0b),platform=Mac OS X 10.11.6 x86_64)
_______________

 
これらより、キーワード Go To を使う場合はURIスキームを付けるほうが、エラーが出ることなく移動できることが分かりました。


ソースコード

GitHubに上げました。selenium2_library_sample/tests/の中にあるselenium_uri_scheme_test.robotファイルが今回のテストファイルです。
thinkAmi-sandbox/RobotFramework-sample

Robot Framework + Selenium2Library + robotframework-requestsで、静的ファイルが本当にあるのか確認する

以前、Robot Framework + Selenium2Libraryで、静的HTMLをテストしてみました。
Robot Framework + Selenium2Libraryで、静的HTMLをテストする - メモ的な思考的な

 
その時、

<img id="img_200" src="/static/image/a.png" alt="あの字" title="画像タイトル">

というHTMLに対し、

page should contain image  jquery=img[alt='あの字']

というテストコードを書きました。

 
しかし、実際にはそのテストコードは静的ファイルが存在するかまではチェックしていないため、

<!--存在する画像ファイル-->
<img id="img_200" src="/static/image/200.png" alt="存在します" title="画像タイトル">

<!--存在しない画像ファイル-->
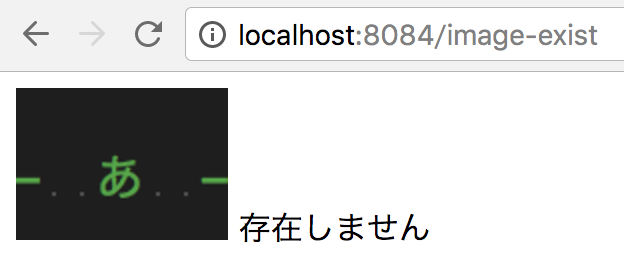
<img id="img_404" src="/static/image/404.png" alt="存在しません" title="画像タイトル2">

というHTMLがあり、実際には

f:id:thinkAmi:20170809202012p:plain:w200

となっていた場合でも、

page should contain image  id=img_404
element should be visible  id=img_404

というテストがパスしてしまいます。

 
静的ファイルが本当にあるのかを確認する方法を探したところ、stackoverflowに robotframework-requests を使う方法が書かれていました。内部で requests を使っているようです。

そのため、今回 robotframework-requests を試してみます。

 
2017/9/2追記

Selenium2Libraryですが、バージョン3からは SeleniumLibrary へと名称が変更されています。詳しくはこちらに書きました。
RobotFrameworkのSelenium2Libraryの名前が、SeleniumLibraryへと変更されてた - メモ的な思考的な

なお、本文はSelenium2Libraryのままにしてあります。

2017/9/2追記ここまで

 
目次


環境

  • Mac OS X 10.11.6
  • Python 3.6.2
  • Google Chrome 60.0.3112.78 (stable)
  • ChromeDriver 2.31 (stable)
  • RobotFramework 3.0.2
  • robotframework-requests 0.4.7
  • Selenium2Library 1.8.1dev1
    • GitHubから現在の最新版をインストール
    • PyPIにある1.8.0では、Python3系だとエラーが出てインストールできない
  • Selenium 3.4.3
  • Bottle 0.12.13
    • Webアプリ用


実装

GitHubにあるREADMEのUsageに使い方があるため、それに従って実装してみます。

SettingsにLibraryを追加

今回、Selenium2Libraryも使うため、2つをSettingsに追加します。

*** Settings ***
Library  Selenium2Library
Library  RequestsLibrary


imgタグのsrc属性から、URLを取得

Get Element Attributeキーワードを使って、imgタグのsrc属性から対象の静的ファイルのURLを取得します。
Get Element Attribute | Selenium2Library

${src404} =  get element attribute  id=img_404@src
log to console  ${src404}
# => http://localhost:8084/static/image/404.png


セッションオブジェクトを作成

requestsと同様、 requests.Session オブジェクトを作成します。
Create Session | RequestsKeywords

今回は任意のセッション名とURLのみ指定していますが、他にもCookieなどいろいろと指定できますので、詳しくはドキュメントを見てください。

# 第一引数は任意のセッション名、第二引数はURL
create session  not-found-session  ${src404}


画像のURLをGET

stackoverflowにはGetキーワードが書かれています。

しかし、

  • ドキュメントでは Deprecated
  • 実行すると、 Deprecation Warning: Use Get Request in the future ワーニング

ですので、キーワード Get Request を代わりに使います。
Get Request | RequestsKeywords

なお、上記のstackoverflowによると、URLは URL is relative to the session URL とのことなので、今回も同じように / を指定します。

${response404} =  get request  not-found-session  /
log to console  ${response404}
#=> <Response [404]>


ステータスコードの検証

上記の通り、Get Requestキーワードの戻り値はResponseオブジェクトになります。

そのため、requestsのResponseオブジェクトの属性 status_code を使って、ステータスコードを検証します。
status_code - class requests.Response | Developer Interface — Requests 2.18.3 documentation

 
なお、検証で使うキーワードは Should Be Equal As IntegersShould Be Equal As Strings 、どちらでも同じ結果になります。

should be equal as integers  ${response404.status_code}  404
should be equal as strings  ${response404.status_code}  404

 
以上で、ファイルが存在しないことを確認できました。

 
なお、静的ファイルが存在することを確認するには、

${src200} =  get element attribute  id=img_200@src
create session  found-session  ${src200}
${response200} =  get request  found-session  /
should be equal as strings  ${response200.status_code}  200

となります。


ソースコード

GitHubに上げました。selenium2_library_sample/tests/の中にあるselenium_requests_test.robotファイルが今回のテストファイルです。
thinkAmi-sandbox/RobotFramework-sample

Robot Framework + Selenium2Libraryで、HTML + JavaScriptまわりをテストする

前回、Robot Framework + Selenium2Libraryで、HTMLのフォームまわりをテストしてみました。
Robot Framework + Selenium2Libraryで、HTMLフォームまわりをテストする - メモ的な思考的な

 
今回は、Robot Framework + Selenium2Libraryで、HTML + JavaScriptまわりをテストしてみます。

 
2017/9/2追記

Selenium2Libraryですが、バージョン3からは SeleniumLibrary へと名称が変更されています。詳しくはこちらに書きました。
RobotFrameworkのSelenium2Libraryの名前が、SeleniumLibraryへと変更されてた - メモ的な思考的な

なお、本文はSelenium2Libraryのままにしてあります。

2017/9/2追記ここまで

 
目次


環境

  • Mac OS X 10.11.6
  • Python 3.6.2
  • Google Chrome 60.0.3112.78 (stable)
  • ChromeDriver 2.31 (stable)
  • RobotFramework 3.0.2
  • Selenium2Library 1.8.1dev1
    • GitHubから現在の最新版をインストール
    • PyPIにある1.8.0では、Python3系だとエラーが出てインストールできない
  • Selenium 3.4.3
  • Bottle 0.12.13
    • Webアプリ用


Elementが出てくるまで待つ

<div id="show_delay"></div>

というHTMLに対し、

window.addEventListener("load", function () {
    setTimeout(function(){
        document.getElementById('show_delay').innerHTML = '<p id="hello">Hello, world!</p>'
    }, 3000);
});

と、3秒後にp要素を追加するJavaScriptがあるとします。

 
この場合、Wait Until Page Contains Elementを使い、p要素が出てくるまで待機します。
Wait Until Page Contains Element | Selenium2Library

# p要素が出てくるまで待つ
wait until page contains element  id=hello

# 出てきたら、p要素のテキストが正しいかを確認
element text should be  id=hello  Hello, world!


マウスオーバーすると出てくるElementをクリックする

<div id="on_mouse_area">このあたりをマウスオーバーするとボタンが見える
    <button id="mouse_target" style="display: none;">
        mouseoverのみ見える
    </button>
</div>

というdisplay: noneなHTMLがあり、

var on_mouse_area = document.getElementById('on_mouse_area');
on_mouse_area.onmouseover = function () {
    document.getElementById('mouse_target').style.display = 'block';
};
on_mouse_area.onmouseout = function () {
    document.getElementById('mouse_target').style.display = 'none';
};
var mouse_target = document.getElementById('mouse_target');
mouse_target.onclick = function () {
    window.location.href = '/'
};

と、マウスオーバー時に表示するJavaScriptがあるとします。

 
この場合、Mouse Overを使いマウスオーバーした後、Click Elementします。
Mouse Over | Selenium2Library

# マウスオーバーする
mouse over  id=on_mouse_area

# クリックする
click element  id=mouse_target


スクロールしてクリックする

JavaScriptでスクロールする
<div class="bottom" style="padding-top: 1200px">
    <button id="bottom_button">下にあるボタン</button>
</div>

と、縦長のページの一番下にボタンがあるとします。

 
この場合、JavaScriptを実行するExecute Javascriptを使い、JavaScriptwindow.scrollTo()などを使います。

# スクロールする
Execute JavaScript  window.scrollTo(0, 1200)

# クリックする
click element  id=bottom_button


画面サイズを変更する

スクロールするとは関係ないですが、画面サイズについて、

などがあります。

# 現在の画面サイズを取得する
${幅}  ${高さ} =  get window size

# 画面サイズを変更する
set window size  10  10

# 画面サイズを元に戻す
set window size  ${幅}  ${高さ}


display:noneなボタンをクリックする

<button id="display_none" style="display: none;">見えない</button>

という、display:noneなStyleのボタンがあるとします。

この場合、JavaScriptを使うことで、強引にクリックすることができます。
Example to click on element which is hidden using Execute Javascript? - Google グループ

execute javascript  document.getElementById('display_none').click();


JavaScriptによるリロードがあったことを確認する

Assign Id To Elementを使う
<button id="run_reload" class="reload_element">リロード</button>

というHTMLがあり、このボタンを押すと

var reload = document.getElementById('run_reload');
reload.onclick = function () {
    location.reload();
};

と、リロードするJavaScriptがあるとします。

 
この場合、Assign Id To Elementを使って

  • リロード前にタグを設定
  • リロード後にタグが存在しないことを確認

を行います。

Assign Id To Elementで設定したidはリロードすると消えてしまう特性を利用します。
Assign Id To Element | Selenium2Library

# id="run_reload"をid="not_reload"に付け替える
assign id to element  run_reload  not_reload


Assign Id To Elementの注意点
assign id to element  id=reload_dummy  not_reload

と、locatorにidを指定すると、

Keyword 'Selenium2Library.Assign Id To Element' got positional argument after named arguments.

というエラーになります。

一方、locatorがclassやxpathであればエラーは出ません。

assign id to element  class=reload_element  not_reload

どうしてもlocatorにidを指定したい場合は、id=を省略すると、デフォルトの挙動であるidnameで検索してくれます。

assign id to element  run_reload  not_reload

 
また、Assign Id To Elementはidを付け替えるため、

<button id="run_reload" class="reload_element">リロード</button>

というHTMLの場合、

# idの割り当て
assign id to element  run_reload  not_reload

# not_reload なidは存在する
page should contain element  id=not_reload

# run_reload なidが存在しない
page should not contain element  id=run_reload

という挙動となります。

idの付け替えが困る場合には、idがないElementなど、他の適当なElementを指定します。


JavaScriptのalertまわり

alertのOKボタンを押す
<button id="show_alert">警告</button>

というHTMLに対し、

var show_alert = document.getElementById('show_alert');
show_alert.onclick = function () {
    alert('OKのみです');
};

とOKのみのalertを表示するJavaScriptがあるとします。

 
この場合、Dismiss Alertを使い、alertのOKボタンを押します。
Dismiss Alert | Selenium2Library

# alertを表示する
click element  id=show_alert

# alertでOKを押す
dismiss alert


alertのメッセージを取得してOKを押す

同じく、

<button id="show_alert">警告</button>

というHTMLに対し、

var show_alert = document.getElementById('show_alert');
show_alert.onclick = function () {
    alert('OKのみです');
};

というJavaScriptがあった場合、メッセージの内容を取得してからOKを押したいとします。

 
この場合、Get Alert Messageを使い、alertのメッセージを取得します。
Get Alert Message | Selenium2Library

# alertを表示する
click element  id=show_alert

# alertのメッセージを取得する
${アラートメッセージ} =  get alert message

# alertのメッセージを確認する
should be equal  ${アラートメッセージ}  OKのみです


alertが表示されていることを確認してからOKを押す

同じく、

<button id="show_alert">警告</button>

というHTMLに対し、

var show_alert = document.getElementById('show_alert');
show_alert.onclick = function () {
    alert('OKのみです');
};

というJavaScriptがあった場合、alertが表示されていることを確認してからOKを押したいとします。

 
この場合、Alert Should Be Presentを使い、alertが表示されていることを確認してからOKを押します。
Alert Should Be Present | Selenium2Library

# alertを表示する
click element  id=show_alert

# alertが表示されていることを確認してからOKを押す
alert should be present


alertの表示とメッセージの一致を確認してからOKを押す

同じく、

<button id="show_alert">警告</button>

というHTMLに対し、

var show_alert = document.getElementById('show_alert');
show_alert.onclick = function () {
    alert('OKのみです');
};

というJavaScriptがあった場合、alertが表示され、メッセージも一致していることを確認してからOKを押したいとします。

 
この場合、Alert Should Be Presentで引数を使い、alert表示とメッセージ一致の確認後にOKを押します。
Alert Should Be Present | Selenium2Library

# alertを表示する
click element  id=show_alert

# alertが表示され、メッセージも一致していることを確認してからOKを押す
alert should be present  OKのみです


alertの表示に時間がかかった場合でもOKを押す
<button id="wait_alert">2秒後に警告</button>

というHTMLに対し、

var wait_alert = document.getElementById('wait_alert');
wait_alert.onclick = function () {
    setTimeout(function(){
        alert('2秒後のアラート');
    }, 2000);
};

と、2秒後にalertを表示するJavaScriptがあるとします。

 
この場合、Wait Until Keyword Succeedsとalertを処理するキーワードを併用します。
Wait Until Keyword Succeeds | BuiltIn

 
Wait Until Keyword Succeedsの引数は

  • 第一引数は、リトライ時間
  • 第二引数は、リトライ間隔
  • 第三引数は、実行するキーワード

です。

# 5秒の間、1秒ごとに、「Get Alert Message」キーワードを実行する
${アラートメッセージ} =  wait until keyword succeeds  5 sec  1 sec  get alert message

# alertに「2秒後のアラート」というメッセージがあったことを確認
should be equal  ${アラートメッセージ}  2秒後のアラート


JavaScriptのconfirmまわり

confirmのOKを押す
<button id="show_confirm">確認</button>

というHTMLに対し、

var show_confirm = document.getElementById('show_confirm');
show_confirm.onclick = function () {
    var answer = confirm('OKとキャンセルです');
    if (answer){
        alert('OKが押されました');
    }
    else{
        alert('キャンセルされました');
    }
};

と、ボタンを押したらconfirmが表示されるJavaScriptがあるとします。

 
この場合、Confirm Actionを使い、confirmでOKを押します。
Confirm Action | Selenium2Library

ちなみに、Confirm ActionのデフォルトではOKを押します。そのため、デフォルトを変更しない限り、Choose Ok On Next Confirmationは不要です。
Choose Ok On Next Confirmation | Selenium2Library

# OKボタンを押して、confirmのメッセージを取得する
${確認メッセージ} =  confirm action

# confirmのメッセージを確認する
should be equal  ${確認メッセージ}  OKとキャンセルです

# OKを押した時にalertが表示され、「OKが押されました」というメッセージがあるかを確認する
${アラートメッセージ} =  get alert message
should be equal  ${アラートメッセージ}  OKが押されました


confirmのキャンセルを押す

同じく、

<button id="show_confirm">確認</button>

というHTMLに対し、

var show_confirm = document.getElementById('show_confirm');
show_confirm.onclick = function () {
    var answer = confirm('OKとキャンセルです');
    if (answer){
        alert('OKが押されました');
    }
    else{
        alert('キャンセルされました');
    }
};

と、ボタンを押したらconfirmが表示されるJavaScriptがあるとします。

 
この場合、Choose Cancel On Next ConfirmationConfirm Actionを使い、confirmでキャンセルを押します。

# 次の確認処理ではキャンセルボタンを押す
choose cancel on next confirmation

# confirmが表示され、キャンセルを押す
${確認メッセージ} =  confirm action
should be equal  ${確認メッセージ}  OKとキャンセルです

# キャンセルを押した時にalertが表示され、「キャンセルされました」というメッセージがあるかを確認する
${アラートメッセージ} =  get alert message
should be equal  ${アラートメッセージ}  キャンセルされました


JavaScriptのpromptに入力する

<button id="show_prompt">入力</button>

というHTMLに対し、

var show_prompt = document.getElementById('show_prompt');
show_prompt.onclick = function () {
    var input_message = prompt('値を入力します');
    alert(input_message);
};

と、JavaScriptのpromptが表示されるとします。

 
この場合、Input Text Into Promptを使い、promptに入力します。
Input Text Into Prompt | Selenium2Library

また、Input Text Into Promptはpromptに入力するだけなので、Confirm ActionによりOKボタンを押します。

なお、ここまでの処理でChoose Cancel On Next Confirmationが使われていた場合、Confirm Actionしてもキャンセルボタンが押されてしまうため、promptへの入力が成功しません。

そのため、Choose Cancel On Next Confirmationが使われている可能性がある場合は、明示的にChoose Ok On Next Confirmationを実行した後にConfirm Actionを実行するとよいでしょう。

# promptを表示する
click element  id=show_prompt

# ここまででChoose Cancel On Next Confirmationが使われている可能性があるため、
# 明示的にChoose Ok On Next Confirmationを実行し、promptでOKを押すように指定する
choose ok on next confirmation

# promptに入力する
input text into prompt  プロンプトに入力しました

# OKボタンを押す
confirm action

# alertではpromptに入力した値が表示されているはずなので、一致しているかを確認する
${アラートメッセージ} =  get alert message
should be equal  ${アラートメッセージ}  プロンプトに入力しました


Headlessブラウザの制限

Headless Chrome v60やPhantomJSの場合、alertやpopup(acceptPopup, cancelPopup)などが未サポートです。
How to run Headless Chrome in Codeception - Codeception / Cookbook - PHP Test Club

そのため、stackoverflowにあるようにモンキーパッチすれば良いかもしれません。
selenium webdriver - chromedriver headless alerts - Stack Overflow

なお、Capybaraでは対応策があるようです。
RSpec + Capybaraでアラート/確認ダイアログを操作する場合は page.driver.browser.switch_to.alert.accept じゃなくて page.accept_confirm を使おう - Qiita

もっとも、Headless Chromeの今後のバージョンでは実装されるかもしれないため、今回はこの部分の対応方法は省略します。


ソースコード

GitHubに上げました。tests/の中にあるselenium_js_test.robotファイルが今回のテストファイルです。
thinkAmi-sandbox/RobotFramework-sample
Robot Framework + Selenium2Libraryで、HTMLフォームまわりをテストする

前回、Robot Framework + Selenium2Libraryで、静的HTMLをテストしてみました。
Robot Framework + Selenium2Libraryで、静的HTMLをテストする - メモ的な思考的な

 
今回は、Robot Framework + Selenium2Libraryで、HTMLフォームまわりをテストしてみます。

 
2017/9/2追記

Selenium2Libraryですが、バージョン3からは SeleniumLibrary へと名称が変更されています。詳しくはこちらに書きました。
RobotFrameworkのSelenium2Libraryの名前が、SeleniumLibraryへと変更されてた - メモ的な思考的な

なお、本文はSelenium2Libraryのままにしてあります。

2017/9/2追記ここまで

 
目次


環境

  • Mac OS X 10.11.6
  • Python 3.6.2
  • Google Chrome 60.0.3112.78 (stable)
  • ChromeDriver 2.31 (stable)
  • RobotFramework 3.0.2
  • Selenium2Library 1.8.1dev1
    • GitHubから現在の最新版をインストール
    • PyPIにある1.8.0では、Python3系だとエラーが出てインストールできない
  • Selenium 3.4.3
  • Bottle 0.12.13
    • Webアプリ用


フォームの送信ボタンを押す場合

こんな感じでフォームの送信ボタンがあるとします。

<form id="id_form" action="/form" method="POST">
    <input id="id_submit" type="submit">
</form>

この送信ボタンを押す方法を考えてみます。


フォームの送信ボタンをクリックする

Click Buttonを使って、フォームの送信ボタンをクリックします。
Click Button | Selenium2Library

click button  id=id_submit


フォームの送信ボタンに対してEnterキーを押す

Press Keyを使って、フォームの送信ボタンに対してEnterキーを押すこともできます。

なお、Enterキーのコードは \\13 となります。

press key  id=id_submit  \\13


リンクをクリックする

フォームとは関係ないような気もしますが、画面遷移になるので、ここに記載します。

このようなリンクがあるとします。

<a id="back_to_top" href="/">トップへ戻る</a>

この時のリンクのクリック方法を考えます。


Click Element

Click Elementでリンクをクリックします。
Click Element | Selenium2Library

click element  id=back_to_top


Click Linkでもリンクをクリックできます。
Click Link | Selenium2Library

click link  id=back_to_top


type=textなinput要素に値を入力する

<input type="text" id="id_subject" name="subject">

というHTMLの場合、

input text  id=id_subject  件名です

とすると、input要素に件名ですが入力されます。


type=passwordなinput要素に値を入力する

<input type="password" id="id_password" name="aikotoba">

というHTMLの場合、

input password  id=id_password  パスワードです

とすると、input要素にパスワードですが入力されます。


ラジオボタンを選択する

<p>
    <label for="id_apple">リンゴ</label>
    <input id="id_apple" type="radio" name="fruit" value="りんご">
    <label for="id_mandarin">ミカン</label>
    <input id="id_mandarin" type="radio" name="fruit" value="みかん">
    <label for="id_grape">ブドウ</label>
    <input id="id_grape" type="radio" name="fruit" value="ぶどう">
</p>
<p>
    <label for="id_big"></label>
    <input id="id_big" type="radio" name="fruit_size" value="大きいもの">
    <label for="id_small"></label>
    <input id="id_small" type="radio" name="fruit_size" value="小さいもの">
</p>

という2つのラジオボタングループがあった場合に、正しいラジオボタンを選択する方法を考えます。


Select Radio Button

Select Radio Buttonキーワードを使います。
Select Radio Button | Selenium2Library

select radio button  fruit  りんご

とすると、name=fruitなラジオボタングループのうち、value=“りんご"なラジオボタンを選択します。


Click Element

Click Elementキーワードでも選択できます。

click element  id=id_small


ラジオボタンの選択確認

ラジオボタンの選択確認はRadio Button Should Be Set Toキーワードを使います。
Radio Button Should Be Set To | Selenium2Library

radio button should be set to  fruit  りんご


単一値のみ選択可能なSelect要素の選択と検証

<p>
    <label for="id_quantity">個数</label>
    <select id="id_quantity" name="quantity">
        <option id="id_selected1_1" name="select1_1" value="1個">1</option>
        <option id="id_selected1_2" name="select1_2" value="2個">2</option>
        <option id="id_selected1_3" name="select1_3" value="3個">3</option>
    </select>
</p>

という、単一値のみ選択可能なSelect要素での選択と検証について考えます。


ラベルで選択する

ラベルとは、

<option>ここ</option>

でのここの値を指します。

 
ラベルの場合、Select From List By Labelを使います。
Select From List By Label | Selenium2Library

select from list by label  id=id_quantity  2


valueで選択する

option要素のvalue属性の値で選択する場合、Select From List By Valueを使います。
Select From List By Value | Selenium2Library

select from list by value  id=id_quantity  3個


indexで選択する

option要素のindexで選択する場合、Select From List By Indexを使います。
Select From List By Index | Selenium2Library

なお、indexは0始まりになります。

select from list by index  id=id_quantity  0


選択されているoption要素をラベルやvalue属性で確認する

List Selection Should Beを使います。
List Selection Should Be | Selenium2Library

なお、第二引数には、ラベルとvalue属性の値のどちらかを指定します。

# ラベル
list selection should be  id=id_quantity  2

# value属性
list selection should be  id=id_quantity  2個


選択したラベルを取得する

Get Selected List Labelを使います。
Get Selected List Label | Selenium2Library

以下の例では、一度変数に入れた後、内容を検証しています。

${選択ラベル} =  get selected list label  id=id_quantity
should be equal  ${選択ラベル}  3


選択したvalue属性を取得する

Get Selected List Valueを使います。
Get Selected List Value | Selenium2Library

こちらも、一度変数に入れて内容を検証する例になります。

${選択値} =  get selected list value  id=id_quantity
should be equal  ${選択値}  3個


Selectに含まれるOptionの件数を調べる

Optionの件数が動的に変わる場合、その件数を調べたくなるかもしれません。

その場合、2つの方法にて検証できます。
selenium webdriver - Check whether SelectBox has items, Robot-Framework, Selenium2Library - Stack Overflow


Get List ItemsとGet Lengthを組み合わせる

を組み合わせて検証します。

なお、Get List Itemsの戻り値はリスト型である一方、Get Lengthの引数はスカラ変数をとるため、波括弧の前を@から$へと切り替えます。

@{items} =  get list items  id=id_quantity
${list_length} =  get length  ${items}
should be equal as integers  ${list_length}  3


Get Matching Xpath Countを使う

XPathでの検索となりますが、Get Matching Xpath Countも使えます。
Get Matching Xpath Count | Selenium2Library

${list_count} =  get matching xpath count  //select[@id="id_quantity"]/option
should be equal as integers  ${list_count}  3

複数選択可能なSelectに含まれるOptionの選択と検証

<p>
    <label for="id_accessories">付属品</label>
    <select id="id_accessories" name="accessories" multiple>
        <option id="id_selected2_1" name="select2_1" value="paper"></option>
        <option id="id_selected2_2" name="select2_2" value="box">容器</option>
        <option id="id_selected2_3" name="select2_3" value="rope">ロープ</option>
    </select>
</p>

という、複数選択可能なSelect要素独特の選択と検証について考えます。


全選択する

Select All From Listを使います。
Select All From List | Selenium2Library

select all from list  id=id_accessories


選択をやめる

Unselect From ListUnselect From List By [Index/Lable/Value]を使います。

なお、Unselect From Listに It's faster to use 'by index/value/label' functions. とある通り、by系の方が速いようです。

unselect from list  id=id_accessories


何も選択されていないことを確認する

List Should Have No Selectionsを使います。
List Should Have No Selections | Selenium2Library

list should have no selections  id=id_accessories


チェックボックスの選択と確認

<p>
    <label for="id_takeout">持ち帰る</label>
    <input type="checkbox" id="id_takeout" name="takeout" value="自分で持ち帰る">
</p>

というチェックボックスのチェックと検証について考えます。


チェックボックスをチェックする

Select Checkboxを使います。
Select Checkbox | Selenium2Library

select checkbox  id=id_takeout


チェックボックスのチェックをやめる

Unselect Checkboxを使います。
Unselect Checkbox | Selenium2Library

unselect checkbox  id=id_takeout


チェックボックスがチェックされているか検証する

Checkbox Should Be Selectedを使います。
Checkbox Should Be Selected | Selenium2Library

checkbox should be selected  id=id_takeout

なお、否定形のCheckbox Should Not Be Selectedもあります。


テキストエリアの入力と検証

<textarea id="id_memo" name="memo"></textarea>

というテキストエリアの入力と検証を考えます。


テキストエリアに入力する

input type=textと同じく、Input Textを使います。

input text  id=id_memo  テキストエリアです


入力文字のクリア

こちらもinput type=textと同じく、Clear Element Textを使います。

clear element text  id=id_memo


テキストエリアの検証
完全一致

Textarea Value Should Beを使います。
Textarea Value Should Be | Selenium2Library

textarea value should be  id=id_memo  テキストエリアです


部分一致

Textarea Should Containを使います。
Textarea Should Contain | Selenium2Library

textarea should contain  id=id_memo  エリア


type=hiddenなinput要素のvalue属性を取得する

<input type="hidden" id="id_hidden_value" class="hidden_class" name="hidden_value" value="隠しデータ">

という、type="hidden"なinput要素があるとします。

Get Element Attributeを使うことで、hiddenなinput要素であってもvalue属性を取得できます。
Get Element Attribute | Selenium2Library

なお、<locator>@<対象の属性>のように書きます。

${hidden_value1} =  get element attribute  id_hidden_value@value

# 検証
should be equal  ${hidden_value1}  隠しデータ


ソースコード

GitHubに上げました。tests/の中にあるselenium_form_test.robotファイルが今回のテストファイルです。
thinkAmi-sandbox/RobotFramework-sample

Robot Framework + Selenium2Libraryで、静的HTMLをテストする

以前、Robot FrameworkとSelenium2Libraryを使ってみました。

 
今回は Robot Framework + Selenium2Libraryで、静的HTMLをテストしてみます。

 
2017/9/2追記

Selenium2Libraryですが、バージョン3からは SeleniumLibrary へと名称が変更されています。詳しくはこちらに書きました。
RobotFrameworkのSelenium2Libraryの名前が、SeleniumLibraryへと変更されてた - メモ的な思考的な

なお、本文はSelenium2Libraryのままにしてあります。

2017/9/2追記ここまで

 
目次


環境

  • Mac OS X 10.11.6
  • Python 3.6.2
  • Google Chrome 60.0.3112.78 (stable)
  • ChromeDriver 2.31 (stable)
  • RobotFramework 3.0.2
  • Selenium2Library 1.8.1dev1
    • GitHubから現在の最新版をインストール
    • PyPIにある1.8.0では、Python3系だとエラーが出てインストールできない
  • Selenium 3.4.3
  • Bottle 0.12.13
    • Webアプリ用

 
Selenium2LibraryをGitHubからインストールする方法は以下と同様ですので、今回は省略します。
Robot Framework + Selenium2Library + ImageMagickで、スクリーンショットの差分を確認する - メモ的な思考的な


ブラウザの起動・移動・終了

起動

が使えます。

Crate Webdriverだと起動時のオプションを利用できます。

通常のChromeを起動する方法です。

create webdriver  Chrome

 
HeadlessなChromeを起動する方法です。オプションとして--headlessを使います。

${options} =  evaluate  sys.modules['selenium.webdriver'].ChromeOptions()  sys
call method  ${options}  add_argument  --headless
create webdriver  Chrome  chrome_options=${options}


移動

Go Toを使います。
Go To | Selenium2Library

以下の例では、localhostの8084ポートへ移動しています。

go to  http://localhost:8084

 
なお、URIスキームの有無で動作の違いがあります。詳しくは以下に書きました。
Robot Framework + Selenium2Libraryで、「Go To」を使う時はURIスキームを付ける - メモ的な思考的な


終了

などが使えます。

close all browsers


ページに文字やElementが存在するか確認する

いわゆるassert系のキーワードです。キーワードの条件を満たさない場合、テストが失敗します。

ページに文字が存在するか

Page Should Containを使います。
Page Should Contain | Selenium2Library

# ページに「Hello, world!」の文字列が含まれるか
page should contain  Hello,${SPACE}world!

 
他に

  • ページに画像が存在するか(Page Should Contain Image)
  • ページに文字が存在しないか(Page Should Not Contain)

などのキーワードがあります。詳しくはドキュメントを見てください。


ページにElementが存在するか

Page Should Contain Elementを使います。
Page Should Contain Element | Selenium2Library

# ページにid=helloのelementが含まれるか
page should contain element  id=hello

 
なお、キーワードの後ろにあるid=helloの部分はlocatorと呼ばれるものです。詳しくは次で説明します。


locatorについて

locatorとは、ページのElementを探す時のキーとなるものです。

いくつか種類があるため、今回は主なものだけ記載します。詳細は以下のドキュメントを確認してください。
Locating or specifying elements | Selenium2Library


id

Elementのid属性を使って検索します。

<button id="locator_id" name="locator_name" class="locator_class">
    locator_text1
</button>

に対し、

page should contain element  id=locator_id

と使います。


name

Elementのname属性を使って検索します。

<button id="locator_id" name="locator_name" class="locator_class">
    locator_text1
</button>

に対し

page should contain element  name=locator_name

と使います。


identifier

Elementのidもしくはname属性を使って検索します。

<button id="locator_id" name="locator_name" class="locator_class">
    locator_text1
</button>

に対し、

page should contain element  identifier=locator_id
page should contain element  identifier=locator_name

と使います。


XPath

XPathを使うこともできます。

<button id="locator_id" name="locator_name" class="locator_class">
    locator_text1
</button>

に対し、

page should contain element  xpath=/html/body/button[@class="locator_class"]
page should contain element  xpath=//button[@class="locator_class"]

と使います。
参考:xpathまとめ - Qiita

 
また、

<button class="locator_class" data-hoge="ham spam" disabled>
    locator_text2
</button>
<button class="locator_class_foo" data-hoge="ham egg">
    locator_text3
</button>
<button class="locator_class_foo" data-hoge="ham spam">
    locator_text4
</button>

のような場合は、

# andを使う
element text should be  xpath=//button[@class="locator_class" and @disabled]  locator_text2

# containを使う(第二引数は文字列をクォートで囲む)
element text should be  xpath=//button[@class="locator_class" and contains(@data-hoge, "spam")]  locator_text2

# notを使う
element text should be
...  xpath=//button[@class="locator_class_foo" and not(contains(@data-hoge, "egg"))]  locator_text4

のような、 andcontainnotなども使えます。


CSS

CSSセレクタもlocatorとして使えます。

<div id="locator_css">
    <ul><li>1-1</li></ul>
    <ul>
        <li>2-1</li>
        <li>2-2</li>
        <li><p>対象</p></li>
    </ul>
    <ul><li>3-1</li></ul>
</div>

に対し、

page should contain element  css=#locator_id
page should contain element  css=button.locator_class

と使います。

 
また、CSSのnth-childなども使えます(nth-childは1始まり)。
:nth-childの使い方 | CSSPRO

element text should be  css=#locator_css > ul:nth-child(2) > li:last-child > p  対象


jQuery

jQueryもlocatorとして使えます。

ただし、対象のHTMLにてjQueryがロードされていない場合、WebDriverException: Message: unknown error: jQuery is not definedというエラーが発生して使えません。
参考:Document that jQuery is not provided by Selenium2Library · Issue #262 · robotframework/Selenium2Library

<img id="img_200" src="/static/image/a.png" alt="あの字" title="画像タイトル">

に対し、

page should contain image  jquery=img[alt='あの字']
page should contain image  jquery=img[title='画像タイトル']

と使います。

画像のalttitle属性で検索したい時は便利かもしれません。


Elementの属性を取得する

Get Element Attributeを使います。
Get Element Attribute | Selenium2Library

 
例えば、

<img id="img_200" src="/static/image/a.png" alt="あの字" title="画像タイトル">

に対し、画像のsrc属性を取得し、比較する例です。

${src} =  get element attribute  css=#img_200@src
${url} =  get location
should be equal  ${src}  ${url}static/image/a.png


Elementに対するvisibleとenableとcontainの違い

似たようなキーワードとして、

があります。

 
例えば

<button id="element_display_none" style="display: none">
    None
</button>

<button id="element_visibility_hidden" style="visibility: hidden">
    Hidden
</button>

<button id="element_disabled" disabled>
    Disabled
</button>

があった場合、パスするテストの書き方は

# not be visible / be visible
element should not be visible  id=element_display_none
element should not be visible  id=element_visibility_hidden
element should be visible  id=element_disabled

# be enable / be disable
element should be enabled  id=element_display_none
element should be enabled  id=element_visibility_hidden
element should be disabled  id=element_disabled

# いずれもcontain element
page should contain element  id=element_display_none
page should contain element  id=element_visibility_hidden
page should contain element  id=element_disabled

となります。

そのため、

  • display:nonevisibility:hiddennot visibledisabledvisible
  • display:nonevisibility:hiddenenableddisableddisabled
  • いずれもcontain

という挙動です。


Elementが見えている/見えていない時に何かする

例えば、

<button id="visible_button">
    見えてる
</button>

<button id="invisible_button" style="display: none">
    見えてない
</button>

があった時に、見えている/見えていないで処理を分ける場合、

# 見えてる
${visible} =  run keyword and return status  element should be visible  id=visible_button
run keyword if  ${visible}  log to console  見えてます

# 見えてない
${invisible} =  run keyword and return status  element should be visible  id=invisible_button
# 「run keyword unless」を使うことで、第一引数がfalseの時に log to console する
run keyword unless  ${invisible}  log to console  見えてないです

となります。

否定形の処理は、Run Keyword Unlessを使います。


テーブルに対する処理

例えば、

<div id="table_search">
    <table>
        <tr>
            <th>key</th>
            <th>value</th>
        </tr>
        <tr>
            <td>一行目のキー</td>
            <td>一行目の値</td>
        </tr>
    </table>
    <table>
        <tr>
            <th>項目</th>
            <th></th>
        </tr>
        <tr>
            <td>項目1</td>
            <td>値1</td>
        </tr>
        <tr>
            <td>項目2</td>
            <td>値2</td>
        </tr>
    </table>
</div>

というテーブルがあった時に、行・列・セルの処理をしたい場合は、

# 行番号(row)にはヘッダ行(th)も含まれていることに注意
# また、「table row should contain」は、指定した行のどこかの列にその文字列があればPASSする
table row should contain  css=#table_search > table:nth-child(2)  3  項目2
table row should contain  css=#table_search > table:nth-child(2)  3  値2

# 行・列の組み合わせで調べたい時は、「table cell should contain」を使う
# 行、列、値の順で指定する
table cell should contain  css=#table_search > table:nth-child(2)  3  2  値2

となります。

他にも、Table Header Should Containなど色々とありますので、ドキュメントを見ると良いかと思います。


ソースコード

GitHubに上げました。
thinkAmi-sandbox/RobotFramework-sample

selenium2_library_sampleディレクトリの中にあるものが今回のコードです。

構成は

  • target_app/target.py : Bottleアプリ
  • target_app/views/index.html : 対象のHTML
  • tests/selenium_page_test.robot : Selenium2Libraryを使ったテストコード

です。

python target.pyでBottleアプリを起動した後、RobotFrameworkのテストコードを実行して動作確認できます。

Heroku CLI を使わずに、BottleアプリをHerokuへデプロイする

通常、Heroku CLI (以前のHeroku Toolbelt)を使ってHerokuにデプロイしています。
Heroku CLI | Heroku Dev Center

ただ、Heroku CLIを使わずにデプロイする方法があるのか気になったため、その方法を調べた時のメモです。

目次


環境


Bottleアプリまわりの作業

Bottleのインストール
$ pip install bottle


Bottleアプリの作成

Hello, world的なものを作成します。


Bottleアプリ本体

app.py

import os
from bottle import get, run

@get('/')
def index():
    return 'Hello, heroku'

if __name__ == "__main__":
    run(host="0.0.0.0", port=int(os.environ.get("PORT", 5000)))

 
起動して動作確認します。

$ python app.py 


requirements.txtの作成
$ pip freeze > requirements.txt


Procfileの作成
web: python app.py


runtime.txtの作成
python-3.6.2

 
なお、サポートされているバージョンは現時点では以下の2つでした。

参考:Specifying a Python Runtime | Heroku Dev Center

 
そのため、

python-3.5.3

のようなサポート外のバージョンを指定すると、push時に

remote: -----> Python app detected
remote: -----> Installing python-3.5.3
remote: -----> Installing pip
remote: -----> Installing requirements with pip
remote:        /app/tmp/buildpacks/779a8bbfbbe7e1b715476c0b23fc63a2103b3e4131eda558669aba8fb5e6e05682419376144189b29beb5dee6d7626b4d3385edb0954bffea6c67d8cf622fd51/bin/steps/pip-install: line 7: /app/.heroku/python/bin/pip: No such file or directory
remote:  !     Push rejected, failed to compile Python app.
remote: 
remote:  !     Push failed

とエラーになりました。


Herokuの準備

アプリの作成

Personal appより作成します。


公開鍵の登録

ssh-keygen -t rsaで公開鍵を作成します。
Managing Your SSH Keys | Heroku Dev Center

 
作成した鍵は、HerokuのAccount settingsの SSH Keys に登録しておきます。


接続の確認

sshでHerokuにアクセスできるか確認します。

状況に応じて、~/.ssh/id_rsa_herokuとしてあるプライベート鍵ファイルのパスを変更します。

$ ssh -i ~/.ssh/id_rsa_heroku -v git@heroku.com
...
debug1: Authentications that can continue: publickey
debug1: Next authentication method: publickey
debug1: Offering RSA public key: ~/.ssh/id_rsa_heroku
debug1: Server accepts key: pkalg ssh-rsa blen 535
debug1: Authentication succeeded (publickey).
Authenticated to heroku.com ([50.19.85.156]:22).
debug1: channel 0: new [client-session]
debug1: Entering interactive session.
debug1: Sending environment.
debug1: Sending env LANG = ja_JP.UTF-8
PTY allocation request failed on channel 0
shell request failed on channel 0

と表示されればOKです。

 
なお、接続に失敗した場合は

$ ssh -i ~/.ssh/id_rsa_heroku -v git@heroku.com
...
debug1: Authentications that can continue: publickey
debug1: Next authentication method: publickey
debug1: Offering RSA public key: ~/.ssh/id_rsa_heroku
debug1: Authentications that can continue: publickey
debug1: No more authentication methods to try.
Permission denied (publickey).

となります。

その時は、ここを見ると解決するかもしれません。
Fixing problems with keys | Managing Your SSH Keys | Heroku Dev Center


Herokuへのデプロイ

コミット
$ git add .
$ git commit -m "first commit"


push

add remoteします。

Heroku_Git_URLは、アプリのSettingsページにあるHeroku Git URLの値を設定します。

$ git remote add heroku https://git.heroku.com/<Heroku_Git_URL>

 
あとはpushしてデプロイします。

$ git push heroku master

 
なお、git - Can a Rails app be deployed without using Heroku Toolbelt? If so, how? - Stack Overflowでは

git remote add heroku git@heroku.com:falling-wind-1624.git

となっていましたが、その方法だと

$ git push heroku master
Permission denied (publickey).
fatal: Could not read from remote repository.

Please make sure you have the correct access rights
and the repository exists.

となり、デプロイに失敗します。


デプロイ後の確認

動作確認

ターミナルに

https://<app_name>.herokuapp.com/ deployed to Heroku

と記載されているURLにアクセスし、動作を確認します。


ログ確認

Heroku CLIを使っていないため、heroku logsが使えません。

そのため、アドオンでの確認となります。手元ではPapertrailを使いました。

ただ、無料プランであっても、Papertrailを追加するにはクレジットカード認証が必要でした。


参考資料