AWS Amplifyで、既存のAmazon Cognitoを使う方法を探してみた

AWS Amplifyでは、Authentication moduleを使うことで、簡単にAmazon Cognitoの新しい環境が作れます。
Authentication

 
ただ、Amplify CLIを使って既存のAmazon Cognito環境を利用する方法が見当たらなかったので、調べた時のメモを残します。

 
目次


環境


結論

これらのissueがあるように、現時点のAmplify CLIでは既存のCognitoを指定できないようです。

 
そのため、既存のCognitoを使いたい場合は、 $ amplify auth add で作るのではなく、Amplify.configure() の引数に対象のCognito情報を入れる必要があります。

また、$ amplify auth add が必要なAWS Amplify Storage moduleについても、 $ amplify storage add で環境を作るのではなく、 Amplify.configure() の引数に指定する形となります。

 
つまり、現時点で既存のCognitoを使いたい場合は

  • $ amplify auth add
  • $ amplify storage add

ができないようです。

 
以降、$ amplify auth add で既存のCognitoを使えないかを試してみた時のログです。


試してみた

実行前の既存のユーザープールは以下です。これを使いたいとします。

$ aws cognito-idp list-user-pools --max-results 20
{
    "UserPools": [
        {
            "Id": "us-east-1_ZTS1WF17W",
            "Name": "directiveauthuserpool-dev",
            "LambdaConfig": {},
            "LastModifiedDate": 1562661761.134,
            "CreationDate": 1562661761.134
        }
    ]
}

 
amplify initします。特別なことはしていません。

$ amplify init
Note: It is recommended to run this command from the root of your app directory
? Enter a name for the project existingawsresources
? Enter a name for the environment dev
? Choose your default editor: Visual Studio Code
? Choose the type of app that you're building javascript
Please tell us about your project
? What javascript framework are you using none
? Source Directory Path:  src
? Distribution Directory Path: dist
? Build Command:  npm run-script build
? Start Command: npm run-script start
Using default provider  awscloudformation

For more information on AWS Profiles, see:
https://docs.aws.amazon.com/cli/latest/userguide/cli-multiple-profiles.html

? Do you want to use an AWS profile? Yes
? Please choose the profile you want to use default

 
続いて AmplifyのAuthenticationモジュールを追加します。既存のものが使えるかなと思い名前を合わせてみました。

$ amplify auth add
Using service: Cognito, provided by: awscloudformation
 
 The current configured provider is Amazon Cognito. 
 
 Do you want to use the default authentication and security configuration? Manual configuration
 Select the authentication/authorization services that you want to use: User Sign-Up, Sign-In, connected with AWS IAM controls (Enables per-user Storage features for images or oth
er content, Analytics, and more)
 Please provide a friendly name for your resource that will be used to label this category in the project: existingawsresourcesb5bd8fa8b5bd8fa8

# 名前が既存と同じになるよう指定する
 Please enter a name for your identity pool. directiveauthidpool
 Allow unauthenticated logins? (Provides scoped down permissions that you can control via AWS IAM) No
 Do you want to enable 3rd party authentication providers in your identity pool? No

# こちらも同様
 Please provide a name for your user pool: directiveauthuserpool
 Warning: you will not be able to edit these selections. 
 How do you want users to be able to sign in? Username
 Multifactor authentication (MFA) user login options: OFF
 Email based user registration/forgot password: Enabled (Requires per-user email entry at registration)
 Please specify an email verification subject: Your verification code
 Please specify an email verification message: Your verification code is {####}
 Do you want to override the default password policy for this User Pool? No
 Warning: you will not be able to edit these selections. 
 What attributes are required for signing up? (Press <space> to select, <a> to toggle all, <i> to invert selection)Email
 Specify the app's refresh token expiration period (in days): 30
 Do you want to specify the user attributes this app can read and write? No
 Do you want to enable any of the following capabilities? (Press <space> to select, <a> to toggle all, <i> to invert selection)
 Do you want to use an OAuth flow? No
? Do you want to configure Lambda Triggers for Cognito? No

 
この時にできあがったファイルはこちら

 
続いて、既存のものに合わせるべく、不要なところを修正・削除します。

その後、 amplify auth update

$ amplify auth update
Please note that certain attributes may not be overwritten if you choose to use defaults settings.
Using service: Cognito, provided by: awscloudformation
 What do you want to do? Apply default configuration without Social Provider (Federation)
Successfully updated resource existingawsresourcesb5bd8fa8b5bd8fa8 locally

 
update後の変更点はこちら。

 
amplify push すると成功。

$ amplify push

Current Environment: dev

| Category | Resource name                        | Operation | Provider plugin   |
| -------- | ------------------------------------ | --------- | ----------------- |
| Auth     | existingawsresourcesb5bd8fa8b5bd8fa8 | Create    | awscloudformation |
? Are you sure you want to continue? Yes
...
✔ All resources are updated in the cloud

 
しかし、AWS CLIで見ると、同じ名前で別のユーザープールができあがっていました。残念。
list-user-pools — AWS CLI 1.16.197 Command Reference

$ aws cognito-idp list-user-pools --max-results 20
{
    "UserPools": [
        {
            "Id": "us-east-1_MoYYcoq4F",
            "Name": "directiveauthuserpool-dev",
            "LambdaConfig": {},
            "LastModifiedDate": 1563375883.473,
            "CreationDate": 1563375883.473
        },
        {
            "Id": "us-east-1_ZTS1WF17W",
            "Name": "directiveauthuserpool-dev",
            "LambdaConfig": {},
            "LastModifiedDate": 1562661761.134,
            "CreationDate": 1562661761.134
        }
    ]
}


対応

こんな感じのJavaScriptを書いてみました。

use_aws_exportsがtrueの時は aws-exports.js を使い、falseの時は、既存のCognito情報を使っています。

const signInUsingCognito = async (use_aws_exports) => {
  if (use_aws_exports) {
    Amplify.configure(awsconfig);
  }
  else {
    Amplify.configure({
      Auth: {
        // TODO replace for your environment
        identityPoolId: 'xxx',
        region: 'us-east-1',
        userPoolId: 'us-east-1_ZTS1WF17W',
        userPoolWebClientId: 'xxx',
      }
    });
  }

  const username = document.getElementById('user').value;

  await Auth.signIn(username, '11111111')
    .then( user => {
      showUsername(user);
      document.getElementById('message').innerText = ''
    })
    .catch(e => {
      console.log(Object.keys(e));
      console.log(e['message']);
      document.getElementById('message').innerText = e['message'];
    })
};

 
結果です。

aws-exports.jsを使った場合は、Amplify Authenticationモジュールで新規作成したため、ユーザープールにユーザーが存在していないことから、エラーとなりました。

(3) ["code", "name", "message"]0: "code"1: "name"2: "message"length: 3__proto__: Array(0)
app.js:59 User does not exist.

 
一方、既存のCognitoにはユーザーがいるため、サインインができました。

foo
CognitoUser {username: "foo", pool: CognitoUserPool, Session: null, client: Client, signInUserSession: CognitoUserSession, …}

 
今回はCognitoだけでしたが、もし他のリソースを指定したい場合は、AmplifyのGetting Started の下部にある Configuration Parameters for existing AWS resources に記載があります。
Getting Started - Amplify JavaScript


ソースコード

GitHubに上げました。 existing_aws_resources ディレクトリ以下が今回のファイルです。
https://github.com/thinkAmi-sandbox/AWS_AppSync_Amplify-sample
AWS AppSync + Amplify JavaScript + CustomResourcesで、既存のDynamoDBなどをDatasourceとしたリゾルバーを作成する

AWS Amplify JavaScriptを使ってAWS AppSync APIを作成する場合、 amplify add api した直後はDynamoDBのテーブルが新規作成されます。

既存のDynamoDBを使いたい場合は、 amplify pushAPIをデプロイ後にAppSync Consoleにて内容を編集することもできます。

ただ、手作業になるため

  • 同一環境の再現
  • 作業ミスの防止

などは難しいです。

 
コードベースでカスタマイズする方法を探したところ、CustomResourcesを使えば良さそうでした。
RFC: Custom data sources, resolvers, and resources with GraphQL API category. · Issue #574 · aws-amplify/amplify-cli

 
そこで今回は

  • 既存のDynamoDBを使って、ユニットリゾルバーを作成
  • 既存のDynamoDBを使って、パイプラインリゾルバーを作成
  • Noneデータソースのリゾルバーを作成

の3パターンを試してみた時のメモを残します。

 
なお、multi-env下で各環境固有のパラメータもCustomResourceに設定しようとしましたが、現状ではできないようです。以下のissueが対応されれば、将来的にはできるようになるかもしれません。
How can you define custom environment-specific variables? · Issue #1366 · aws-amplify/amplify-cli

 
また、CustomResourcesはCloudFormationの設定ファイルを書く感じとなります。

ただ、CloudFormationの設定ファイルはJSONYAMLの両方をサポートしていますが、Amplifyで作成する場合はJSONのみサポートしています。

そのため、YAMLで記述したCustomResourceを使おうとすると、以下のエラーが発生します。

Yaml is not yet supported. Please convert the CloudFormation stack ExistsDynamoDB.yaml to json.

 
目次


環境

   
また、AppSync API環境は、以下の方法で作成したものとします。

amplify init

$ amplify init
Note: It is recommended to run this command from the root of your app directory
? Enter a name for the project infra_by_amplify
? Enter a name for the environment dev
? Choose your default editor: Visual Studio Code
? Choose the type of app that you're building javascript
Please tell us about your project
? What javascript framework are you using none
? Source Directory Path:  src
? Distribution Directory Path: dist
? Build Command:  npm run-script build
? Start Command: npm run-script start
Using default provider  awscloudformation

For more information on AWS Profiles, see:
https://docs.aws.amazon.com/cli/latest/userguide/cli-multiple-profiles.html

? Do you want to use an AWS profile? Yes
? Please choose the profile you want to use default

CREATE_IN_PROGRESS infrabyamplify-dev-xxx AWS::CloudFormation::Stack ... User Initiated             
CREATE_IN_PROGRESS DeploymentBucket                  AWS::S3::Bucket ...
CREATE_IN_PROGRESS AuthRole                          AWS::IAM::Role ...
CREATE_IN_PROGRESS UnauthRole                        AWS::IAM::Role ...

 
amplify add api

$ amplify add api

? Please select from one of the below mentioned services GraphQL
? Provide API name: InfraAPI
? Choose an authorization type for the API API key
? Do you have an annotated GraphQL schema? No
? Do you want a guided schema creation? No

# Schemaなしは選べなかったので、やむを得ず MyType というtypeを作成
? Provide a custom type name MyType


既存のDynamoDBを使って、ユニットリゾルバーを作成

AppSyncのリゾルバーには

  • ユニットリゾルバー
  • パイプラインリゾルバー

の2つがあります。
システムの概要とアーキテクチャ - AWS AppSync

まずは、既存のDynamoDBをDataSourceとしたユニットリゾルバーを作成してみます。

今回は Board という既存のDynamoDBを使います。スキーマとデータは以下の通りです。

key author content
1 baz egg


schema.graphqlの変更

まずは、デフォルトで作成されたSchemaを変更します。

project_root/amplify/backend/api/infraAPI/schema.graphql を開き、 Query listBoards 用のSchemaに変更します。今回はDynamoDBからデータを取得するQueryを定義します。

なお、DynamoDBは既に存在しているため、 @model ディレクティブは不要です。

type Board {
    key: String
    author: String
    content: String
}

type BoardConnection {
    items: [Board]
    nextToken: String
}

type Query {
    listBoards(limit: Int, nextToken: String): BoardConnection
}


stacksに、CustomResourcesを追加

続いて、

  • 既存のDynamoDBをDatasourceとして使う
  • Schemaに対するユニットリゾルバーを作成する

を行うため、 project_root/amplify/backend/api/infraAPI/stacks の中に ExistsDynamoDB.json ファイルを作成します。

なお、同じディレクトリには CustomResources.json があります。このファイルに追記しても良いですし、別ファイルとして作成しても良いです。

今回は、 CustomResources.json をベースに必要な項目を追加した ExistsDynamoDB.json となります。


Parametersの下に ServiceRoleARN 用の項目を追加

まずは、使い回ししやすくするため、DynamoDBを操作するためのServiceRoleARNを外部から渡せるようにします。

Parameters の下に、BoardDynamoDBServiceRoleArn を追加します。

{
  "AWSTemplateFormatVersion": "2010-09-09",
  ...
  "Parameters": {
    // 以下を追加
    "BoardDynamoDBServiceRoleArn": {
      // 外部ファイルから文字列で受け取るため、 "String" を指定
      "Type": "String",
      "Description": "ServiceRoleArnOfDynamoDB"
    }
    ...
}


Resourcesの下に、DataSourceを追加

今回はDynamoDBの Board テーブルをDataSourceとして追加します。

なお、 RefAWS::AppSync::DataSourceDynamoDBConfig の詳細については、以下のCloudFrontの公式ドキュメントに記載があります。

{
  "AWSTemplateFormatVersion": "2010-09-09",
  ...
  "Parameters": {
    "AppSyncApiId": {
      "Type": "String",
      "Description": "The id of the AppSync API associated with this project."
    },
    ...
    "BoardDynamoDBServiceRoleArn": {
      "Type": "String",
      "Description": "ServiceRoleArnOfDynamoDB"
    }
  },
  "Resources": {
    // 以下を追加
    "DataSourceOfExistsDynamoDB": {
      // DataSourceの定義をするので、固定値
      "Type": "AWS::AppSync::DataSource",
      "Properties": {
        // どこのAPIに紐付けるか
        // "Ref": "AppSyncApiId"で、上のParametersで指定 AppSyncApiId の値を渡す
        "ApiId": {
          "Ref": "AppSyncApiId"
        },
        // 任意の名前、AppSync Console - Data Source のNameとなる
        "Name": "BoardDataSource",
        // DynamoDBを使うので固定
        "Type": "AMAZON_DYNAMODB",
        // DynamoDBを使うので必須
        // 上のParametersで指定した BoardDynamoDBServiceRoleArn の値を渡す
        "ServiceRoleArn": {
          "Ref": "BoardDynamoDBServiceRoleArn"
        },
        // DynamoDBの設定
        "DynamoDBConfig": {
          "TableName": "Board",
          "AwsRegion" : {
            "Ref": "AWS::Region"
          }
        }
      }
    },
}


Resourcesの下に、ユニットリゾルバーを追加

DataSourceができたので、次はQueryとDataSourceをつなぐリゾルバーを追加します。

関係するCloudFormationのドキュメントはこちらです。


{
  "AWSTemplateFormatVersion": "2010-09-09",
  ...
  "Parameters": {
    "AppSyncApiId": { ...
    },
    ...
    "S3DeploymentBucket": { ...
    },
    "S3DeploymentRootKey": { ...
    },
    ...
  },
  "Resources": {
    "DataSourceOfExistsDynamoDB": {
        ...
        "Name": "BoardDataSource",
        ...
        }
      }
    },
    // 以下を追加
    "ListBoardsResolver": {
      // リゾルバーを追加するので固定値
      "Type": "AWS::AppSync::Resolver",
      "Properties": {
        // リゾルバーを作成するAPI
        "ApiId": {
          "Ref": "AppSyncApiId"
        },
        // リゾルバーのDataSource。名前を参照するため、先ほど追加した "DataSourceOfExistsDynamoDB" の "Name" を使う
        "DataSourceName": {
          "Fn::GetAtt": [
            "DataSourceOfExistsDynamoDB",
            "Name"
          ]
        },
        // リゾルバーのType。今回はQuery用のリゾルバー
        "TypeName": "Query",
        // リゾルバーをAttachするQuery名。Schemaに書いたものを指定
        "FieldName": "listBoards",
        // リクエストマッピングテンプレートの指定。直接書くこともできるが、今回はS3にテンプレートをアップロードして、そちらを参照する
        // 書き方は定形
        "RequestMappingTemplateS3Location": {
          "Fn::Sub": [
            // 後で resolvers ディレクトリに用意するリクエストマッピングテンプレートのファイル名を指定
            "s3://${S3DeploymentBucket}/${S3DeploymentRootKey}/resolvers/Query.listBoards.req.vtl",
            {
              "S3DeploymentBucket": {
                "Ref": "S3DeploymentBucket"
              },
              "S3DeploymentRootKey": {
                "Ref": "S3DeploymentRootKey"
              }
            }
          ]
        },
        // 同じく、レスポンスマッピングテンプレートを指定
        "ResponseMappingTemplateS3Location": {
          "Fn::Sub": [
            // 同様に、 resolvers ディレクトリに用意するリクエストマッピングテンプレートのファイル名を指定
            "s3://${S3DeploymentBucket}/${S3DeploymentRootKey}/resolvers/Query.listBoards.res.vtl",
            {
              "S3DeploymentBucket": {
                "Ref": "S3DeploymentBucket"
              },
              "S3DeploymentRootKey": {
                "Ref": "S3DeploymentRootKey"
              }
            }
          ]
        }
      }
    }
...


resolversに、マッピングテンプレートを作成

次に、 project_root/amplify/backend/api/infraAPI/resolvers の中に、リクエスト/レスポンスマッピングテンプレートを作成します。


リクエスマッピングテンプレートを作成

stacks/ExistsDynamoDB.json で指定したファイル名 Query.listBoards.req.vtl にてリクエスマッピングテンプレートを作成します。

今回はスキャンのテンプレートを作成します。
https://docs.aws.amazon.com/ja_jp/appsync/latest/devguide/resolver-mapping-template-reference-dynamodb.html#aws-appsync-resolver-mapping-template-reference-dynamodb-scan

{
  "version": "2017-02-28",
  "operation": "Scan",
  "limit": $util.defaultIfNull($ctx.args.limit, 20),
  "nextToken": $util.toJson($util.defaultIfNullOrEmpty($ctx.args.nextToken, null)),
}


レスポンスマッピングテンプレートを作成

同じく、 stacks/ExistsDynamoDB.json で指定したファイル名 Query.listBoards.res.vtl にてレスポンスマッピングテンプレートを作成します。

今回は取得した結果をそのまま返します。

$util.toJson($context.result)


parameters.jsonの追加

最後に、ServiceRoleARN をCustomResourcesに渡すため、今回は project_root/amplify/backend/api/InfraAPI/paramters.json に追加します。

{
    "AppSyncApiName": "InfraAPI",
    "DynamoDBBillingMode": "PAY_PER_REQUEST",
    // Boardテーブルを操作可能なServiceRoleのARNを追加
    "BoardDynamoDBServiceRoleArn": "arn:aws:iam::xxx:role/service-role/appsync-xxx-Board",
}


amplify push

ここまでで作業が終わったため、AppSync APIを作成します。

$ amplify push

Current Environment: dev

| Category | Resource name | Operation | Provider plugin   |
| -------- | ------------- | --------- | ----------------- |
| Api      | InfraAPI      | Create    | awscloudformation |
? Are you sure you want to continue? Yes

GraphQL schema compiled successfully.
Edit your schema at path/to/infra_by_amplify/amplify/backend/api/InfraAPI/schema.graphql
or place .graphql files in a directory at path/to/infra_by_amplify/amplify/backend/api/InfraAPI/schema

# APIを新しく作成する
? Do you want to generate code for your newly created GraphQL API Yes

# JavaScript用のコードを生成する
? Choose the code generation language target javascript

# 生成するコードを置くディレクトリなどを指定する
? Enter the file name pattern of graphql queries, mutations and subscriptions src/graphql/**/*.js

# JavaScript用のQueryコードを自動生成する
? Do you want to generate/update all possible GraphQL operations - queries, mutations and subscriptions Yes

# ネストはデフォルト(2)のまま
? Enter maximum statement depth [increase from default if your schema is deeply nested] 2

 
pushが終わると、AppSync APIが新規作成されています。AppSync Consoleで自分が書いた内容と一致するか確認します。


動作確認

最後に、AppSync ConsoleのQueriesを使って動作確認をします。

Queriesに

query listBoards {
  listBoards {
    items {
      key
      author
      content
    }
    nextToken
  }
}

と記載し、

{
  "data": {
    "listBoards": {
      "items": [
        {
          "key": "1ad5dcf8-ca8b-4eba-9193-5c3c37371644",
          "author": "baz",
          "content": "egg"
        }
      ],
      "nextToken": null
    }
  }
}

となれば、無事に作成できています。


既存のDynamoDBを使って、パイプラインリゾルバーを作成

続いて、既存のDynamoDBを使って、パイプラインリゾルバーを作成してみます。

パイプラインリゾルバーをAppSync Console上で作成するのは以前試しました。 AWS AppSyncのPipeline Resolverを使って、複数のDynamoDBの値をマージして返すAPIを作成してみた - メモ的な思考的な

そこで今回は、上記記事と同じ内容でパイプラインリゾルバを作成します。

なお、DynamoDBの状況は以下の通りです。

Blog table

id (key) title author_id
1 ham 100
2 spam 200


Author table

Blog tableの author_id に紐づく id を持つテーブルです。

id (key) name
100 foo
200 bar


schema.graphqlへの追記
type BlogWithAuthor {
    id: String!
    title: String
    author_id: String
    author_name: String
}

type Query {
    ...
    getByPipeline(id: String!): BlogWithAuthor
}


stacks/PipelineResolver.jsonの作成

ユニットリゾルバーとは別のファイル PipelineResolver.json に、CustomResources を追加していきます。

ユニットリゾルバーとは異なる部分をメインにコメントを入れてあります。また、関係するCloudFormationのドキュメントは以下です。

{
  "AWSTemplateFormatVersion": "2010-09-09",
  ...
  "Parameters": {
    ...
    // DynamoDB "Author" を操作するための ServiceRoleArn を渡すためのパラメータ
    "AuthorDynamoDBServiceRoleArn": {
      "Type": "String",
      "Description": "DynamoDBServiceRoleArn of Author table"
    },
    // DynamoDB "Blog" を操作するための ServiceRoleArn を渡すためのパラメータ
    "BlogDynamoDBServiceRoleArn": {
      "Type": "String",
      "Description": "DynamoDBServiceRoleArn of Blog table"
    }
  },
  "Resources": {
    // 既存のDynamoDBテーブルその1
    "AuthorTable": {
      "Type": "AWS::AppSync::DataSource",
      "Properties": {
        "ApiId": {
          "Ref": "AppSyncApiId"
        },
        "Name": "AuthorDataSource",
        "Type": "AMAZON_DYNAMODB",
        "ServiceRoleArn": {
          "Ref": "AuthorDynamoDBServiceRoleArn"
        },
        "DynamoDBConfig": {
          "TableName": "Author",
          "AwsRegion" : {
            "Ref": "AWS::Region"
          }
        }
      }
    },
    // 既存のDynamoDBテーブルその1
    "BlogTable": {
      "Type": "AWS::AppSync::DataSource",
      "Properties": {
        "ApiId": {
          "Ref": "AppSyncApiId"
        },
        "Name": "BlogDataSource",
        "Type": "AMAZON_DYNAMODB",
        "ServiceRoleArn": {
          "Ref": "BlogDynamoDBServiceRoleArn"
        },
        "DynamoDBConfig": {
          "TableName": "Blog",
          "AwsRegion" : {
            "Ref": "AWS::Region"
          }
        }
      }
    },
    "PipeLineResolverOfAuthorAndBlog": {
      "Type": "AWS::AppSync::Resolver",
      "Properties": {
        "ApiId": {
          "Ref": "AppSyncApiId"
        },
        "TypeName": "Query",
        "FieldName": "getByPipeline",
        // パイプラインリゾルバーの場合、 `Kind: "PIPELINE"` が必要
        "Kind": "PIPELINE",
        // パイプラインリゾルバーの設定
        "PipelineConfig": {
          // パイプラインリゾルバーで使用するFunctionの "FunctionId" を、使用順で定義する
          "Functions": [
            {
              "Fn::GetAtt" : [ "FunctionBlog" , "FunctionId" ]
            },
            {
              "Fn::GetAtt" : [ "FunctionBlogWithAuthor" , "FunctionId" ]
            }
          ]
        },
        "RequestMappingTemplateS3Location": {
          "Fn::Sub": [
            "s3://${S3DeploymentBucket}/${S3DeploymentRootKey}/resolvers/Query.PipeLineResolverOfAuthorAndBlog.req.vtl",
            {
              "S3DeploymentBucket": {
                "Ref": "S3DeploymentBucket"
              },
              "S3DeploymentRootKey": {
                "Ref": "S3DeploymentRootKey"
              }
            }
          ]
        },
        "ResponseMappingTemplateS3Location": {
          "Fn::Sub": [
            "s3://${S3DeploymentBucket}/${S3DeploymentRootKey}/resolvers/Query.PipeLineResolverOfAuthorAndBlog.res.vtl",
            {
              "S3DeploymentBucket": {
                "Ref": "S3DeploymentBucket"
              },
              "S3DeploymentRootKey": {
                "Ref": "S3DeploymentRootKey"
              }
            }
          ]
        }
      }
    },
    // Blogテーブルからデータを取得するFunction
    "FunctionBlog": {
      // Functionの定義なので固定
      "Type": "AWS::AppSync::FunctionConfiguration",
      "Properties": {
        // Functionを含むAppSync APIのID
        "ApiId": {
          "Ref": "AppSyncApiId"
        },
        // Functionの名前
        "Name": "GetBlog",
        "Description": "Get Blog Table",
        // FunctionのDataSource
        "DataSourceName": {
          "Fn::GetAtt" : [ "BlogTable" , "Name" ]
        },
        "FunctionVersion": "2018-05-29",
        "RequestMappingTemplateS3Location": {
          "Fn::Sub": [
            "s3://${S3DeploymentBucket}/${S3DeploymentRootKey}/resolvers/Query.GetBlog.req.vtl",
            {
              "S3DeploymentBucket": {
                "Ref": "S3DeploymentBucket"
              },
              "S3DeploymentRootKey": {
                "Ref": "S3DeploymentRootKey"
              }
            }
          ]
        },
        "ResponseMappingTemplateS3Location": {
          "Fn::Sub": [
            "s3://${S3DeploymentBucket}/${S3DeploymentRootKey}/resolvers/Query.GetBlog.res.vtl",
            {
              "S3DeploymentBucket": {
                "Ref": "S3DeploymentBucket"
              },
              "S3DeploymentRootKey": {
                "Ref": "S3DeploymentRootKey"
              }
            }
          ]
        }
      }
    },
    // Authorテーブルからデータを取得するFunction
    "FunctionBlogWithAuthor": {
      "Type": "AWS::AppSync::FunctionConfiguration",
      "Properties": {
        "ApiId": {
          "Ref": "AppSyncApiId"
        },
        "Name": "GetBlogWithAuthor",
        "Description": "Merge Blog and Author",
        "DataSourceName": {
          "Fn::GetAtt" : [ "AuthorTable" , "Name" ]
        },
        "FunctionVersion": "2018-05-29",
        "RequestMappingTemplateS3Location": {
          "Fn::Sub": [
            "s3://${S3DeploymentBucket}/${S3DeploymentRootKey}/resolvers/Query.GetBlogWithAuthor.req.vtl",
            {
              "S3DeploymentBucket": {
                "Ref": "S3DeploymentBucket"
              },
              "S3DeploymentRootKey": {
                "Ref": "S3DeploymentRootKey"
              }
            }
          ]
        },
        "ResponseMappingTemplateS3Location": {
          "Fn::Sub": [
            "s3://${S3DeploymentBucket}/${S3DeploymentRootKey}/resolvers/Query.GetBlogWithAuthor.res.vtl",
            {
              "S3DeploymentBucket": {
                "Ref": "S3DeploymentBucket"
              },
              "S3DeploymentRootKey": {
                "Ref": "S3DeploymentRootKey"
              }
            }
          ]
        }
      }
    }
  },
  ...
}


マッピングテンプレートを作成

今回は、1つのパイプラインリゾルバーと、2つのFunctionを作成したため、それぞれのマッピングテンプレートを作成します。


パイプラインリゾルバー用

resolvers ディレクトリの中に、Before mapping template Query.PipeLineResolverOfAuthorAndBlog.req.vtl を作成します。Queryの引数として id を受け取ります。

#set($result = { "id": $ctx.args.id })
$util.toJson($result)

 
after mapping template Query.PipeLineResolverOfAuthorAndBlog.res.vtl はこちら。Functionの結果をそのまま返します。

$util.toJson($ctx.result)


GetBlog Function用

リクエスマッピングテンプレート Query.GetBlog.req.vtl です。今回は GetItem を使います。
https://docs.aws.amazon.com/ja_jp/appsync/latest/devguide/resolver-mapping-template-reference-dynamodb.html#aws-appsync-resolver-mapping-template-reference-dynamodb-getitem

また、 $context の短縮形 $ctx を使っています。

{
    "operation": "GetItem",
    "key": {
        "id": $util.dynamodb.toDynamoDBJson($ctx.args.id),
    }
}

 
レスポンスマッピングテンプレート Query.GetBlog.res.vtl です。エラーがあればエラーを返します。

## Raise a GraphQL field error in case of a datasource invocation error
#if($ctx.error)
    $util.error($ctx.error.message, $ctx.error.type)
#end
## Pass back the result from DynamoDB. **
$util.toJson($ctx.result)


GetBlogWithAuthor Function用

リクエスマッピングテンプレート Query.GetBlogWithAuthor.req.vtl です。

{
    "operation": "GetItem",
    "key": {
        "id": $util.dynamodb.toDynamoDBJson($ctx.prev.result.author_id),
    }
}

 
リクエスマッピングテンプレート Query.GetBlogWithAuthor.res.vtl です。

今回はGetBlogで取得したデータに追加していますが、GetBlogWithAuthorのデータにGetBlogのデータをマージすることもできます。

## Raise a GraphQL field error in case of a datasource invocation error
#if($ctx.error)
    $util.error($ctx.error.message, $ctx.error.type)
#end
## Pass back the result from DynamoDB. **

## GetBlogの結果に、author_nameとして今回取得したAuthorテーブルのnameの値をマージ
$util.qr($ctx.prev.result.put("author_name", $ctx.result.name))

## マージしたデータを返す
$util.toJson($ctx.prev.result)


parameters.jsonへの追加

今回もDynamoDBの操作用ServiceRoleを設定していますので、 parameters.json へも追加します。

{
    // 追加
    "AuthorDynamoDBServiceRoleArn": "arn:aws:iam::xxx:role/service-role/appsync-xxx-Author",
    "BlogDynamoDBServiceRoleArn": "arn:aws:iam::xxx:role/service-role/appsync-xxx-Blog"
}

 
以上で作成が終わりました。


動作確認

ユニットリゾルバーと同様に、AppSync ConsoleのQueriesにて動作確認をします。

query GetByPipeline($id: String!) {
  getByPipeline(id: $id) {
    id
    title
    author_id
    author_name
  }
}

QUERY VARIABLES にも以下を追加します。

{
  "id": "1"
}

実行すると、以下の結果が得られます。

{
  "data": {
    "getByPipeline": {
      "id": "1",
      "title": "ham",
      "author_id": "100",
      "author_name": "foo"
    }
  }
}


Noneデータソースのリゾルバーを作成

今まで、既存DynamoDBをDatasourceとして使ってみました。

ただ、AppSyncではDynamoDB以外にもDatasourceとして扱えるものがあり、それらもCustomResourceで生成できます。
リゾルバーのマッピングテンプレートリファレンス - AWS AppSync

 
今回は、ローカルリゾルバーに向いている None データソースのリゾルバーを作成してみます。
チュートリアル : ローカルリゾルバー - AWS AppSync


schema.graphql の追加

NoneデータソースのQueryを追加します。

type NoneResponse {
    comment: String
}

type Query {
    ...
    getNoneDatasource: NoneResponse
}


stacks/ResolverWithNoneDatasource.json の追加
{
  "AWSTemplateFormatVersion": "2010-09-09",
  ...
  "Resources": {
    "NoneSourceOfGetContext": {
      "Type": "AWS::AppSync::DataSource",
      "Properties": {
        "ApiId": {
          "Ref": "AppSyncApiId"
        },
        "Name": "NoneSource",
        // TypeをNoneにする
        "Type": "NONE"
      }
    },
    "GetContextResolver": {
      "Type": "AWS::AppSync::Resolver",
      "Properties": {
        "ApiId": {
          "Ref": "AppSyncApiId"
        },
        "DataSourceName": {
          "Fn::GetAtt": [
            "NoneSourceOfGetContext",
            "Name"
          ]
        },
        "TypeName": "Query",
        "FieldName": "getNoneDatasource",
        "RequestMappingTemplateS3Location": {
          "Fn::Sub": [
            "s3://${S3DeploymentBucket}/${S3DeploymentRootKey}/resolvers/Query.getNoneDatasource.req.vtl",
            {
              "S3DeploymentBucket": {
                "Ref": "S3DeploymentBucket"
              },
              "S3DeploymentRootKey": {
                "Ref": "S3DeploymentRootKey"
              }
            }
          ]
        },
        "ResponseMappingTemplateS3Location": {
          "Fn::Sub": [
            "s3://${S3DeploymentBucket}/${S3DeploymentRootKey}/resolvers/Query.getNoneDatasource.res.vtl",
            {
              "S3DeploymentBucket": {
                "Ref": "S3DeploymentBucket"
              },
              "S3DeploymentRootKey": {
                "Ref": "S3DeploymentRootKey"
              }
            }
          ]
        }
      }
    }
  },
  ...
}


リクエスト/レスポンスマッピングテンプレートを作成
リクエスマッピングテンプレート

resolvers/Query.getNoneDatasource.req.vtl を作成します。

{
    "version": "2017-02-28",
    "payload": {
        "comment": "Hello, world!"
   }
}


レスポンスマッピングテンプレート

resolvers/Query.getNoneDatasource.res.vtl を作成します。

$utils.toJson($context.result)


動作確認

こちらもAppSync Consoleで動作を確認します。

query GetNoneDatasource {
  getNoneDatasource {
    comment
  }
}

を実行すると

{
  "data": {
    "getNoneDatasource": {
      "comment": "Hello, world!"
    }
  }
}

の結果が得られました。


ソースコード

Githubに上げました。ディレクトinfra_by_amplify の中が今回のファイルです。
https://github.com/thinkAmi-sandbox/AWS_AppSync_Amplify-sample
AWS AppSyncのリゾルバで、AWS CognitoのグループやHTTPリクエストヘッダを使った認可処理を書いてみた

前回、Schemaで @aws_auth@ aws_cognito_user_pools などを使って認可処理を書いてみました。
AWS AppSyncのSchemaで、認証・認可系ディレクティブの @aws_auth や @aws_cognito_user_pools などを試してみた - メモ的な思考的な

ただ、複数認証時に @aws_auth が使えなかったため、Schemaだけでは複数認証時にAWS Cognitoのグループによる認可処理ができなさそうでした。

 
他の方法を探してみたところ、Schemaに紐づくリゾルバ内で $context の値を参照することで、AWS CognitoのグループやHTTPリクエストヘッダを使った認可処理ができそうでしたので、メモを残します。

 
目次


環境

  • AppSync
  • aws-amplify 1.1.30
  • @aws-amplify/cli 1.8.1


ゾルバの $context について

ゾルバとは、Schema (QueryやMutation、Subscription) とデータソースを紐付ける関数のようなものです。

ゾルバ内で参照できる変数 $context とは

$context 変数は、リゾルバー呼び出しのすべてのコンテキスト情報が保持されるマップです。この変数の構造は次のとおりです。

{
   "arguments" : { ... },
   "source" : { ... },
   "result" : { ... },
   "identity" : { ... },
   "request" : { ... }
}

です。
リゾルバーのマッピングテンプレートのコンテキストリファレンス - AWS AppSync

 
最初に、 $context にはどんな値が設定されているかを確認してみます。

スキーマとして、以下を用意します。また、データソースは None

type Context {
    source: String
    identity: String
    claims: String
    sourceIp: String
    request: String
    headers: String
}

type Query {
    getContext: Context
}

 
次にデータソースを指定します。今回は $context の値を表示するだけなので、データソースには None を指定します。
None データソースのリゾルバーマッピングテンプレートリファレンス - AWS AppSync

 
最後にリゾルバを作成します。リクエストテンプレートでは、中身を見たい項目を指定しておきます。

{
    "version": "2017-02-28",
    "payload": {
        "source": $util.toJson($context.source),
        "identity": $util.toJson($context.identity),
        "claims": $context.identity.claims,
        "sourceIp": $util.toJson($context.identity.sourceIp),
        "request": $util.toJson($context.request),
        "headers": $util.toJson($context.request.headers)
   }
}

 
レスポンステンプレートでは、リクエストテンプレートの中身をそのまま表示します。

$utils.toJson($context.result)

 
あとはAmplify frameworkを使って

Amplify.configure(awsconfig);

// サインイン
Auth.signIn(username, '11111111')

// AppSync APIを呼ぶ
await API.graphql(
  {
    query: queries.getContext,
    authMode: 'AMAZON_COGNITO_USER_POOLS'
  }
).then((event) => {
  console.log('ok');
  console.log(event.data.getContext);
}).catch((e) => {
  console.log('error!');
  console.log(e);
});

として、レスポンスをログ出力してみます。

 
結果は以下のような感じでした。

# claims:
"{sub=xxx,
  cognito:groups=[member],  <= groupが設定されている場合のみ存在するキー
  event_id=xxx,
  token_use=access,
  scope=aws.cognito.signin.user.admin,
  auth_time=nnn,
  iss=https://cognito-idp.<region>.amazonaws.com/<region>_xxx,
  exp=xxx,
  iat=xxx,
  jti=xxx,
  client_id=xxx,
  username=foo}"

# headers:
"{x-forwarded-for=xxx.xxx.xxx.xxx, yyy.yyy.yyy.yyy,
  cloudfront-is-tablet-viewer=false,
  cloudfront-viewer-country=JP,
  pragma=no-cache,
  via=2.0 xxx.cloudfront.net (CloudFront),
  cloudfront-forwarded-proto=https,
  origin=http://localhost:8080,
  content-length=149,
  cache-control=no-cache,
  host=<host>.appsync-api.<region>.amazonaws.com,
  x-forwarded-proto=https,
  accept-language=ja,en-US;q=0.9,en;q=0.8,
  user-agent=Mozilla/5.0 ...,
  cloudfront-is-mobile-viewer=false,
  accept=application/json, text/plain, */*,
  cloudfront-is-smarttv-viewer=false,
  accept-encoding=gzip, deflate, br,
  referer=http://localhost:8080/,
  content-type=application/json; charset=UTF-8,
  x-amz-cf-id=xxx,
  x-amzn-trace-id=Root=xxx,
  authorization=xxx,
  cloudfront-is-desktop-viewer=true,
  x-forwarded-port=443}"

# identity:
"{sub=xxx,
  issuer=https://cognito-idp.<region>.amazonaws.com/<region>_xxx,
  username=foo,
  claims={...},
  sourceIp=[...],
  defaultAuthStrategy=ALLOW,
  groups=null}"

# request:
  実質headersしか入っていなかったので略

 
これより、

  • cognito:groups にて、AWS Cognitoのグループ
  • request.headers にて、HTTPリクエストヘッダ

などを使った認可処理が書けそうでした。


AWS Cognitoのグループを使った認可制御

AWS Cognitoで認証されたユーザーかつユーザーがグループに所属している場合、 $context.identity.claims にキー cognito:groups が追加されます。

これを使い、リクエストテンプレートの先頭にて、VTL(Apache Velocity Template Language)を使って実装します。VTLの書き方はAppSyncのドキュメントの他、Javaまわりでも確認できます。
リゾルバーのマッピングテンプレートプログラミングガイド - AWS AppSync

なお、認可できない時は、 ユーティリティヘルパーの $utils.unauthorized() を使ってエラーを返します。
リゾルバーのマッピングテンプレートのユーティリティリファレンス - AWS AppSync

全体はこんな感じです。

## Cognitoのユーザープールのユーザーのうち、Groupが "admin" の場合のみ、データを取得可能にする
#set( $groups = $context.identity.claims.get("cognito:groups") )

## ユーザーにグループが設定されていない場合は、キー自体が存在しないことに注意
#if( $util.isNull($groups) )
    $util.unauthorized()
#end

#foreach( $group in $groups )
    #if( $group != "admin" )
        $util.unauthorized()
    #end
#end

## 以降は、前述通りなので略
{
    "version": "2017-02-28",
    ...
}

参考:AppSync + Cognitoによる認可制御 | Takumon Blog


HTTPリクエストヘッダを使った認可制御

こちらも同様に、リクエストテンプレートに記載します。

HTTPリクエストヘッダを見るとCloudFrontのヘッダーが追加されていたため*1、今回はそれを用いるようにしました。
参考:https://docs.aws.amazon.com/ja_jp/AmazonCloudFront/latest/DeveloperGuide/header-caching.html#header-caching-web-device

## また、モバイルの時は、データ取得不可
## CloudFrontのヘッダが取得できているので、それを使用(ふつうのUserAgentも取得できる)
#if( $context.request.headers.get("cloudfront-is-mobile-viewer") == "true")
    $util.unauthorized()
#end


schema.graphql でのmulti-auth directivesは、今のところ未対応 (PR #1524)

前回の記事の通り、AWS Amplify Consoleでは @aws_cognito_user_pools などが使えたため、Amplifyでも使えるのかと思いましたが、現在は対応中のようです。
[WIP] Add support for new multi-auth AppSync directives by attilah · Pull Request #1524 · aws-amplify/amplify-cli

そのため、今のところは、AppSync Consoleにて手書きで @aws_cognito_user_pools などを付けるしかなさそうです。


ソースコード

Githubに上げました。 resolver_auth ディレクトリの中が今回のファイルです。
https://github.com/thinkAmi-sandbox/AWS_AppSync_Amplify-sample
 

環境構築ログ

今回試した時の環境構築ログです。

初期化
$ amplify init

Note: It is recommended to run this command from the root of your app directory
? Enter a name for the project resolver_auth
? Enter a name for the environment dev
? Choose your default editor: Visual Studio Code
? Choose the type of app that you're building javascript
Please tell us about your project
? What javascript framework are you using none
? Source Directory Path:  src
? Distribution Directory Path: dist
? Build Command:  npm run-script build
? Start Command: npm run-script start
Using default provider  awscloudformation

For more information on AWS Profiles, see:
https://docs.aws.amazon.com/cli/latest/userguide/cli-multiple-profiles.html

? Do you want to use an AWS profile? Yes
? Please choose the profile you want to use default


Authを追加

Cognitoは新規作成します。

$ amplify add auth
Using service: Cognito, provided by: awscloudformation
 
 The current configured provider is Amazon Cognito. 
 
 Do you want to use the default authentication and security configuration? Manual configuration
 Select the authentication/authorization services that you want to use: User Sign-Up & Sign-In only (Best used with a cloud API only)
 Please provide a friendly name for your resource that will be used to label this category in the project: ResolverAuthResource
 Please provide a name for your user pool: ResolverAuthUserPool
 Warning: you will not be able to edit these selections. 
 How do you want users to be able to sign in? Username
 Multifactor authentication (MFA) user login options: OFF
 Email based user registration/forgot password: Enabled (Requires per-user email entry at registration)
 Please specify an email verification subject: Your verification code
 Please specify an email verification message: Your verification code is {####}
 Do you want to override the default password policy for this User Pool? Yes
 Enter the minimum password length for this User Pool: 8
 Select the password character requirements for your userpool: (Press <space> to select, <a> to toggle all, <i> to invert selection)
 Warning: you will not be able to edit these selections. 
 What attributes are required for signing up? (Press <space> to select, <a> to toggle all, <i> to invert selection)Email
 Specify the app's refresh token expiration period (in days): 30
 Do you want to specify the user attributes this app can read and write? No
 
 # 何も選択しない
 Do you want to enable any of the following capabilities? (Press <space> to select, <a> to toggle all, <i> to invert selection)
 Do you want to use an OAuth flow? No
? Do you want to configure Lambda Triggers for Cognito? No

 
pushして、Cognitoを生成します。

$ amplify push

Current Environment: dev

| Category | Resource name        | Operation | Provider plugin   |
| -------- | -------------------- | --------- | ----------------- |
| Auth     | ResolverAuthResource | Create    | awscloudformation |
? Are you sure you want to continue? Yes

 
Cognito作成後、ユーザーとグループを作成します。


APIを追加
$ amplify add api

? Please select from one of the below mentioned services GraphQL
? Provide API name: ResolverAuthAPI
? Choose an authorization type for the API Amazon Cognito User Pool
? Do you have an annotated GraphQL schema? No
? Do you want a guided schema creation? Yes
? What best describes your project: (Use arrow keys)
❯ Single object with fields (e.g., “Todo” with ID, name, description) 
  One-to-many relationship (e.g., “Blogs” with “Posts” and “Comments”) 
ShinanoDolce:resolver_auth kamijoshinya$ amplify add api
? Please select from one of the below mentioned services GraphQL
? Provide API name: ResolverAuthAPI
? Choose an authorization type for the API Amazon Cognito User Pool
? Do you have an annotated GraphQL schema? No
? Do you want a guided schema creation? No
? Provide a custom type name MyType

 
ただ、自動生成されたスキーマだと @model ディレクティブが付与されているため、DynamoDBを作ってしまいます。

そのため、resolver_auth/amplify/backend/api/ResolverAuthAPI/schema.graphql を修正し、データソース None に対応できるようにします。

type Context {
    source: String
    identity: String
    claims: String
    sourceIp: String
    request: String
    headers: String
}

type Query {
    getContext: Context
}

 
また、APIで必要な

  • データソースやリゾル
    • resolver_auth/amplify/backend/api/ResolverAuthAPI/stacks/CustomResources.json
  • ゾルバのテンプレート
    • resolver_auth/amplify/backend/api/ResolverAuthAPI/resolvers/Query.getContext.req.vtl
    • resolver_auth/amplify/backend/api/ResolverAuthAPI/stacks/Query.getContext.res.vtl

なども作成しておきます。

 
一通り終わったら、pushしてAPIを作成します。

その際、 ? Do you want to generate/update all possible GraphQL operations - queries, mutations and subscriptions Yes としておくと、schema.graphql の内容に基づいて、 resolver_auth/src/graphql/queries.js が生成されます。

今回はQueryだけ用意しましたので、 queries.js のみが生成されます。

$ amplify push

Current Environment: dev

| Category | Resource name        | Operation | Provider plugin   |
| -------- | -------------------- | --------- | ----------------- |
| Api      | ResolverAuthAPI      | Create    | awscloudformation |
| Auth     | ResolverAuthResource | No Change | awscloudformation |
? Are you sure you want to continue? Yes

GraphQL schema compiled successfully.
Edit your schema at path/to/resolver_auth/amplify/backend/api/ResolverAuthAPI/schema.graphql or place .graphql files in a directory at path/to/resolver_auth/amplify/backend/api/ResolverAuthAPI/schema
? Do you want to generate code for your newly created GraphQL API Yes
? Choose the code generation language target javascript
? Enter the file name pattern of graphql queries, mutations and subscriptions src/graphql/**/*.js
? Do you want to generate/update all possible GraphQL operations - queries, mutations and subscriptions Yes


アプリの作成と起動
# 作成して実装
$ touch package.json index.html webpack.config.js src/app.js

# 必要なものをインストール
$ npm install

# amplifyもインストール
$ npm install --save aws-amplify

# 起動して動作確認
$ npm start

*1:AppSyncの前段にCloudFrontがいるのかなと思いましたが、それらしき資料は見つけられず...

AWS AppSyncのSchemaで、認証・認可系ディレクティブの @aws_auth や @aws_cognito_user_pools などを試してみた

AWS AppSyncのSchemaには、簡単にユーザー認証・認可を行える

などのディレクティブが用意されています。

 
そこで、実際に試してみた時のメモを残します。

 
目次


環境

また、認証・認可に使うAWS Cognitoのユーザーとグループは以下の通りです。

ユーザー名 グループ
foo admin
bar member


また、今回使用するDynamoDBのレコードは

id name description
111 cook breakfast

となっている前提です。


また、今回の検証を行うための環境構築方法については、長いので一番最後に記載しています。


長いのでまとめ

  • @aws_auth は、Cognitoのグループで制御できる

    • ただし、認証方法が1つ(Default authorization modeしか設定されていない)場合に限る
      • 複数認証では動作しないため、他の @aws_api_key などとは併用できない
  • 複数認証のディレクティブ @aws_api_key などは、queryやtype全体の他、フィールド単位でも制御できる

    • ただし、ディレクティブを付けてしまうと、Default authorization modeは無視される
    • また、 @aws_cognito_user_pools では、Cognitoのグループを使った制御ができない

 
以降、それぞれを検証した結果を書いていきます。  
 

認証方法が1つの場合

@aws_authについて

@aws_auth は、Amazon Cognitoを使って認証・認可する時に使います。
https://docs.aws.amazon.com/ja_jp/appsync/latest/devguide/security.html#amazon-cognito-user-pools-authorization


ゾルバレベルでの制限が可能

ドキュメントにもある通り、 @aws_auth はリゾルバ (query, mutation, subscription) レベルで制限することが可能です。

例えば、

type Query {
    awsAuth(filter: ModelTodoFilterInput, limit: Int, nextToken: String): ModelTodoConnection
        @aws_auth(cognito_groups: ["admin"])
}

と、Query awsAuth はCognitoのグループが admin しか実行できないとします。

 
この場合、ユーザー bar (Cognitoグループは member) で awsAuth を実行すると、

{data: {…}, errors: Array(1)}
    data:
        awsAuth: null
        __proto__: Object
    errors: Array(1)
        0:
            data: null
            errorInfo: null
            errorType: "Unauthorized"
            locations: [{…}]
            message: "Not Authorized to access awsAuth on type Query"
            path: ["awsAuth"]

と、エラーになり、Cognitoのグループでの制限ができていることが分かります。


typeの制限はできない

一方、 @aws_auth を使って、

# descriptionを admin グループしか取得できなくしたい
type Todo {
    id: ID!
    name: String!
    description: String
        @aws_auth(cognito_groups: ["admin"])
}

# nextTokenを admin グループしか取得できなくしたい
type ModelTodoConnection {
    items: [Todo]
    nextToken: String
        @aws_auth(cognito_groups: ["admin"])
}

と、特定のフィールドだけを制限することや

type ModelTodoConnection @aws_auth(cognito_groups: ["admin"]) {
    items: [Todo]
    nextToken: String
}

と、type全体を制限することはできないようです。

 
そのため、上記のtypeに対して値を取得すると

{id: "111", name: "cook", description: "breakfast"}

と、値が取得できてしまうので、注意が必要です。


認証方法が複数の場合

今年の5月に、AppSyncでは複数の認証方法がサポートされました。

 
また、Schemaにディレクティブも追加されたようです。

・@aws_api_key —A field uses API_KEY for authorization.
・@aws_iam —A field uses AWS_IAM for authorization.
・@aws_oidc —A field uses OPENID_CONNECT for authorization.
・@aws_cognito_user_pools —A field uses AMAZON_COGNITO_USER_POOLS for authorization.

https://aws.amazon.com/jp/blogs/mobile/using-multiple-authorization-types-with-aws-appsync-graphql-apis/


今回は aws_api_keyaws_cognito_user_pools を試してみます。

まず、AWS AppSync ConsoleのSettingsは以下とします。

  • Default authorization mode
  • Additional authorization providers


また、Amplifyクライアントは、注釈がない限り、 Amazon Cognito User Pool 認証を行います。

await API.graphql({
    query: queries.<name>,
    authMode: 'AMAZON_COGNITO_USER_POOLS'
  })
  ...


複数認証環境下では、@aws_auth による制限ができなさそう

先ほどの例であげたQuery

type Query {
    awsAuth(filter: ModelTodoFilterInput, limit: Int, nextToken: String): ModelTodoConnection
        @aws_auth(cognito_groups: ["admin"])
}

はそのままに、複数認証環境へと変更し、ユーザー bar でQuery awsAuth を実行したところ

{id: "111", name: "cook", description: "breakfast"}

と、先ほどの結果とは異なっていました。

 
そのため、複数認証環境下では @aws_auth による制限ができないようです。


@aws_api_key や @aws_cognito_user_pools での制限

続いて、 @aws_api_key@aws_cognito_user_pools での制限を見ます。


Queryレベルでの制限

まずは、先ほどと同じように、Queryに対し、 @aws_cognito_user_pools を追加します。

type Query {
    awsCognito(filter: ModelTodoFilterInput, limit: Int, nextToken: String): TodoConnectionCognitoAuth
        @aws_cognito_user_pools
}

 
この状態でCognito認証を使ってアクセスすると、以下のようにフィールド description が取得できます。

{id: "111", name: "cook", description: "breakfast"}

 
続いて、Amplifyでの認証方式をCognitoからAPI Keyへと変更して、実行します。

await API.graphql(
{
  query: queries.awsCognito,
  authMode: 'API_KEY'
  // authMode: 'AMAZON_COGNITO_USER_POOLS'
}

 
結果は

{data: {…}, errors: Array(1)}
    data: {awsCognito: null}
    errors: Array(1)
    0:
        data: null
        errorInfo: null
        errorType: "Unauthorized"
        locations: [{…}]
        message: "Not Authorized to access awsCognito on type Query"
        path: ["awsCognito"]

と、認証エラーになりました。

これはQueryに @aws_cognito_user_pools ディレクティブしかなかったことから、API Keyでの認証が拒否されたようです。

 
もし、API Keyでの認証をパスするためには

  • Query - awsCognito
  • Type - TodoConnectionCognitoAuth
  • Type - TodoCognitoAuth

の3ヶ所で @auth_api_key を付ける必要があります。

今回は、順を追って確認します。


まず、Queryにだけ @aws_api_key を付けてみます。

type Query {
    awsCognito(filter: ModelTodoFilterInput, limit: Int, nextToken: String): TodoConnectionCognitoAuth
        @aws_cognito_user_pools
        @aws_api_key
}

結果は

{data: {…}, errors: Array(2)}
    data: {awsCognito: {…}}
    errors: Array(2)
    0:
        data: null
        errorInfo: null
        errorType: "Unauthorized"
        locations: [{…}]
        message: "Not Authorized to access items on type TodoConnectionCognitoAuth"
        path: (2) ["awsCognito", "items"]
    1:
        data: null
        errorInfo: null
        errorType: "Unauthorized"
        locations: [{…}]
        message: "Not Authorized to access nextToken on type TodoConnectionCognitoAuth"
        path: (2) ["awsCognito", "nextToken"]

と、レスポンスの TodoConnectionCognitoAuth が認証エラーとなりました。


続いて、 TodoConnectionCognitoAuthに対し、 @aws_api_key を追加します。

type TodoConnectionCognitoAuth @aws_api_key {
    items: [TodoCognitoAuth]
    nextToken: String
}

結果は

{data: {…}, errors: Array(3)}
data: {awsCognito: {…}}
errors: Array(3)
    0:
        data: null
        ...
        message: "Not Authorized to access id on type TodoCognitoAuth"
        path: (4) ["awsCognito", "items", 0, "id"]
    1:
        data: null
        ...
        message: "Not Authorized to access name on type TodoCognitoAuth"
        path: (4) ["awsCognito", "items", 0, "name"]
    2:
        data: null
        ...
        message: "Not Authorized to access description on type TodoCognitoAuth"
        path: (4) ["awsCognito", "items", 0, "description"]

と、itemのtype TodoCognitoAuth が認証エラーとなりました。


最後に、TodoCognitoAuthに @aws_api_key を追加します。

type TodoCognitoAuth @aws_api_key {
    id: ID!
    name: String!
    description: String
}

 
ようやく、すべての結果を取得できました。

{id: "111", name: "cook", description: "breakfast"}

 
ここではqueryだけを試しましたが、mutationやsubscriptionも同様です。


フィールドレベルでの制限

複数認証向けのディレクティブ @aws_api_key@aws_cognito_user_pools などは、フィールドごとに制限を加えることができます。

例えば、以下はフィールド description に対し、Cognito認証の時のみ取得できるようにしています。

type TodoWithoutDescription @aws_api_key {
    id: ID!
    name: String!
    description: String
        @aws_cognito_user_pools
}

API Key認証でQueryを実行してみると

{data: {…}, errors: Array(1)}
data: {awsWithoutDescription: {…}}
errors: Array(1)
    0:
        data: null
        errorInfo: null
        errorType: "Unauthorized"
        locations: [{…}]
        message: "Not Authorized to access description on type TodoWithoutDescription"
        path: (4) ["awsWithoutDescription", "items", 0, "description"]

と、API Key認証では取得できない項目 description をqueryで指定したため、エラーになりました。


もし、API Key認証でエラーにならないようにするには、Amplifyから実行するQuery定義

awsWithoutDescription(filter: $filter, limit: $limit, nextToken: $nextToken) {
  items {
    id
    name
    description
  }
  nextToken
  }
}

からフィールド description を削除します。

awsWithoutDescription(filter: $filter, limit: $limit, nextToken: $nextToken) {
  items {
    id
    name
  }
  nextToken
  }
}

 
すると、

{id: "111", name: "cook"}

と、権限のあるフィールドデータが取得できました。


複数認証時のDefault authorization modeとディレクティブについて

前述のフィールドレベルでの制限では、

  • Default authorization modeはCognito認証
  • クライアントはAPI Key認証

で試しました。

 
Default authorization modeの動きをもう少し確認するため、Schemaはそのままに

  • Default authorization modeは、そのままCognito認証
  • クライアントは、Cognito認証へと切り替え

として実行します。

すると、

{data: {…}, errors: Array(2)}
data: {awsWithoutDescription: {…}}
errors: Array(2)
    0:
        ...
        message: "Not Authorized to access items on type TodoConnectionWithoutDescription"
        path: (2) ["awsWithoutDescription", "items"]
    1:
        ...
        message: "Not Authorized to access nextToken on type TodoConnectionWithoutDescription"
        path: (2) ["awsWithoutDescription", "nextToken"]

とエラーになりました。

Schemaを確認すると

type TodoConnectionWithoutDescription @aws_api_key {
    items: [TodoWithoutDescription]
    nextToken: String
}

と、 @aws_api_key はあるものの、Default authorization modeのディレクティブがありません。

これより、

  • ディレクティブを何も付けない場合、Default authorization modeでの認証となる
  • Default authorization mode以外のディレクティブを付けた場合、Default authorization modeでの認証は不可

となることが分かりました。

 
これに対応するには

type TodoConnectionWithoutDescription @aws_api_key
@aws_cognito_user_pools {
    items: [TodoWithoutDescription]
    nextToken: String
}

type TodoWithoutDescription @aws_api_key
@aws_cognito_user_pools {
    id: ID!
    name: String!
    description: String
        @aws_cognito_user_pools
}

と、Default authorization modeのディレクティブ (今回は @aws_cognito_user_pools )を付ける必要があります。


まとめ(再掲)

  • @aws_auth は、Cognitoのグループで制御できる

    • ただし、認証方法が1つ(Default authorization modeしか設定されていない)場合に限る
      • 複数認証では動作しないため、他の @aws_api_key などとは併用できない
  • 複数認証のディレクティブ @aws_api_key などは、queryやtype全体の他、フィールド単位でも制御できる

    • ただし、ディレクティブを付けてしまうと、Default authorization modeは無視される
    • また、 @aws_cognito_user_pools では、Cognitoのグループを使った制御ができない


ソースコード

GitHubに上げました。ディレクトdirective_auth の中が今回のファイルです。
https://github.com/thinkAmi-sandbox/AWS_AppSync_Amplify-sample
 

環境構築

今回の環境は以下の流れで作成しましたので、こちらもメモとして残しておきます。

なお、Amplify経由で作成できたAWSリソースの詳細も記録していますが、Amplifyのバージョンが上がると変わるかもしれません。


Amplify のGetting started のStep1.とStep2.を実施

以下の流れで行いました。
https://aws-amplify.github.io/docs/js/start


amplify init

基本的にはデフォルトのままです。

$ amplify init
Note: It is recommended to run this command from the root of your app directory
? Enter a name for the project directive_auth
? Enter a name for the environment dev
? Choose your default editor: Visual Studio Code
? Choose the type of app that you're building javascript
Please tell us about your project
? What javascript framework are you using none
? Source Directory Path:  src
? Distribution Directory Path: dist
? Build Command:  npm run-script build
? Start Command: npm run-script start
Using default provider  awscloudformation

For more information on AWS Profiles, see:
https://docs.aws.amazon.com/cli/latest/userguide/cli-multiple-profiles.html

? Do you want to use an AWS profile? Yes
? Please choose the profile you want to use default


AWS Amplify Authentication module によるAWS Cognito の作成

選択したものを意訳してみました。

$ amplify add auth
Using service: Cognito, provided by: awscloudformation
 
The current configured provider is Amazon Cognito. 

# 手動で作成
Do you want to use the default authentication and security configuration? Manual configuration

# IAMでログイン可能にする
Select the authentication/authorization services that you want to use: User Sign-Up, Sign-In, connected with AWS IAM controls (Enables per-user Storage features for images or other content, Analytics, and more)

# 適当な名前をつける
# アンダースコアがあると:The resource name must be at least 1 character and no more than 128 and only contain alphanumeric characters.
Please provide a friendly name for your resource that will be used to label this category in the project: directiveauthresource

# 適当なID Pool名をつける
Please enter a name for your identity pool.  directiveauthidpool

# 認証なしのログインは認めない
Allow unauthenticated logins? (Provides scoped down permissions that you can control via AWS IAM) No

# 3rdパーティの認証は許可しない
Do you want to enable 3rd party authentication providers in your identity pool? No

# 適当なユーザープール名を作る
Please provide a name for your user pool: directiveauthuserpool

# 変更できない項目:ログインはユーザ名で行う
Warning: you will not be able to edit these selections. 
How do you want users to be able to sign in when using your Cognito User Pool? Username

# 2段階認証はoff
Multifactor authentication (MFA) user login options: OFF

# Eメールをベースに登録などを行う
Email based user registration/forgot password: Enabled (Requires per-user email entry at registration)

# Eメールの内容
Please specify an email verification subject: Your verification code
Please specify an email verification message: Your verification code is {####}

# ユーザープールのパスワードポリシーを更新:8文字で数字だけ (テストが手間なので)
Do you want to override the default password policy for this User Pool? Yes
Enter the minimum password length for this User Pool: 8
Select the password character requirements for your userpool: Requires Numbers

# 変更できない項目:ユーザー作成の時に必要な項目はメールのみ
Warning: you will not be able to edit these selections. 
What attributes are required for signing up? Email

# トークンの期限は30日
Specify the app's refresh token expiration period (in days): 30

# 特別なユーザ属性は作らない
Do you want to specify the user attributes this app can read and write? No

# OAuthは不要
Do you want to use an OAuth flow? No

Successfully added resource resourceofauthdirective locally

 
Authentication module の環境ができたら、AWSにpushしておきます。

$ amplify push


Cognitoの確認
ユーザープール

Cognitoにて、できあがったユーザープールを確認します。現時点では以下のような設定がされていました。

分類 項目
属性 エンドユーザーのサインイン ユーザー名
必須の標準属性 email
カスタム属性 無し
ポリシー パスワード強度 8文字の数字
自己サインアップ ユーザーに自己サインアップを許可する
有効期限 7 (日)
MFAそして確認 多要素認証 オフ
どの属性を確認 Eメール
新規ロール名 新規作成・設定済
アドバンスドセキュリティ 有効化するか いいえ
メッセージのカスタマイズ SESリージョン 作成したリージョン
FROM Eメールアドレス デフォルト
REPLY-TO Eメールアドレス <空欄>
Amazon SES 設定を通じて E メールを送信 いいえ - Cognito を使用 (デフォルト)
検証メッセージ - 検証タイプ コード
検証メッセージ - Eメールの件名 Your verification code
検証メッセージ - Eメールのメッセージ Your verification code is {####}
招待メッセージ - SMSメッセージ ユーザー名は {username}、仮パスワードは {####} です。
招待メッセージ - Eメールの件名 仮パスワード
招待メッセージ - Eメールのメッセージ ユーザー名は {username}、仮パスワードは {####} です。
タグ <空欄>
バイス ユーザーのデバイスを記憶するか いいえ
アプリクライアント アクセス権限のあるクライアント 2つ用意される(xxx_app_clientWeb/xxx_app_client)、clientWebにはアプリクライアントのシークレットが無い
トリガー <空欄>
分析 <空欄>
アプリクライアントの設定 IDプロバイダとOAuth2.0設定 2つのクライアントとも設定なし(空欄)
ドメイン ドメインの使用 <空欄>
UIのカスタマイズ エンドユーザーエクスペリエンス エラーが出てる(There has to be an existing domain associated with this user pool)
リソースサーバー <空欄>
IDプロバイダー <設定なし>
属性マッピング <設定なし>


なお、AmplifyではMFAを無効化できませんでした。pushした際にロールが作られてしまっているためです。

ただし、開発者がユーザーを作る場合にはメールなどの検証をOKにできるため、開発時点ではこのままで問題なさそうです。

 
あるいは、開発時にCognitoへ登録するユーザについて、メールアドレスを以下にすれば良さそうです。

Eメールを配信するアクションをテストする場合、次のいずれかの E メールアドレスを使用してハードバウンスを回避します。

- テスト用に所有し、使用している E メールアカウントのメールアドレス。自分の E メールアドレスを使用すると、Amazon Cognito からの E メールが送信されます。この E メールでは、検証コードを使用して、アプリのサインアップエクスペリエンスをテストできます。ユーザープールの E メールメッセージをカスタマイズした場合は、正しく表示されていることを確認します。

- メールボックスシミュレーターのアドレス (success@simulator.amazonses.com)。シミュレーターのアドレスを使用した場合、メールは Amazon Cognito から正しく送信されますが、表示することはできません。このオプションは、検証コードを使用する必要がなく、E メールのメッセージを確認する必要がない場合に役立ちます。

- 任意のラベルを追加したメールボックスシミュレーターのアドレス (例: success+user1@simulator.amazonses.com または success+user2@simulator.amazonses.com)。E メールは、Amazon Cognito よりこれらのアドレスに正しく送信されますが、送信されたメールを表示することはできません。このオプションは、複数のテストユーザーをユーザープールに追加してサインアッププロセスをテストし、各テストユーザーに一意の E メールアドレスがある場合に便利です。

https://docs.aws.amazon.com/ja_jp/cognito/latest/developerguide/signing-up-users-in-your-app.html#managing-users-accounts-email-testing


IDプール

続いて、IDプールの設定を確認します。

分類 項目
IDプール名 auth_directive_identity_pool__dev
認証されていないロール authdirective-dev-xxx-unauthRole
認証されたロール authdirective-dev-xxx-authRole
認証されていないID 認証されていない ID に対してアクセスを有効にする チェックなし
認証プロバイダー Cognito - ユーザープールID 上記のユーザープールID
Cognito - アプリクライアントID 2つ用意される(xxx_app_clientWeb/xxx_app_client)
Cognito - 認証されたロールの選択 デフォルトのロールを使用
同期をプッシュします 未設定
Cognitoストリーム 未設定
Cognitoイベント Sync Trigger アクションなし


Cognitoでユーザーとグループを作る

今回は、管理者ユーザー(foo)と、一般ユーザー(bar)を用意します。

項目
ユーザー名 foo
この新規ユーザーに招待を送信しますか チェックを外す
仮パスワード 22222222
電話番号 空欄
電話番号を検証済にしますか チェックを外す
Eメール foo@example.com
Eメールを検証済にしますか チェックする

fooとbarは、ユーザー名とメールアドレスが異なるだけで、あとは同じです。

なお、アカウントのステータスが FORCE_CHANGE_PASSWORD となっているので、初めて使う時にパスワードを変更する必要がある点に注意が必要です。


続いて、グループ (adminとmember)の2つを作成します。

項目
名前 admin、もしくはmember
説明 <空欄>
IAMロール <選択せず>
優先順位 <空欄>

 
その後、各ユーザーにグループを割り当てればOKです。


AWS AppSync API作る

今回はamplifyを使って作成します。

$ amplify add api

# GraphQLのAPIを作成
? Please select from one of the below mentioned services GraphQL

# API名は適当に
? Provide API name: DirectiveAuthAPI

# 初期データ投入のため、ひとまずAPI Key認証としておく
? Choose an authorization type for the API API key

# GraphQLのスキーマ注釈は不要
? Do you have an annotated GraphQL schema? No

# スキーマ作成のガイドを頼む
? Do you want a guided schema creation? Yes

# 一番簡単なスキーマを作る
? What best describes your project: Single object with fields (e.g., “Todo” with ID, name, description)

# スキーマはできたそのものを利用する
? Do you want to edit the schema now? No

 
これでAPIのひな形ができたため、クラウドにpushします。

$ amplify push

Current Environment: dev

| Category | Resource name           | Operation | Provider plugin   |
| -------- | ----------------------- | --------- | ----------------- |
| Api      | AuthDirectiveAPI        | Create    | awscloudformation |
| Auth     | resourceofauthdirective | No Change | awscloudformation |

# pushを続けて問題ない
? Are you sure you want to continue? Yes

GraphQL schema compiled successfully.
Edit your schema at path/to/auth_directive/amplify/backend/api/AuthDirectiveAPI/schema.graphql or place .graphql files in a directory at path/to/auth_directive/amplify/backend/api/AuthDirectiveAPI/schema

# GraphQL APIのコードを生成してもらう
? Do you want to generate code for your newly created GraphQL API Yes

# JavaScript製
? Choose the code generation language target javascript

# 保管先はデフォルトのままで
? Enter the file name pattern of graphql queries, mutations and subscriptions src/graphql/**/*.js

# GraphQLのオペレーションは自動生成してもらう
? Do you want to generate/update all possible GraphQL operations - queries, mutations and subscriptions Yes

# ネストはデフォルトのまま
? Enter maximum statement depth [increase from default if your schema is deeply nested] 2


できあがったAPI

以下の通りです。

  • Schema: query + mutation + subscriptionあり
  • Data source : TodoTable というDynamoDBができた
  • Functions, Queries : 空


分類 項目
Settings Primary auth mode API KEY
Default authentication mode API key


できあがったDynamoDB

こちらも以下の通りです。

分類 項目
ストリームの詳細 ストリーム有効 はい
表示タイプ 新旧イメージ
テーブルの詳細 テーブル名 Todo-xxx
プライマリパーティションキー id(文字列)
プライマリソートキー <空欄>
ポイントインタイムリカバリ 無効
暗号化タイプ KMS
有効期限(TTL)属性 無効
テーブルの状態 有効
読み込み/書き込みキャパシティーモード オンデマンド
プロビジョンド読み込みキャパシティーユニット -
プロビジョンド書き込みキャパシティーユニット -


DynamoDBにデータ投入

AppSync ConsoleのQueriesに以下の設定を行います。

mutation createTodo($createinput: CreateTodoInput!) {
  createTodo(input: $createinput) {
    id
    name
    description
  }
}

また、QUERY_VARIABLESにも追加します。

{
  "createinput": {
    "id": "1",
    "name": "cook",
    "description": "breakfast"
  }
}

実行結果は以下となり、DynamoDBにデータが登録されました。

{
  "createinput": {
    "id": "1",
    "name": "cook",
    "description": "breakfast"
  }
}


Amplifyアプリの作成

Getting start に従い、ローカルにAmplifyアプリを作成します。
https://aws-amplify.github.io/docs/js/start?platform=purejs

  • package.jsonつくる
  • npm install
  • webpack.config.jsつくる
  • index.htmlつくる
  • src/app.jsつくる

 
最後にコンパイルと起動をして完了です。

$ npm start

usernameAttributesを使って、aws-amplify-vueのamplify-sign-inにあるusernameを変更する

AWS Amplify Framework (JavaScript) には、Vue.jsで使える便利な Vue Componentが用意されています。

 
ここには

  • SignIn
  • ConfirmSignIn
  • SignUp
  • ConfirmSignUp
  • ForgotPassword

などがあります。

 
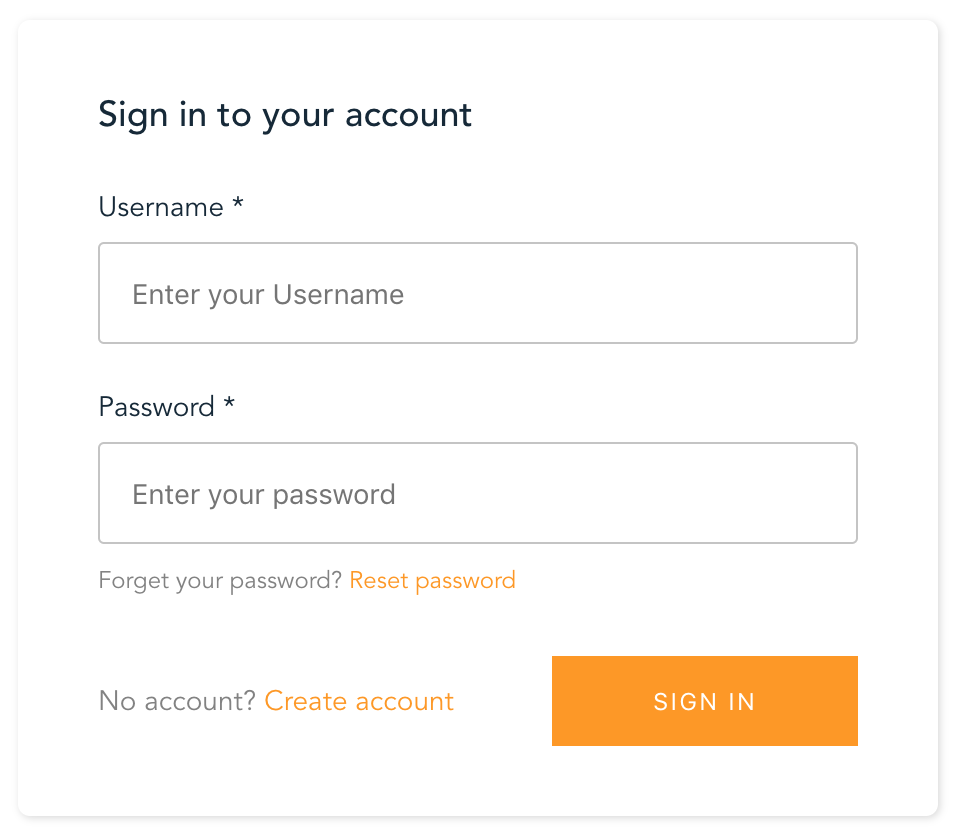
試しにSignInを使うと、こんな感じの表示になります。

f:id:thinkAmi:20190706225722p:plain:w450

 
さらに、ドキュメントを見ると、headerやusernameが変更できそうでした。
https://aws-amplify.github.io/docs/js/vue#signin

 
そこで、 signInConfig を渡そうと

<template>
  <amplify-sign-in v-if="!signedIn"
                   v-bind:signInConfig="options.signInConfig">
  </amplify-sign-in>
</template>

<script>
  import { components } from 'aws-amplify-vue'

  export default {
    name: 'app',
    components: {
      components
    },

    data: function () {
      return {
        options: {
          signInConfig: {
            header: '[overwrite] my header',
            username: '[overwrite] my name'
          },
        },
        signedIn: false,
      }
    }
  }
</script>

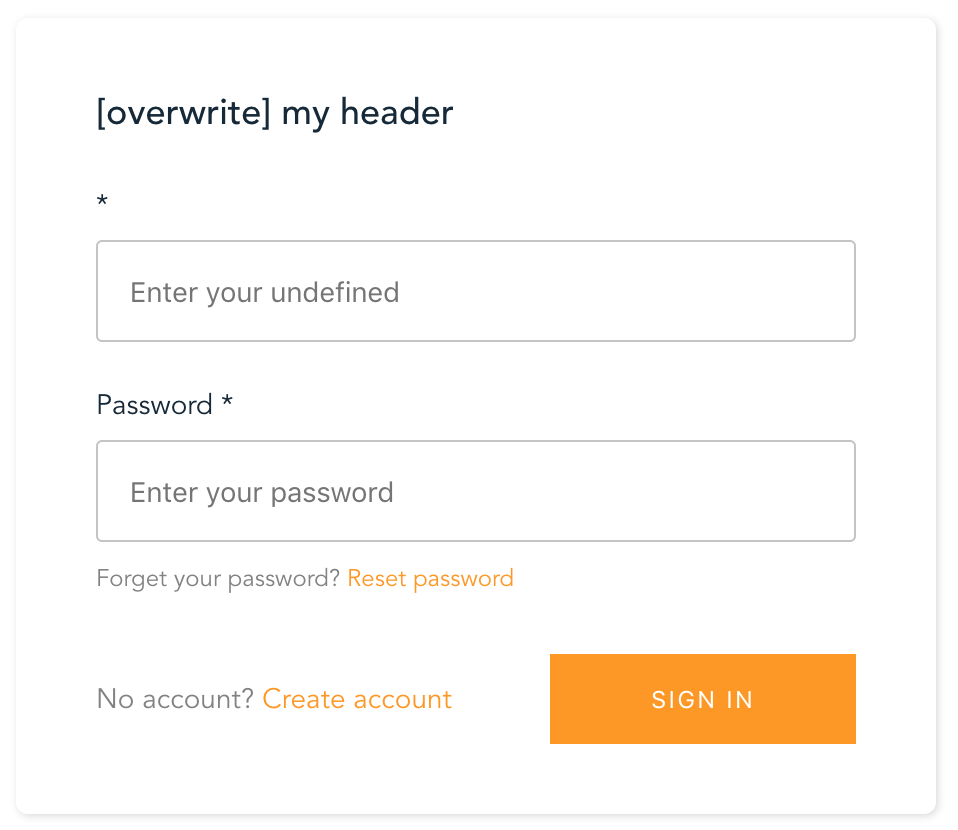
としたところ、

f:id:thinkAmi:20190706231612p:plain:w450

と、headerは変更できたものの、usernameが消えてしまいました。

 
そこで試したことをメモしておきます。

 
目次


環境

  • Node.js 10.16.0
  • aws-amplify 1.1.29
  • aws-amplify-vue 0.2.12
  • vue 2.6.10
  • vue-router 3.0.3
  • vuex 3.0.1


対応

aws-amplify-vueのソースコードを読んだところ、 usernameAttributes を渡せば良さそうでした。

 
そのため、

<template>
  <amplify-sign-in v-if="!signedIn"
                   v-bind:signInConfig="options.signInConfig"
                   v-bind:usernameAttributes="options.usernameAttributes">
  </amplify-sign-in>
</template>

<script>
...
    data: function () {
      return {
        options: {
          signInConfig: {
            header: '[overwrite] my header',
          },
          usernameAttributes: '[overwrite] my user name',
        },
...
</script>

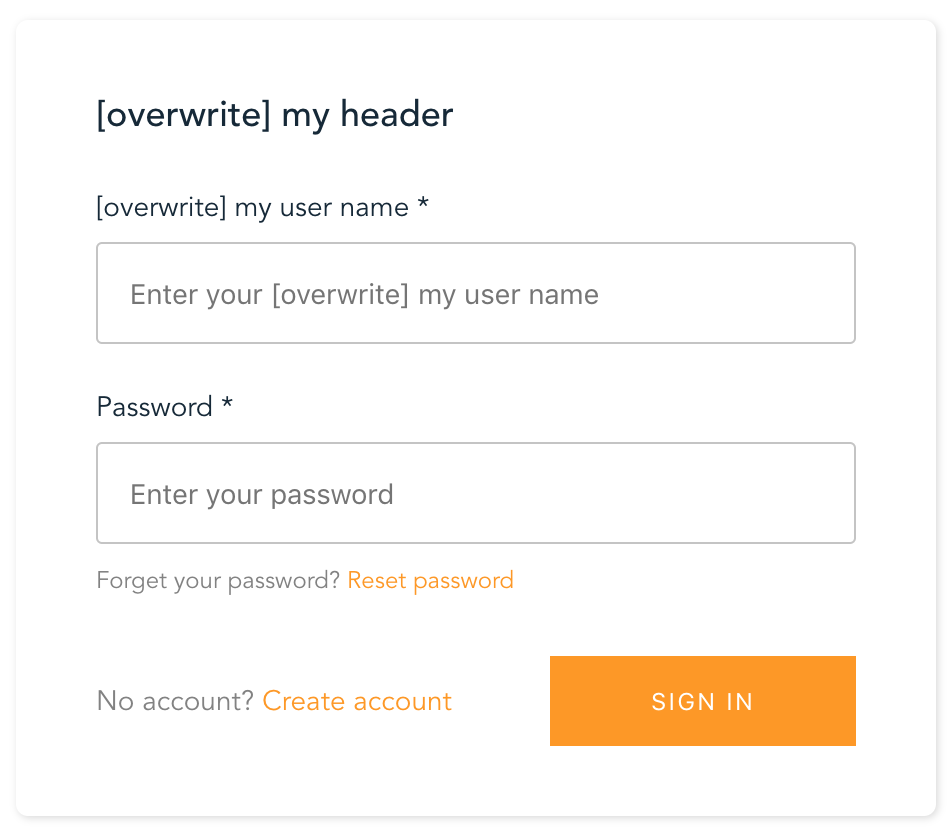
としたところ、

f:id:thinkAmi:20190706230731p:plain:w450

と、username も変更できました。


ソースコード

Githubに上げました。 amplify_vue/src/views/SignInOnly.vue あたりが今回のファイルです。
https://github.com/thinkAmi-sandbox/AWS_AppSync_Amplify-sample


その他

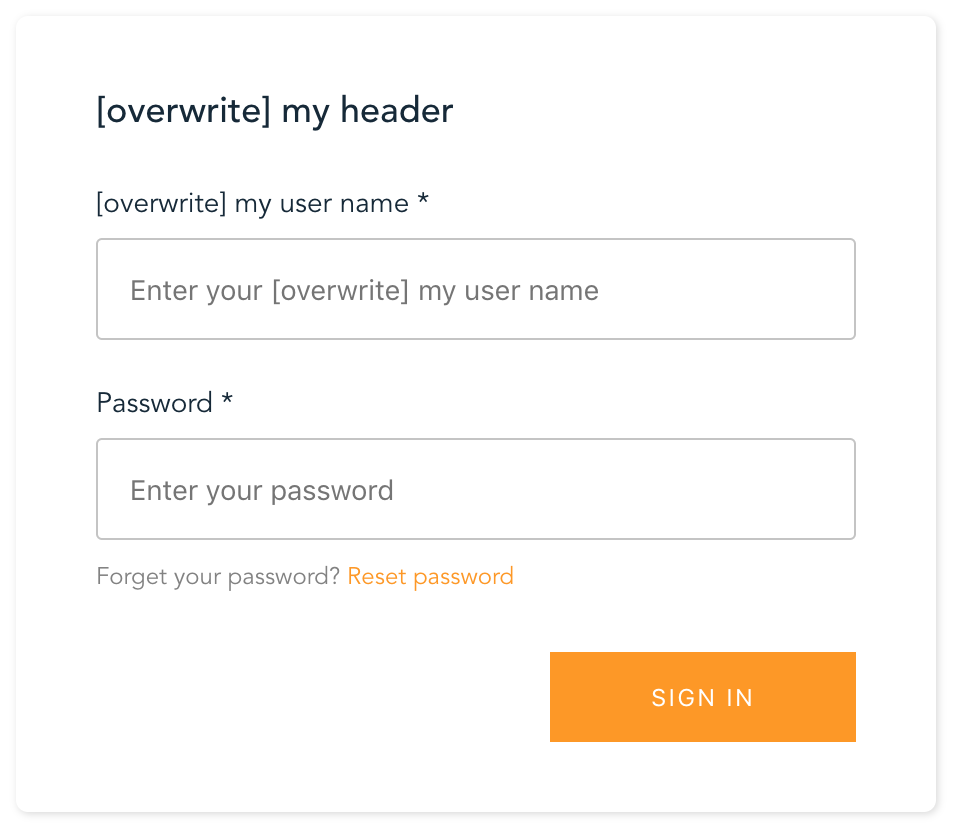
No account? Create account を非表示にする

左下にある、 No account? Create account を非表示にするには、isSignUpDisplayed: false にすれば良いようです。
参考:aws-amplify-vueで作成した認証画面でSignUpをさせないようにする - Qiita

f:id:thinkAmi:20190706231730p:plain:w450


環境構築

この環境を構築した手順も残しておきます。基本は、Getting Startedに従い作っていきます。
https://aws-amplify.github.io/docs/js/start?platform=vue

$ node -v
v10.16.0

$ npm install -g @vue/cli

# Vue.jsのプロジェクトを作る
$ vue create amplify_vue

Vue CLI v3.9.2
? Please pick a preset: Manually select features
? Check the features needed for your project: Router, Vuex
? Use history mode for router? (Requires proper server setup for index fallback in production) Yes
? Where do you prefer placing config for Babel, PostCSS, ESLint, etc.? In package.json
? Save this as a preset for future projects? No

# amplifyで必要なものをインストール
$ cd amplify_vue
$ npm install --save aws-amplify
$ npm install --save aws-amplify-vue

# 初期化
$ amplify init
Note: It is recommended to run this command from the root of your app directory
? Enter a name for the project amplify_vue
? Enter a name for the environment dev
? Choose your default editor: IDEA 14 CE
? Choose the type of app that you're building javascript
Please tell us about your project
? What javascript framework are you using vue
? Source Directory Path:  src
? Distribution Directory Path: dist
? Build Command:  npm run-script build
? Start Command: npm run-script serve
Using default provider  awscloudformation

For more information on AWS Profiles, see:
https://docs.aws.amazon.com/cli/latest/userguide/cli-multiple-profiles.html

? Do you want to use an AWS profile? Yes
? Please choose the profile you want to use default

 
今回は amplify add ... 系は不要なので、ここまでで環境ができます。

#awsxon #jawsug AWS Expert Online at JAWS-UG長野 (AppSync編) に参加しました

7/4に開催された、AWS Expert Online at JAWS-UG長野 (AppSync編) に参加しました。
AWS Expert Online at JAWS-UG長野 - connpass

会場はギークラボ長野でした。

また、資料などは後日公開されるとのことです。

 
最近AppSyncをさわっていたので、タイムリーなイベントでした。

内容も

  • いろいろな事例の紹介
  • AppSyncをさわっている中で気になったことも、気軽に質問ができた

など、とても有意義な時間でした。

 
以下、個人的なメモなどを残します。誤りがあればご指摘ください。


メモ

自分のTweetから拾ったものです。

  • AppSync APIのドキュメントは自動生成される
  • GraphQLは、FacebookからLinux傘下になった
  • 非推奨のAPI@deprecated を使って示せる
  • nullをうまく使うのがGraphQLの特徴
  • 事例
    • リアクション配信として、8,000リクエスト/秒 をさばいてる
    • Subscriptionは配信の上限がある。バッファリングをして配信してる
    • リアルタイムデータだけではなく、通常のデータもさばいている
    • 書き込み系はDynamoDB、イベントソーシングとしてElasticsearchに流して、検索はElasticsearchで行う
    • AppSyncからDynamoDBへ直接書き込みもできるが、ビジネスロジックを入れるため、Lambdaでビジネスロジックを書いて、その後にDynamoDBへ入れている
  • AppSync SDKとAmplifyの違い
    • AppSync SDKは高機能なSDKApolloのextensionみたいな扱いで、Apolloで行えるものは使える
    • Amplifyはシンプルなもの。できることは少ないけれど、AppSyncに簡単にアクセスできる。クライアントがシンプルになる。
  • デザインパターンやサンプル
    • デザインパターンなどの情報は、 AppSync Mob401 で検索すると良い
    • aws-samplesにて、 appsync で検索すると、サンプルがいろいろと出てくる


自分の上げた質問

2点質問を上げたので、回答とともに残しておきます。

1. DynamoDBなどのように、ユニットテストのためにAppSyncをローカルで動かすことはできるのでしょうか?

今のところ、ローカルではユニットテストができないとのことです。

 
2. Amplifyのチュートリアルを見ると、DynamoDBやCognitoを新規作成するものが多いです。ただ、既存のDynamoDBやCognitoを使いたい場合、どうするのがベターな感じでしょうか

以下のどちらかのパターンが良いとのことです。

  • amplifyのカスタムテンプレートを使う
  • amplifyを使わずに、CloudFormationを使う


その他

AppSyncやAmplifyについて、個人的には

あたりが来ると嬉しいなーと感じました。

 
最後になりましたが、SA塚越さんをはじめ、関係者のみなさま、ありがとうございました。

AWS AppSyncのPipeline Resolverを使って、複数のDynamoDBの値をマージして返すAPIを作成してみた

前回・前々回と、単一のデータソースから値を取得するAWS AppSync APIを作成しました。

 
ただ、単一ではなく、「複数のDynamoDBから値を取得し、その結果をマージして返す」ようなAPIが作れないかが気になりました。

調べてみたところ、通常のResolverの代わりにPipeline Resolverを使えば良さそうでした。
チュートリアル: パイプラインリゾルバー - AWS AppSync

 
公式ドキュメントによると、今回のAPIに必要なものは

  • Data source
  • Schema
  • Function
  • Pipeline Resolver
    • Before mapping template
    • After mapping template

でした。

そこで、公式チュートリアルよりももう少し単純な例を使って、理解を深めてみることにしました。

 
目次


環境

  • Python 3.7.3
    • graphqlclient 0.2.4
  • AWS AppSync
    • データソース:Amazon DynamoDB x 2
      • 両DynamoDBとも作成済
    • API Key 認証
    • データ取得(Query)のみ、APIとして実装


DynamoDB

事前に用意した2つのDynamoDBは、以下の通りです*1

Blog table

id (key) title author_id
1 ham 100
2 spam 200


Author table

Blog tableの author_id に紐づく id を持つテーブルです。

id (key) name
100 foo
200 bar


APIの仕様

Blog.id == "1" となるようなQueryを投げると

Blog.id Blog.title Author.id Author.name
1 ham 100 foo

が返るものとします。


AWS AppSync APIのひな形作成

Build from scratch より作成します。

API nameは Pipeline Resolver API とします。


Data sourceの作成

Data Sources のCreate Data sourceより作成します。今回は2つ作成します。

なお、作成する際 、両方ともAutomatically generate GraphQLon にすると、2つのData source分がマージされた Schema が作成されます。便利。

ただ、今回はSchemaのResolverではなく、FunctionでDatasourceから値を取得することから、自分でSchemaを作成することになります。そのため、 off でも良いです。

また、ロールは新規作成としますが、必要な権限を持ったロールがある場合はそちらを利用しても良さそうです。


BlogテーブルのData source
項目
Data source name Blog_DataSource
Data source type Amazon DynamoDB table
Region DynamoDB Blog のあるRegion
Table name Blog
Create or use an existing role New role


AuthorテーブルのData source

Data source name・Table nameを変えるくらいで、あとは同じです。

項目
Data source name Author_DataSource
Data source type Amazon DynamoDB table
Region DynamoDB Author のあるRegion
Table name Author
Create or use an existing role New role


Data source Schemaの作成

今回は、

  • リクエストを受け付けるQueryの型: getBlogWithAuthor
  • 戻り値の型: BlogWithAuthor

のみ定義します。

前述のとおり、データの取得はFunctionで行うため、schema { query: Query } の定義は不要です。

type BlogWithAuthor {
    id: String!
    title: String
    author_id: String
    author_name: String
}

type Query {
    getBlogWithAuthor(id: String!): BlogWithAuthor
}


Functionの作成

Functionを作成してからでないとPipeline Resolverで使えなかったため、まずはFunctionから作成します。

今回、Functionは2つ用意します。

  • Blogテーブルからデータを取得
    • Function名: GetBlog
  • Blogテーブルの author_id と等しい id を持つAuthor tableデータを取得し、Blog table とAuthor tableをマージ
    • Function名: GetBlogWithAuthor


Functionを作るには

  • Data source name
  • Function name
  • request mapping template
  • response mapping template

が必要ですので、それぞれ作成していきます。

 
なお、mapping template系の書き方については、以下が参考になりました。ありがとうございました。
AWS AppSyncのPipeline Resolverで複数データリソースを扱う場合のVTLの書き方 | Takumon Blog


Function: GetBlog

Data sourceとFunction nameです。

項目
Data source name Blog_DataSource
Function name GetBlog


request mapping template

右にあるテンプレート GetItem を使うことで、Blog tableから指定した id のデータを取得しています。

{
    "operation": "GetItem",
    "key": {
        "id": $util.dynamodb.toDynamoDBJson($ctx.args.id),
    }
}


response mapping template

デフォルトのままです。

## Raise a GraphQL field error in case of a datasource invocation error
#if($ctx.error)
    $util.error($ctx.error.message, $ctx.error.type)
#end
## Pass back the result from DynamoDB. **
$util.toJson($ctx.result)


Function: GetBlogWithAuthor

Data sourceとFunction nameです。

項目
Data source name Author_DataSource
Function name GetBlogWithAuthor


request mapping template

GetBlogと似ていますが、1点異なるのは、toDynamoDBJsonの引数 $ctx.prev.result.author_id です。

Function: GetBlogWithAuthorは、GetBlogの後に動作させますが、その際、GetBlogで取得した author_id を使ってAuthorテーブルからデータを取得します。

Pipeline Resolverでは、 $ctx.prev.result で、そのFunctionの直前に動作したFunctionの結果を参照できます(今回だと、GetBlog Functionの結果)。

{
    "operation": "GetItem",
    "key": {
        "id": $util.dynamodb.toDynamoDBJson($ctx.prev.result.author_id),
    }
}


response mapping template

GetBlogとは異なり、結果をマージする処理を追加しています。

今回は、GetBlogで取得したBlogデータに、Authorテーブルから取得したnameをマージして返します。

なお、マージする際のキー author_name は、Schemaの type BlogWithAuthor で定義した author_name と一致させます。

type BlogWithAuthor {
    ...
    author_name: String
}

 
以上より、response mapping templateはこんな感じになります。

## Raise a GraphQL field error in case of a datasource invocation error
#if($ctx.error)
    $util.error($ctx.error.message, $ctx.error.type)
#end
## Pass back the result from DynamoDB. **

## GetBlogの結果に、author_nameとして今回取得したAuthorテーブルのnameの値をマージ
$util.qr($ctx.prev.result.put("author_name", $ctx.result.name))

## マージしたデータを返す
$util.toJson($ctx.prev.result)


Pipeline Resolverの作成

Schemaページの右側にあるResolverのうち、Query: getBlogWithAuthorの Attach をクリックします。

Data source nameの下に Convert to pipeline resolver があるため、何も入力しない状態でそのリンクをクリックします。

すると

  • Before mapping template
  • Function
  • After mapping template

を定義できるようになります。


Functionの配置

以下の順番でFunctionを配置します。

  1. Before mapping template
  2. GetBlog
  3. GetBlogWithAuthor
  4. After mapping template


Before mapping templateの定義

Queryから呼び出される、Before mapping template を定義します。

## Query: getBlogWithAuthorから渡された `id` を `$result` 変数に入れる
#set($result = { "id": $ctx.args.id })

## JSON化して、次のFunction: GetBlog へと渡す
$util.toJson($result)

参考:Queryの内容

type Query {
    getBlogWithAuthor(id: String!): BlogWithAuthor
}


After mapping templateの定義

Function: GetBlogWithAuthorから呼び出される、After mapping template を定義します。

$util.toJson($ctx.result)

こちらはFunctionの値をそのままJSON化するだけです。


AppSync APIクライアントの作成

今回もPythonで作ります。

  • データがある場合 (Blog.id == "1")
  • データが無い場合 (Blog.id == "x")

をそれぞれ取得するようなQueryを実行します。

from graphqlclient import GraphQLClient

from secret import API_KEY, API_URL


def execute_query_api(gql_client):
    # pipeline resolverを使ったqueryを呼ぶ:データがある場合
    query = """
        query {
          getBlogWithAuthor(id: "1") {
            id
            title
            author_id
            author_name
          }
        }
    """
    result = gql_client.execute(query)
    print(result)

    # pipeline resolverを使ったqueryを呼ぶ:データがない場合
    query = """
        query {
          getBlogWithAuthor(id: "x") {
            id
            title
            author_id
            author_name
          }
        }
    """
    result = gql_client.execute(query)
    print(result)


if __name__ == '__main__':
    c = GraphQLClient(API_URL)
    c.inject_token(API_KEY, 'X-Api-Key')
    execute_query_api(c)


実行結果

データがある場合の結果です。期待した結果となりました。

{"data":{"getBlogWithAuthor":{"id":"1","title":"ham","author_id":"100","author_name":"foo"}}}

 
一方、データがない場合はこのようになります。

{
"data":{"getBlogWithAuthor":null},
"errors":[{"path":["getBlogWithAuthor"],
           "data":null,
           "errorType":"DynamoDB:AmazonDynamoDBException",
           "errorInfo":null,
           "locations":[{"line":3,"column":11,"sourceName":null}],
           "message":"The provided key element does not match the schema
                      (Service: AmazonDynamoDBv2; Status Code: 400;
                       Error Code: ValidationException;
                       Request ID: xxx)"}]}


ソースコード

Githubに上げました。 pipeline_resolver ディレクトリの中が、今回のソースコードとなります。
https://github.com/thinkAmi-sandbox/AWS_AppSync_python_client-sample

*1:あまり良いDynamoDBの構造ではないかもしれませんが、とりあえず...