開発をしていると、AWS Amplifyを使ったソースコードをGithubなどでチームで共有することがあります。
AppSync APIやDynamoDBなどの環境を同一にして、チームで開発する方法を探したところ、公式ドキュメントに amplify env を使う方法が記載されていました。
そこで、実際にどんな感じになるのか試してみたため、メモを残します。
目次
- 環境
- 共有するソースコード
- git clone & amplify init で既存のAppSync環境にアクセスする
- 新しい環境 staging を作成し、動作確認
- amplify env checkout で環境を切り替えて確認
- 注意:amplify delete は全環境を削除
環境
共有するソースコード
今回は、以下のリポジトリをチーム間で共有し、開発を進めるものとします。なお、 team-provider-info.json ファイルには機密情報が含まれていたため、わざと空ファイルにしてあります。
https://github.com/thinkAmi-sandbox/appsync_app_for_multi_developer
DataSourceとしてDynamoDBを使います。schema.graphqlは以下の通りです。
type Todo {
    title: String!
    content: String
}

input CreateTodoInput {
    title: String!
    content: String
}


type Query {
    getTodo(title: String!): Todo
}

type Mutation {
    createTodo(input: CreateTodoInput!): Todo
}
また、動作確認としてAppSyncを使ったWebアプリを用意します。
各ボタンをクリックすると、対応するQueryやMutationを実行します。
import Amplify, {API} from 'aws-amplify';
import awsconfig from './aws-exports';
import * as queries from "./graphql/queries";
import * as mutations from "./graphql/mutations";


const queryButton = document.getElementById('query');
queryButton.addEventListener('click', () => {
  console.log('Run Query!');
  Amplify.configure(awsconfig);
  API.graphql(
    {
      query: queries.getTodo,
      authMode: 'API_KEY',
      variables: {
        title: "hello"
      }
    }
  ).then((data) => {
    console.log(data);
  })
    .catch((e) => {
      console.log('error!');
      console.log(e)
    });
});


const mutationButton = document.getElementById('mutation');
mutationButton.addEventListener('click', () => {
  console.log('Run Mutation!');

  const content = document.getElementById('content').value;
  Amplify.configure(awsconfig);
  API.graphql(
    {
      query: mutations.createTodo,
      authMode: 'API_KEY',
      variables: {
        input: {
          title: "hello",
          content: content
        }
      }
    }
  ).then((data) => {
    console.log(data);
  })
    .catch((e) => {
      console.log('error!');
      console.log(e)
    });
});
また、DynamoDBには以下が登録されているとします。

git clone & amplify init で既存のAppSync環境にアクセスする
上記のリポジトリを手元に持ってきます。
$ git clone git@github.com:thinkAmi-sandbox/appsync_app_for_multi_developer.git .
git cloneしただけではAmplifyの環境ができていないため、 amplify init を実行します。
ゼロから開発するときと異なり、 Do you want to use an existing environment? が表示されます。
ここでは既存のAppSync環境にアクセスするため、 Yes を選択します。
$ amplify init
Note: It is recommended to run this command from the root of your app directory

# 既存のAppSync環境へアクセスするため、 "Yes" を選択
? Do you want to use an existing environment? Yes

? Choose the environment you would like to use: dev
? Choose your default editor: Visual Studio Code
Using default provider  awscloudformation

For more information on AWS Profiles, see:
https://docs.aws.amazon.com/cli/latest/userguide/cli-multiple-profiles.html

? Do you want to use an AWS profile? Yes
? Please choose the profile you want to use default
✔ Initialized provider successfully.
amplify status で状況を確認します。既存の環境が認識されているようです。
$ amplify status

Current Environment: dev

| Category | Resource name     | Operation | Provider plugin   |
| -------- | ----------------- | --------- | ----------------- |
| Api      | MultiDeveloperAPI | No Change | awscloudformation |
動作を確認するため、必要なモジュールをインストールします。
$ npm install
別の開発環境で実行していると分かるよう、 webpack.config.js 中のポート番号を 9501 へと変更します。
devServer: {
...
  port: 9501
起動して動作を確認します。ポートは 9501 を使っているようです。
$ npm start

...
ℹ 「wds」: Project is running at http://localhost:9501/
...
Queryボタンを押すと、既存のDynamoDBの値が取得できました。

新しい環境 staging を作成し、動作確認
続いて、 amplify env add で新しい環境 staging を作成します。
$ amplify env add
Note: It is recommended to run this command from the root of your app directory

# 既存の環境を使うか確認されるため、 "No" を選択
? Do you want to use an existing environment? No

# あとは、ゼロから開発したときと同様
? Enter a name for the environment staging
Using default provider  awscloudformation

For more information on AWS Profiles, see:
https://docs.aws.amazon.com/cli/latest/userguide/cli-multiple-profiles.html

? Do you want to use an AWS profile? Yes
? Please choose the profile you want to use default
⠋ Initializing project in the cloud...

# 新しくstackが作成される
CREATE_IN_PROGRESS multideveloper-staging-xxx AWS::CloudFormation::Stack
CREATE_IN_PROGRESS DeploymentBucket                      AWS::S3::Bucket
...
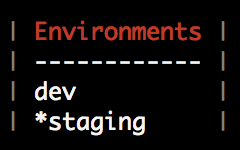
実行後、 amplify env list すると、環境が増えていました。また、新しく作成した環境 staging にも切り替わっています。
また、 amplify status で状況を確認すると、 Create に変わっていました。
$ amplify status

Current Environment: staging

| Category | Resource name     | Operation | Provider plugin   |
| -------- | ----------------- | --------- | ----------------- |
| Api      | MultiDeveloperAPI | Create    | awscloudformation |
他に、team-provider-info.json ファイルにも、新規環境 staging が追加されています。
https://aws-amplify.github.io/docs/cli-toolchain/quickstart#sharing-projects-outside-the-team-
{
    "dev": {
        "awscloudformation": {
            "AuthRoleName": "xxx",
            "UnauthRoleArn": "xxx",
            "AuthRoleArn": "xxx",
            "Region": "xxx",
            "DeploymentBucketName": "xxx",
            "UnauthRoleName": "xxx",
            "StackName": "xxx",
            "StackId": "xxx"
        }
    },
    "staging": {
        "awscloudformation": {
            "AuthRoleName": "yyy",
            "UnauthRoleArn": "yyy",
            "AuthRoleArn": "yyy",
            "Region": "yyy",
            "DeploymentBucketName": "yyy",
            "UnauthRoleName": "yyy",
            "StackName": "yyy",
            "StackId": "yyy"
        }
    }
}
ためしに、この状態でQueryを実行してみたところ、エラーとなりました。
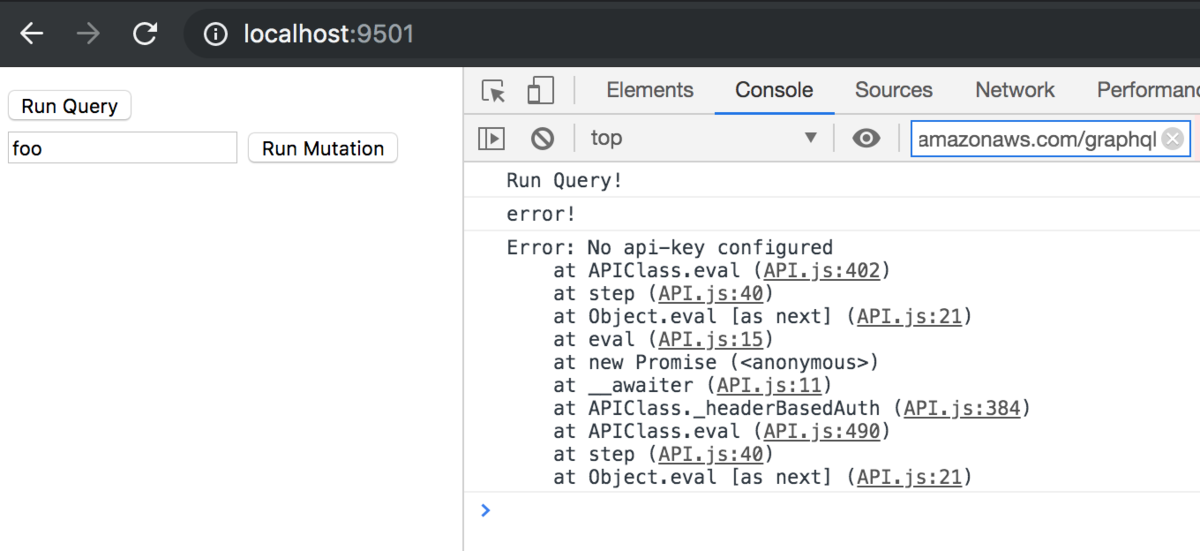
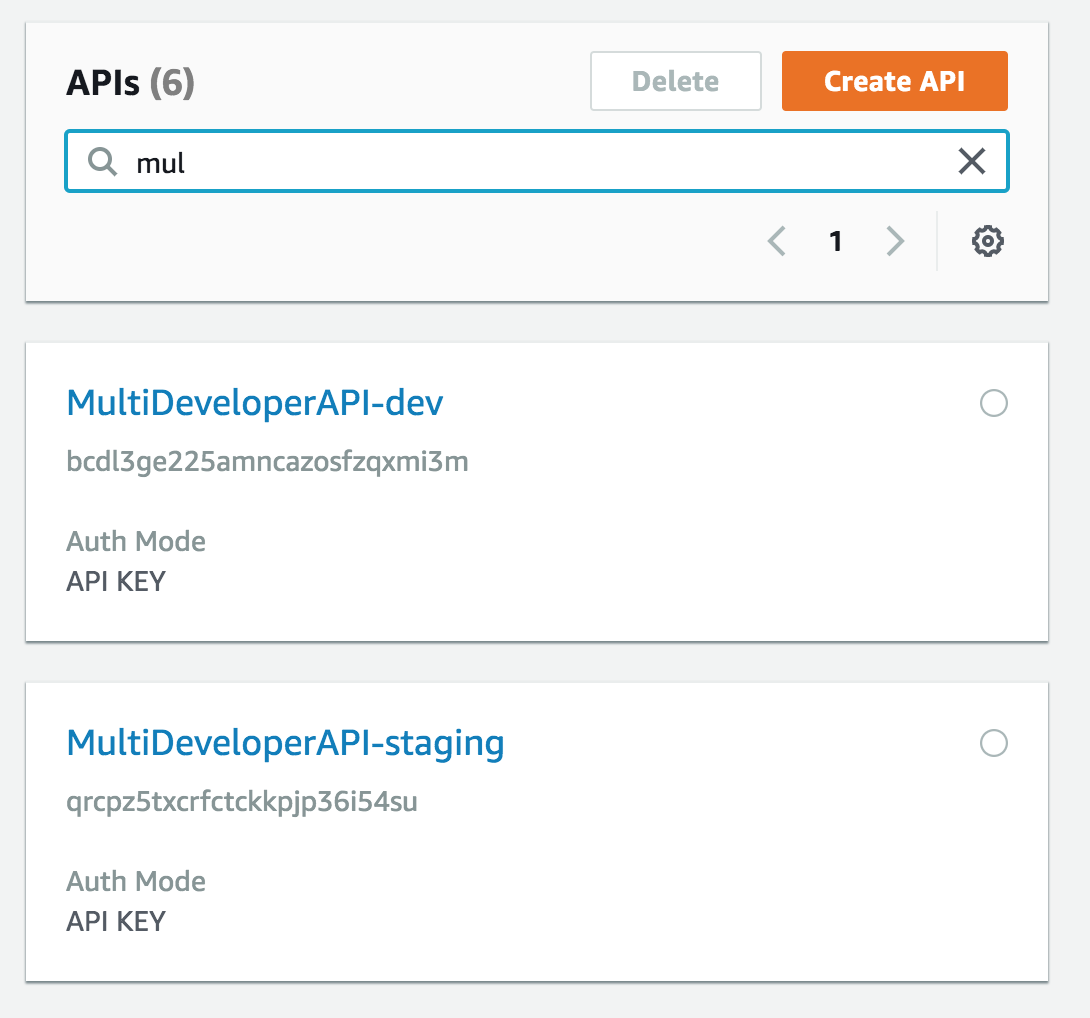
AppSync API 環境がまだ作成されていないようなので、 amplify push したところ、新しいAppSync APIが作成されました。
$ amplify push

Current Environment: staging

| Category | Resource name     | Operation | Provider plugin   |
| -------- | ----------------- | --------- | ----------------- |
| Api      | MultiDeveloperAPI | Create    | awscloudformation |
? Are you sure you want to continue? Yes

GraphQL schema compiled successfully.

? Do you want to generate code for your newly created GraphQL API Yes
? Choose the code generation language target javascript
? Enter the file name pattern of graphql queries, mutations and subscriptions src/graphql/**/*.js
? Do you want to generate/update all possible GraphQL operations - queries, mutations and subscriptions Yes
? Enter maximum statement depth [increase from default if your schema is deeply nested] 2
⠹ Updating resources in the cloud. This may take a few minutes...

...
CREATE_IN_PROGRESS apiMultiDeveloperAPI                  AWS::CloudFormation::Stack
...
各種AWSリソースも追加されています。
AppSync API
DynamoDB

S3

この状態でQueryやMutationを実行したところ、正常に動作しました。

DynamoDBにも登録されています。
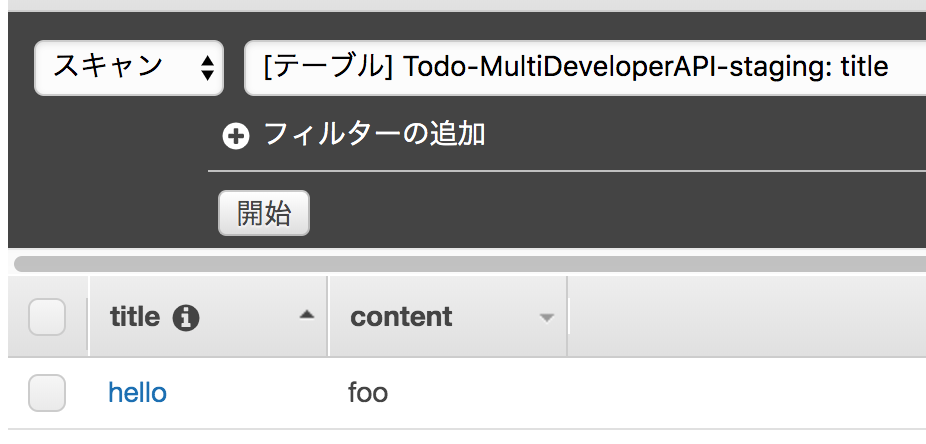
以上より、 amplify env add で新しい環境を作成することで、既存の環境はそのままに、別の環境で作業できることが分かりました。
amplify env checkout で環境を切り替えて確認
再度、 dev 環境に切り替えた時に、元のリソースにアクセスできるかを確認します。
まずは、staging環境のDynamoDBの列contentsを bar へと更新します。
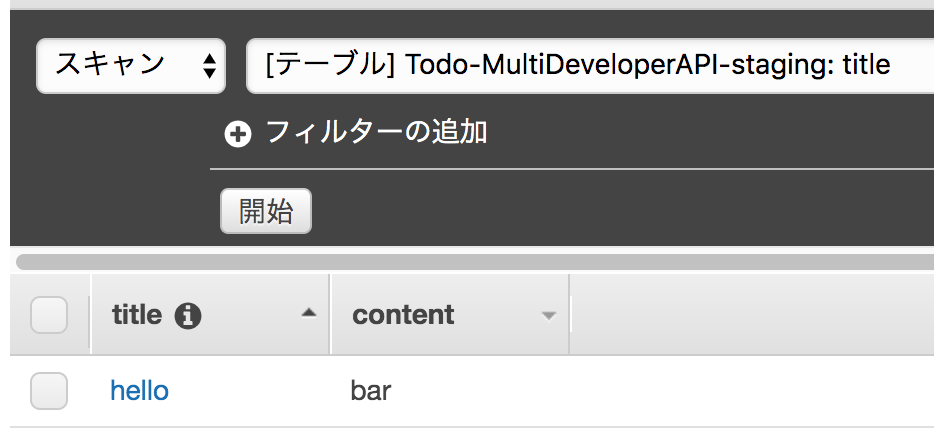
続いて、環境を切り替えます。
# 状況を確認
$ amplify env list

| Environments |
| ------------ |
| dev          |
| *staging     |

# checkout で切り替え
$ amplify env checkout dev
✔ Initialized provider successfully.
Initialized your environment successfully.

# 再度状況を確認
$ amplify env list

| Environments |
| ------------ |
| *dev         |
| staging      |
この状態でWebアプリのQueryを実行すると、dev環境のDynamoDBの値が取得できました。dev環境へアクセスできているようです。

注意:amplify delete は全環境を削除
amplify delete は実行時に
Are you sure you want to continue?(This would delete all the environments of the project from the cloud and wipe out all the local amplify resource files)
と表示されるように、全環境のリソースを削除します。うっかり amplify delete すると大変なことになります。
実際に試してみると
# env を確認
$ amplify env list

| Environments |
| ------------ |
| *dev         |
| staging      |


# stagingへと移動
$ amplify env checkout staging
✔ Initialized provider successfully.
Initialized your environment successfully.


# 削除
$ amplify delete
? Are you sure you want to continue?(This would delete all the environments of the project from the cloud and wipe out all the local amplify resource files) Yes

Deleting env:dev  # devを削除

Deleting env:staging  # stagingを削除
✔ Project deleted in the cloud
Project deleted locally.


# 確認すると、amplifyプロジェクト自体がない
$ amplify env list
/path/to/lib/node_modules/@aws-amplify/cli/node_modules/gluegun/build/index.js:13
    throw up;
    ^

Error: You are not working inside a valid amplify project.
となりました。
また、実際のリソースもありません。
DynamoDB

AppSync API
