以前、IIS + wfastcgiによるDjangoのホストを試しました。
Windows7 + IIS + virtualenv + wfastcgiで、Djangoをホストする - メモ的な思考的な
今回は、Django + IIS + wfastcgiでの静的ファイル配信を試してみました*1。
なお、Djangoで静的ファイルを扱う時の考え方は以下が参考になりました。ありがとうございました。
- django.contrib.staticfilesを使う - 偏った言語信者の垂れ流し
- DjangoテンプレートのstaticタグとSTATIC_URLコンテキスト変数の使い分け - 偏った言語信者の垂れ流し
- Django での static files の扱い方まとめ - AWS / PHP / Python ちょいメモ
- python - Can I make STATICFILES_DIR same as STATIC_ROOT in Django 1.3? - Stack Overflow
目次
環境
端末まわり
Djangoまわり
Djangoのデフォルトでは、以下のフォルダに静的ファイルを置くことで配信されます。
- settings.pyの
STATICFILES_DIRSで指定したフォルダdjango.contrib.staticfiles.finders.FileSystemFinderの動作によるもの
- 各アプリの
staticフォルダdjango.contrib.staticfiles.finders.AppDirectoriesFinderの動作によるもの
参考:Settings - STATICFILES_FINDERS | Django documentation | Django
また、IISでホストする時の静的ファイル配信では以下の設定も必要になります。
STATICFILES_DIRSに静的ファイルを置くパターン- 下記のいずれかを実施
- 全体のweb.configファイルに、静的ファイルの配信について追加
- 静的ファイル向けのフォルダにweb.configを置き、「全体のweb.configで設定したhandlerをremoveする」設定を記述
- 下記のいずれかを実施
- 各アプリの
staticフォルダに静的ファイルを置くパターン
そこで今回は、両方のパターンを試してみます。
STATICFILES_DIRSに静的ファイルを置くパターン
環境セットアップ
IISとPython、virtualenvのセットアップからstartappまでは前回同様なのでさらっと流します。
# 作業用フォルダの作成と移動
d:\>mkdir django_redblue
d:\>cd django_redblue

# virtualenvの作成
d:\django_redblue>virtualenv -p c:\python34\python.exe env

# Activateとdjangoとwfastcgiのインストール
d:\django_redblue>env\Scripts\activate
(env) d:\django_redblue>pip install django
(env) d:\django_redblue>pip install wfastcgi

# プロジェクトの生成
# `django-admin.py startproject myproject`(.pyあり)だと、`ImportError: No module named django.core`エラーになった
(env) d:\django_redblue>django-admin startproject redblue_project

# 各アプリ(red_appとblue_app)のひな形を生成
(env) d:\django_redblue>cd redblue_project
(env) d:\django_redblue\redblue_project>mkdir apps\red_app
(env) d:\django_redblue\redblue_project>mkdir apps\blue_app
(env) d:\django_redblue\redblue_project>python manage.py startapp red_app apps/red_app
(env) d:\django_redblue\redblue_project>python manage.py startapp blue_app apps/blue_app
この時点でひな形が完成したので、引き続きred_appとblue_appを作成します。
なお、両アプリの内容はほとんど同じなので、blue_app分は省略します。
テンプレートの作成
D:\django_redblue\redblue_project\apps\red_app\templates\red.html
{% load staticfiles %}
<link href={% static 'css/common.css' %} rel='stylesheet'>

<h1 class="red_style">red app</h1>
CSSファイルの作成
D:\django_redblue\redblue_project\static\css\common.css
.red_style{
    color: red
}
.blue_style{
    color: blue
}
テンプレートを使うviewの作成
今回は Class base viewの TemplateView を使ってみます。
D:\django_redblue\redblue_project\apps\red_app\views.py
from django.views.generic import TemplateView

class RedIndexView(TemplateView):
    template_name = "red.html"
URLの設定
プロジェクトのurls.pyで、各アプリのurls.pyをincludeします。
D:\django_redblue\redblue_project\redblue_project\urls.py
from django.conf.urls import url, include
from django.contrib import admin

urlpatterns = [
    url(r'^red/', include('apps.red_app.urls', namespace='red_namespace')),
    url(r'^blue/', include('apps.blue_app.urls', namespace='blue_namespace')),
    url(r'^admin/', admin.site.urls),
]
各アプリのurls.pyで、先ほど作成したviewを指定します。
D:\django_redblue\redblue_project\apps\red_app\urls.py
from django.conf.urls import url
from .views import RedIndexView

urlpatterns = [
    url(r'^$', RedIndexView.as_view(), name='index'),
]
settings.pyの設定
変更箇所のみ記載します。
INSTALLED_APPS = [
    'django.contrib.admin',
    'django.contrib.auth',
    'django.contrib.contenttypes',
    'django.contrib.sessions',
    'django.contrib.messages',
    'django.contrib.staticfiles',
    'apps.red_app',   # add
    'apps.blue_app',  # add
]
...
# プロジェクトルートに置いた静的ファイル用フォルダを認識させるため、STATICFILES_DIRSを追加
STATICFILES_DIRS = [
    os.path.join(BASE_DIR, "static"),
]
Djangoアプリが完成したので、python manage.py runserverにて開発サーバーを起動し、動作確認をします。
http://localhost:8000/red

http://localhost:8000/blue

IISでホストするためのwfastcgiまわりの設定
続いて、IISでDjangoをホストするため、管理者権限のコマンドプロンプトで設定します。
(env) d:\django_redblue\redblue_project>%windir%\system32\inetsrv\appcmd unlock config -section:system.webServer/handlers
構成パス "MACHINE/WEBROOT/APPHOST" のセクション "system.webServer/handlers" のロックを解除しました。

(env) d:\django_redblue\redblue_project>wfastcgi-enable
構成変更を構成コミット パス "MACHINE/WEBROOT/APPHOST" の "MACHINE/WEBROOT/APPHOST" のセクション "system.webServer/fastCgi" に適用しました
"d:\django_redblue\env\scripts\python.exe|d:\django_redblue\env\lib\site-packages\wfastcgi.py" can now be used as a FastCGI script processor

(env) d:\django_redblue\redblue_project>%windir%\system32\inetsrv\appcmd set vdir "Default Web Site/" -physicalPath:"D:\django_redblue\redblue_project"
VDIR オブジェクト "Default Web Site/" は変更されました
Djangoをホストするweb.configファイルの作成
以前同様、Djangoをホストするweb.configファイルを作成します。
D:\django_redblue\redblue_project\web.config
<configuration>
  <appSettings>
    <add key="WSGI_HANDLER" value="django.core.wsgi.get_wsgi_application()" />
    <add key="PYTHONPATH" value="d:\django_redblue" />
    <add key="DJANGO_SETTINGS_MODULE" value="redblue_project.settings" />
  </appSettings>
  <system.webServer>
    <handlers>
        <add name="Python FastCGI" path="*" verb="*" modules="FastCgiModule" scriptProcessor="d:\django_redblue\env\scripts\python.exe|d:\django_redblue\env\lib\site-packages\wfastcgi.py" resourceType="Unspecified" />
    </handlers>
  </system.webServer>
</configuration>
この時点でhttp://localhost/red/やhttp://localhost/blue/にアクセスしても、静的ファイルであるCSSが配信されていません。

静的ファイルを配信するには
- 全体のweb.configファイルに、静的ファイルの配信について追加
- 静的ファイル向けのフォルダにweb.configを置き、全体のweb.configで設定したhandlerをremove
などの方法が考えられます。
前者の場合、handlerにStaticFileModuleを使った静的ファイルの配信を記載します。Python FastCGIよりも前に追加しないと配信されません。
IIS 7.0 のモジュールの概要
D:\django_redblue\redblue_project\web.config
...
<handlers>
    <add name="Python CSS" path="*.css" verb="GET" modules="StaticFileModule" resourceType="File" requireAccess="Read" />
    <add name="Python FastCGI" path="*" verb="*" modules="FastCgiModule" scriptProcessor="d:\django_redblue\env\scripts\python.exe|d:\django_redblue\env\lib\site-packages\wfastcgi.py" resourceType="Unspecified" />
</handlers>
...
後者の場合、以下の記事を参考に、静的ファイルのあるフォルダにweb.cofigファイルを用意します。
- 1.9. 静的ファイルを供給する — Python on Windows Azure Hands-on @ PyCon JP 2012 Sprints
- security - prevent IIS from executing scripts in a specific directory - Webmasters Stack Exchange
プロジェクトのweb.configで設定したhandlerのPython FastCGIをremoveします。
D:\django_redblue\redblue_project\static\web.config
<?xml version="1.0" encoding="UTF-8"?>
<configuration>
  <system.webServer>
    <handlers>
      <remove name="Python FastCGI" />
    </handlers>
  </system.webServer>
</configuration>
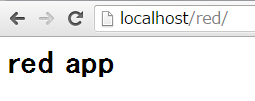
再度、http://localhost/red/などにアクセスすると、静的ファイルが配信され、colorの設定が行われました。


各アプリのstaticフォルダに静的ファイルを置くパターン
続いて、各アプリのstaticフォルダに静的ファイルを置く方法を試してみます。
アプリ作成まで
先ほど試したパターンとの違いは、
- CSSファイルは各アプリの
staticフォルダの下に置く settings.pyには、STATICFILES_DIRSは追加しない
となります。その部分を踏まえたアプリの作成とrunserverによる動作確認を行います。
IISまわりの設定
runserverにて動作確認が取れたら、wfastcgiまわりの設定を行います。
(env) d:\django_yellowgreen\yellowgreen_project>%windir%\system32\inetsrv\appcmd unlock config -section:system.webServer/handlers
構成パス "MACHINE/WEBROOT/APPHOST" のセクション "system.webServer/handlers" のロックを解除しました。

(env) d:\django_yellowgreen\yellowgreen_project>wfastcgi-enable
構成変更を構成コミット パス "MACHINE/WEBROOT/APPHOST" の "MACHINE/WEBROOT/APPHOST" のセクション "system.webServer/fastCgi" に適用しました
"d:\django_yellowgreen\env\scripts\python.exe|d:\django_yellowgreen\env\lib\site-packages\wfastcgi.py" can now be used as a FastCGI script processor

(env) d:\django_yellowgreen\yellowgreen_project>%windir%\system32\inetsrv\appcmd set vdir "Default Web Site/" -physicalPath:"D:\django_yellowgreen\yellowgreen_project"
VDIR オブジェクト "Default Web Site/" は変更されました
次に、http://localhost/yellowへとアクセスして動作を確認します。
テンプレートの中身は表示されたものの、静的ファイルを読み込めていないため、colorが設定されていません。

そのため、
の作業を以下を参考に行います。
collectstaticの実行
settings.pyにSTATIC_ROOTを追加します。内容はcollectstaticの実行時に静的ファイルが集められるフォルダとなります。
STATIC_ROOT = os.path.join(BASE_DIR, 'static_for_deploy')
次に、collectstaticを実行し、静的ファイルを集めます。
(env) d:\django_yellowgreen\yellowgreen_project>python manage.py collectstatic

You have requested to collect static files at the destination
location as specified in your settings:

    d:\django_yellowgreen\yellowgreen_project\static_for_deploy

This will overwrite existing files!
Are you sure you want to do this?

Type 'yes' to continue, or 'no' to cancel: yes
...
Copying 'd:\django_yellowgreen\yellowgreen_project\apps\green_app\static\css\green.css'

58 static files copied to 'd:\django_yellowgreen\yellowgreen_project\static_for_deploy'.
IISでの仮想ディレクトリ設定
IISでの仮想ディレクトリ設定では、以下の手順にてSTATIC_URLとSTATIC_ROOTの紐付けを行います。
inetmgrでIISマネージャーを開く- 左ペインの
サイト > Default Web Siteをクリック - 右ペインの
仮想ディレクトリの表示をクリック - 右ペインの
仮想ディレクトリの追加をクリック - 以下の内容を入力
- エイリアス:
static - 物理パス:
D:\django_yellowgreen\yellowgreen_project\static_for_deploy
- エイリアス:
web.configファイルの追加
忘れずに静的ファイルを配信するフォルダにweb.configファイルを作成します(D:\django_yellowgreen\yellowgreen_project\static_for_deploy\web.config)。
なお、web.configファイルの内容は、こんな感じでD:\django_redblue\redblue_project\static\web.configと同じものになります。
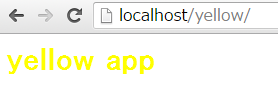
その後、再度http://localhost/yellowへとアクセスすると、CSSが適用されてcolorが設定されました。

参考
公式ドキュメント関係
- Managing static files (e.g. images, JavaScript, CSS) | Django documentation | Django
- Deploying static files | Django documentation | Django
- django-admin-collectstatic - The staticfiles app | Django documentation | Django
仮想ディレクトリまわり
ソースコード(再掲)
各パターンのリポジトリを用意しています。
- プロジェクトルートの
staticを、STATICFILES_DIRSに指定したパターン - 各アプリに
staticがあるパターン
*1:今回の例ではJavaScriptはないけど...