WSL2 + Playwrightな環境にて、codegen機能によりReactアプリやDjango管理サイト向けのテストコードを自動生成してみた

前回の記事にて、WSL2上にPlaywrightをインストールして動作することを確認しました。
WSL2上にインストールしたPlaywrightを、Visual Studio Codeから動かしてみた - メモ的な思考的な

これにより環境ができたため、次はPlaywrightのcodegen機能でテストコードを自動生成してみることにしました。
Test Generator | Playwright

特に、codegen機能で生成されるテストコードが

  • ReactのようなSPAアプリ
  • Django管理サイトのような認証が必要なアプリ

にも対応しているのか気になったため、試してみたときのメモを残します。

 
目次


環境

Playwright環境は前回同様とします。

 
また、ReactやDjango管理サイトを持つアプリは、以前作成したものを流用し、WSL2上に構築します。
django-vite を使って、Django の template 上で React を動かしてみた - メモ的な思考的な

  • Django環境
  • React 環境
    • React 18.2.0
    • React Router 6.4.4
    • Vite 3.2.3
    • TypeScript 4.6.4

 
なお、ReactやDjangoは開発モードで起動しておきます。

# React
$ npm run dev

# Django
$ python manage.py runserver


自動生成するテストコード

SPAなReactアプリ向け

まずはSPAなReactアプリ向けのテストコードを生成してみます。

なお、現在の公式ドキュメントでは生成したテストコードの出力先についての記載が見当たりませんでした。

そこで、 npx playwright codegen --help によりヘルプを確認してみます。

$ npx playwright codegen --help
Usage: npx playwright codegen [options] [url]

open page and generate code for user actions

Options:
  -o, --output <file name>        saves the generated script to a file
  --target <language>             language to generate, one of javascript, playwright-test, python, python-async, python-pytest, csharp, csharp-mstest, csharp-nunit, java (default:
                                  "playwright-test")
  --save-trace <filename>         record a trace for the session and save it to a file
  -b, --browser <browserType>     browser to use, one of cr, chromium, ff, firefox, wk, webkit (default: "chromium")
  --block-service-workers         block service workers
  --channel <channel>             Chromium distribution channel, "chrome", "chrome-beta", "msedge-dev", etc
  --color-scheme <scheme>         emulate preferred color scheme, "light" or "dark"
  --device <deviceName>           emulate device, for example  "iPhone 11"
  --geolocation <coordinates>     specify geolocation coordinates, for example "37.819722,-122.478611"
  --ignore-https-errors           ignore https errors
  --load-storage <filename>       load context storage state from the file, previously saved with --save-storage
  --lang <language>               specify language / locale, for example "en-GB"
  --proxy-server <proxy>          specify proxy server, for example "http://myproxy:3128" or "socks5://myproxy:8080"
  --proxy-bypass <bypass>         comma-separated domains to bypass proxy, for example ".com,chromium.org,.domain.com"
  --save-har <filename>           save HAR file with all network activity at the end
  --save-har-glob <glob pattern>  filter entries in the HAR by matching url against this glob pattern
  --save-storage <filename>       save context storage state at the end, for later use with --load-storage
  --timezone <time zone>          time zone to emulate, for example "Europe/Rome"
  --timeout <timeout>             timeout for Playwright actions in milliseconds, no timeout by default
  --user-agent <ua string>        specify user agent string
  --viewport-size <size>          specify browser viewport size in pixels, for example "1280, 720"
  -h, --help                      display help for command

Examples:

  $ codegen
  $ codegen --target=python
  $ codegen -b webkit https://example.com

 
オプションが色々と表示されましたが

-o, --output <file name>        saves the generated script to a file

と、 -o, --output を指定すれば良さそうです。

 
そこで以下を入力したところ、Chromiumが起動しました。

$ npx playwright codegen localhost:8000 -o localhost.spec.ts

 
今回は、React Routerによるルーティングの動作確認も兼ねて、

  1. すでにあるタスクをクリック
  2. 戻るボタンで一覧に戻る

という操作をテストコードに落としてみます。

 
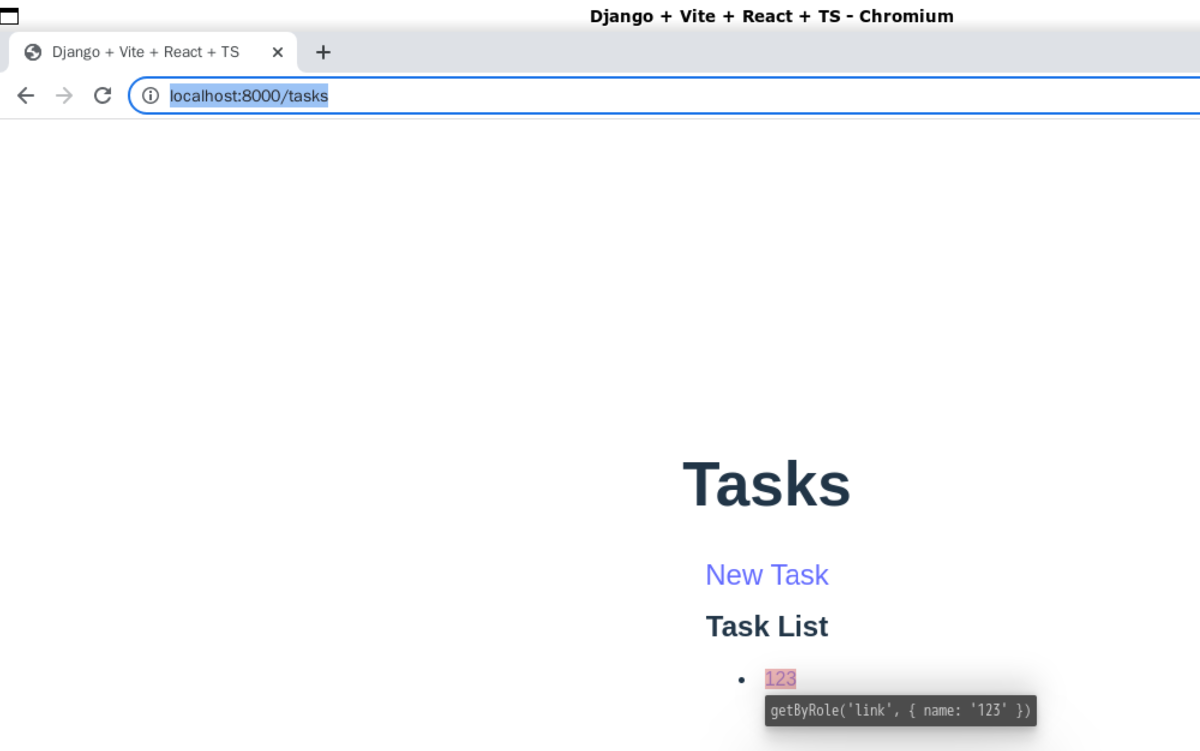
まず、すでにあるタスクをクリックします。

 
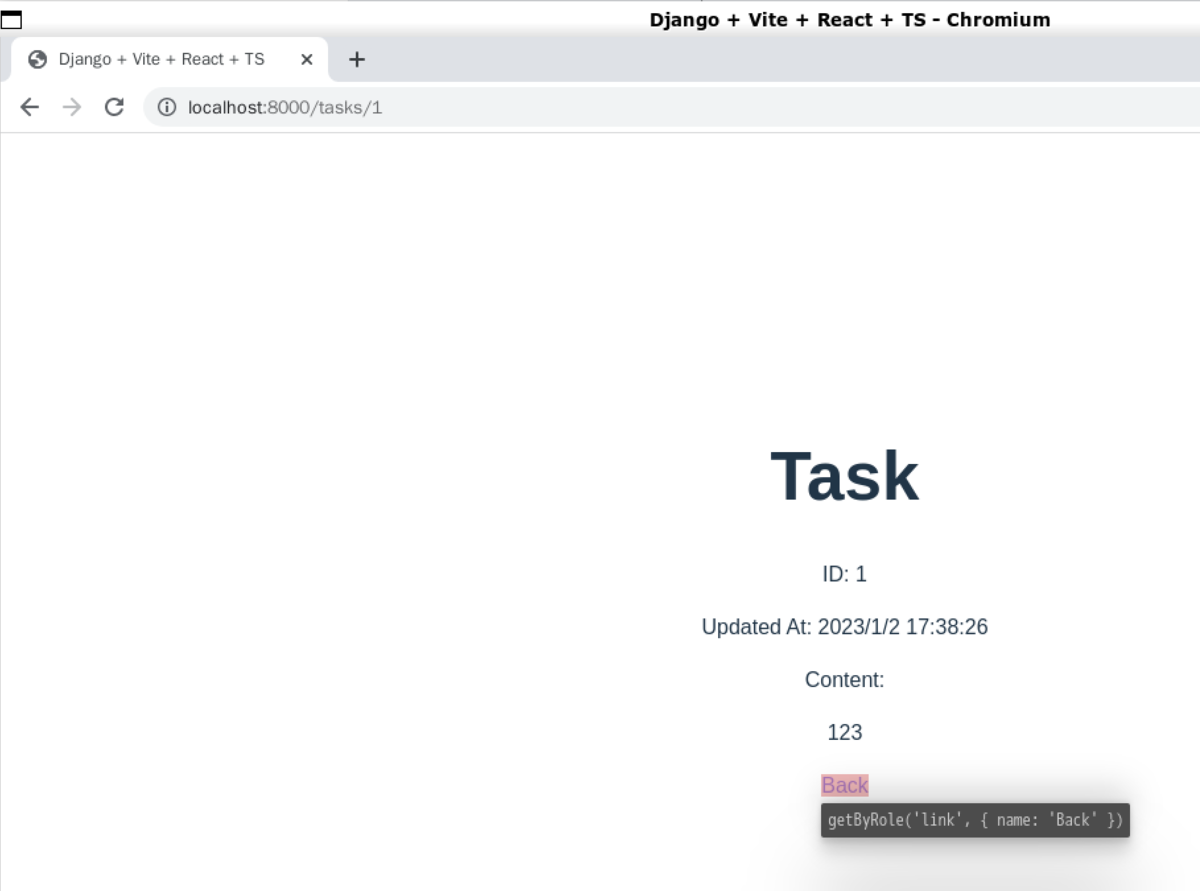
続いて、戻るボタンをクリックします。

 
以上で操作が終わったたため、ブラウザを閉じます。

すると、 e2e ディレクトリの中に localhost.spec.ts ファイルが生成されていました。

import { test, expect } from '@playwright/test';

test('test', async ({ page }) => {
  await page.goto('http://localhost:8000/');
  await page.goto('http://localhost:8000/tasks');
  await page.getByRole('link', { name: '123' }).click();
  await page.getByRole('link', { name: 'Back' }).click();
});

 
次に、このままでテストコードとして使えるのか確認してみます。

自動生成されたテストコードをVS Codeにて実行したところパスしました。SPAなアプリでもPlaywrightは問題なく動くようです。


処理に時間がかかるReactアプリ

昔、Seleniumでテストコードを書いていた時に悩んだのが「時間のかかる処理が含まれる場合、テストコードでどのように待機させるか」でした。

Playwrightの場合はどうだろうと思い調べたところ、自動でいい感じに待機してくれそうでした。
Auto-waiting | Playwright

 
そこで、先程試していたReactアプリに対し、「時間がかかるような処理を追加することで、自動生成されるテストコードがどのように変化するか」を試してみます。

 
まずはReactアプリで処理に時間がかかるよう修正を加えます。

今回は、単純に5秒くらいsleepするコードを追加しました。

export const Index = () => {
  const [tasks, setTasks] = useState<Task[]>([])

  const fetchTasks = async() => {
    const apiUrl = 'http://localhost:8000/api/tasks/'
    const response: AxiosResponse<ApiGetResponse> = await axios.get(apiUrl)

    // ここを追加し、擬似的に遅くしてみた
    await new Promise(resolve => setTimeout(resolve, 5000))

    setTasks(response.data)
  }

 
この状態で React + Django を起動し、テストコードを生成してみます。

$ npx playwright codegen localhost:8000 -o localhost_sleep.spec.ts

 
ただ、生成されたテストコードは、sleepなしのものと同じ内容でした。

生成されたテストコードを実行してみたところ、sleepしているところでテストが待ちに入りました。

 
5秒ほど待つとテストの実行が再開し、テストがパスしました。

VS Code上でも、sleepしている箇所は5秒ほどかかっていることが分かります。

 
これにより、Playwrightでは処理に時間がかかる場合は自動で待機してくれそうでした。


Django管理サイト

続いて、認証が必要となるDjango管理サイト向けのテストコードを生成してみます。

なお、認証で使った情報については、 --save-storage オプションを使うことでローカル保存されるようです。
Preserve authenticated state | Test Generator | Playwright

 
まずは

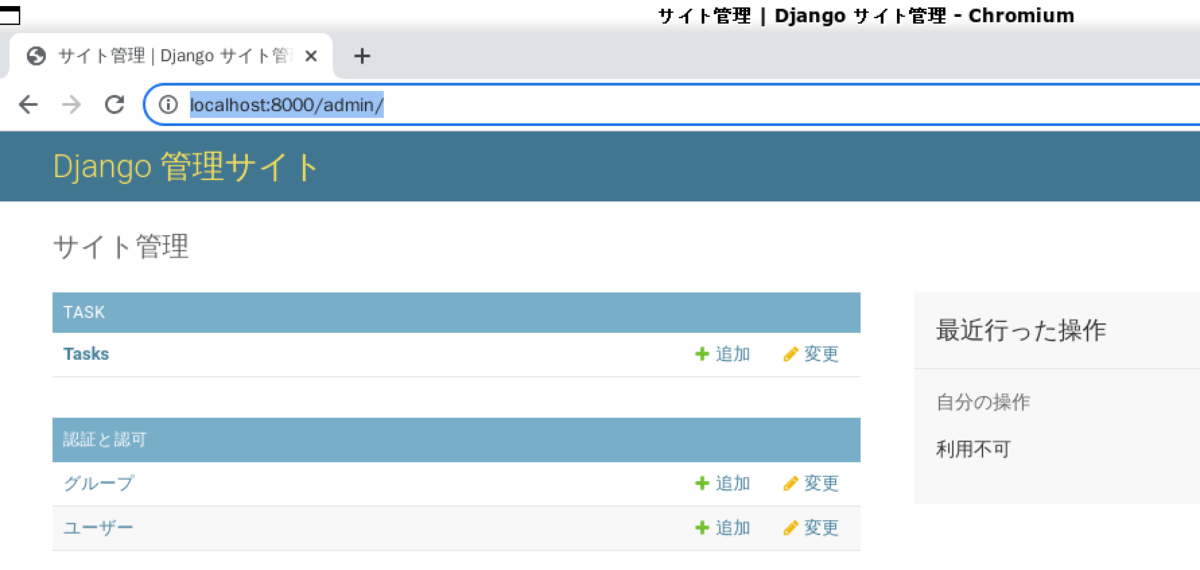
  1. Django管理サイトでログイン
  2. Taskモデルの詳細を開く

という操作を元にしたテストコードを生成してみます。

なお、後でログイン情報を再利用できるよう、 --save-storage オプションで認証情報をファイルに保存してみます。

$ npx playwright codegen localhost:8000/admin/ -o localhost_django_admin.spec.ts --save-storage secret.json

 
操作後、以下のテストコードが生成されていました。

import { test, expect } from '@playwright/test';

test('test', async ({ page }) => {
  await page.goto('http://localhost:8000/admin/login/?next=/admin/');
  await page.getByLabel('ユーザー名:').click();
  await page.getByLabel('ユーザー名:').fill('admin');
  await page.getByLabel('ユーザー名:').press('Tab');
  await page.getByLabel('パスワード:').fill('pass');
  await page.getByRole('button', { name: 'ログイン' }).click();
  await page.getByRole('link', { name: 'Tasks' }).click();
  await page.getByRole('link', { name: '123' }).click();
});

 
また、同一ディレクトリに secret.json ファイルもできていました。

中身を確認するとCookie情報が出力されていました。

{
  "cookies": [
    {
      "name": "csrftoken",
      "value": "HWgAoaHgFP2vqyVzU0nVE8lHgOAEhnD0",
      "domain": "localhost",
      "path": "/",
      "expires": 1704112164.422583,
      "httpOnly": false,
      "secure": false,
      "sameSite": "Lax"
    },
    {
      "name": "sessionid",
      "value": "z8nhd1j1s56jn0af84g5b8uskosy0gj0",
      "domain": "localhost",
      "path": "/",
      "expires": 1673872159.310954,
      "httpOnly": true,
      "secure": false,
      "sameSite": "Lax"
    }
  ],
  "origins": []
}

 
生成されたテストコードを実行したところ、問題なくパスしました。


ファイルから認証情報を読み込み、Django管理サイトの認証をスキップする

先ほど secret.json として保存した認証情報は、 --load-storage オプションにより読み込むことができそうでした。

そこで、認証情報を読み込んだ上で、

  1. Task一覧ページを開く
  2. Taskにチェックを入れ、ドロップダウンから「削除」を選択して実行
  3. 削除はキャンセルする

という操作をしてみました。

$ npx playwright codegen localhost:8000/admin/ -o localhost_django_admin_with_load_storage.spec.ts --load-storage secret.json

 
コマンドを実行したところ、ブラウザが既にログインした状態で開きました。

 
操作を終えてブラウザを閉じると、以下のテストコードが生成されていました。

先ほどのテストコードとは異なり、ログインする処理のコードが見当たりません。一方、 test.use に認証情報ファイルが指定されていました。

import { test, expect } from '@playwright/test';

test.use({
  storageState: 'secret.json'
});

test('test', async ({ page }) => {
  await page.goto('http://localhost:8000/admin/');
  await page.getByRole('link', { name: 'Tasks' }).click();
  await page.getByText('変更する task を選択 task を追加 操作: --------- 選択された tasks の削除 実行 1個の内ひとつも選択されていません 内容 Upd').click();
  await page.locator('input[name="_selected_action"]').check();
  await page.getByRole('combobox', { name: '操作:' }).selectOption('delete_selected');
  await page.getByRole('button', { name: '実行' }).click();
  await page.getByRole('link', { name: '戻る' }).click();
});

 
このテストコードを実行したところ、テストが落ちました。認証情報ファイルが見当たらないようです。

 
調べてみたところ、 path.join() が必要そうでした。
typescript - ENOENT: no such file or directory, when attempting to upload a file with playwright - Stack Overflow

そこで、自動生成されたテストコードを修正します。

import { test, expect } from '@playwright/test';
import path from 'path';  // 追加

test.use({
  // 差し替え
  // storageState: 'secret.json'
  storageState: path.join(__dirname, 'secret.json')
});

// 以降は同じ

 
この状態で再度テストを実行したところ、パスしました。


おわりに

今回、気になるパターンをいくつか試してみて、ある程度は自動生成したものがそのまま使えそうだと分かりました。


ソースコード

Githubに上げました。

アプリ側のソースコードはこちら。

 
Playwright側のソースコードはこちら。

WSL2上にインストールしたPlaywrightを、Visual Studio Codeから動かしてみた

以前、E2Eテスト用のツールとしてSeleniumやRobot Frameworkをさわっていました。
Selenium カテゴリーの記事一覧 - メモ的な思考的な

 
そんな中、最近のメジャーなE2Eテスト用ツールは何だろうと思い調べてみたところ、CypressとPlaywrightがありました。

CypressとPlaywrightのどちらが自分に合っていそうかを調べたところ、以下の記事の比較表に出会いました。
E2Eテストフレームワークはどれを選べばいいんじゃい!

上記記事で記載されていた特徴のうち、気になったのは以下でした。

  • 自分のブラウザ操作を記録してコードを生成できるのが非常に魅力的
  • 試験的機能としてUIフレームワークコンポーネントをテストできる
  • 公式がVSCode拡張機能を出している
  • Microsoft製でゼロコストでTypeScript対応可能
  • プラグインなしでVisual Regression Test(以下VRT)が可能
  • テストが失敗したときにtraceファイルを出力でき、traceファイルには以下のデータが含まている

E2Eテストフレームワークはどれを選べばいいんじゃい!

 
Playwrightを試してみたくなりましたが、WSL2上にインストールしたPlaywrightが果たして動作するのか、公式ドキュメントには記載がありませんでした。

そこで、WSL2上で試してみたときのメモを残します。

 
目次


環境


セットアップ

インストール

Playwrightのドキュメントに従いインストールします。
Installation | Playwright

$ npm init playwright@latest
Need to install the following packages:
  create-playwright@1.17.124
Ok to proceed? (y) y
Getting started with writing end-to-end tests with Playwright:
Initializing project in '.'

 
途中で対話形式になります。今回は以下の通りの設定としました。

✔ Do you want to use TypeScript or JavaScript? · TypeScript
✔ Where to put your end-to-end tests? · e2e
✔ Add a GitHub Actions workflow? (y/N) · false
✔ Install Playwright browsers (can be done manually via 'npx playwright install')? (Y/n) · true
✔ Install Playwright operating system dependencies (requires sudo / root - can be done manually via 'sudo npx playwright install-deps')? (y/N) · false

 
入力が終わると、インストールが継続・完了します。

Initializing NPM project (npm init -y)…
...
Inside that directory, you can run several commands:

  npx playwright test
    Runs the end-to-end tests.

  npx playwright test --project=chromium
    Runs the tests only on Desktop Chrome.

  npx playwright test example
    Runs the tests in a specific file.

  npx playwright test --debug
    Runs the tests in debug mode.

  npx playwright codegen
    Auto generate tests with Codegen.

We suggest that you begin by typing:

    npx playwright test

And check out the following files:
  - ./e2e/example.spec.ts - Example end-to-end test
  - ./tests-examples/demo-todo-app.spec.ts - Demo Todo App end-to-end tests
  - ./playwright.config.ts - Playwright Test configuration

Visit https://playwright.dev/docs/intro for more information. ✨


動作確認

インストールでは、Playwrightを動かすためのサンプルコードも作成されます。

インストール直後の状態で動作するか、動作を確認してみたところ、エラーで落ちました。

$ npx playwright test

Running 1 test using 1 worker
  1) [Google Chrome] › example.spec.ts:3:5 › homepage has title and links to intro page ============

    browserType.launch:
    ╔══════════════════════════════════════════════════════╗
    ║ Host system is missing dependencies to run browsers. ║
    ║ Please install them with the following command:      ║
    ║                                                      ║
    ║     sudo npx playwright install-deps                 ║
    ║                                                      ║
    ║ Alternatively, use apt:                              ║
    ║     sudo apt-get install libatk1.0-0\                ║
    ║         libatk-bridge2.0-0\                          ║
    ║         libcups2\                                    ║
    ║         libatspi2.0-0\                               ║
    ║         libxcomposite1\                              ║
    ║         libxdamage1\                                 ║
    ║         libxfixes3\                                  ║
    ║         libxrandr2\                                  ║
    ║         libgbm1\                                     ║
    ║         libxkbcommon0\                               ║
    ║         libpango-1.0-0\                              ║
    ║         libcairo2\                                   ║
    ║         libasound2                                   ║
    ║                                                      ║
    ║ <3 Playwright Team                                   ║
    ╚══════════════════════════════════════════════════════╝


不足しているパッケージの追加

エラーメッセージにあるように、パッケージが不足しているようです。

そのため、エラーメッセージのままのコマンドを実行すると、別のエラーになりました。

$ sudo npx playwright install-deps
sudo: npx: コマンドが見つかりません

 
issueの記載に従い --dry-run オプション付き・sudoなしで実行してみると、動作しました。
[BUG] Unable to run playwright scripts on Jenkins · Issue #12190 · microsoft/playwright

$ npx playwright install-deps --dry-run
sudo -- sh -c "apt-get update&& apt-get install -y --no-install-recommends libasound2 libatk-bridge2.0-0 libatk1.0-0 libatspi2.0-0 libcairo2 libcups2 libdbus-1-3 libdrm2 libgbm1 libglib2.0-0 libnspr4 libnss3 libpango-1.0-0 libwayland-client0 libx11-6 libxcb1 libxcomposite1 libxdamage1 libxext6 libxfixes3 libxkbcommon0 libxrandr2 xvfb fonts-noto-color-emoji fonts-unifont libfontconfig1 libfreetype6 xfonts-cyrillic xfonts-scalable fonts-liberation fonts-ipafont-gothic fonts-wqy-zenhei fonts-tlwg-loma-otf fonts-freefont-ttf ffmpeg libcairo-gobject2 libdbus-glib-1-2 libgdk-pixbuf-2.0-0 libgtk-3-0 libpangocairo-1.0-0 libx11-xcb1 libxcb-shm0 libxcursor1 libxi6 libxrender1 libxtst6 libenchant-2-2 gstreamer1.0-libav gstreamer1.0-plugins-bad gstreamer1.0-plugins-base gstreamer1.0-plugins-good libicu70 libegl1 libepoxy0 libevdev2 libffi7 libgles2 libglx0 libgstreamer-gl1.0-0 libgstreamer-plugins-base1.0-0 libgstreamer1.0-0 libgudev-1.0-0 libharfbuzz-icu0 libharfbuzz0b libhyphen0 libjpeg-turbo8 liblcms2-2 libmanette-0.2-0 libnotify4 libopengl0 libopenjp2-7 libopus0 libpng16-16 libproxy1v5 libsecret-1-0 libsoup2.4-1 libwayland-egl1 libwayland-server0 libwebpdemux2 libwoff1 libxml2 libxslt1.1 libx264-163 libatomic1 libevent-2.1-7"

 
sudoなしで動作しそうなので、試してみたところインストールができました。

$ npx playwright install-deps
...

 
なお、インストール中にサービスの再起動メッセージが表示されましたので、デフォルトで選択されている内容で 了解 としました。

┌────┤ Daemons using outdated libraries ├─────┐
│                                             │
│                                             │
│ Which services should be restarted?         │
│                                             │
│    [ ] ModemManager.service                 │
│    [ ] networkd-dispatcher.service          │
│    [*] packagekit.service                   │
│    [*] polkit.service                       │
│    [ ] unattended-upgrades.service          │
│                                             │
│                                             │
│          <了解>            <取消>


再度動作確認

不足していたパッケージの追加ができたため、再度動作確認したところ、テストがパスしました。

$ npx playwright test

Running 1 test using 1 worker

  1 passed (3s)

To open last HTML report run:

  npx playwright show-report


Visual Studio Code から Playwright を動かす

Playwright公式で、Visual Studio Code向けの拡張機能が提供されています。
Getting started - VS Code | Playwright

そこで、拡張機能の使い勝手を試してみることにしました。

 
まずは、拡張機能をインストールします。

次に、WSL2のターミナル上でインストール直後に自動生成されたディレクトリへ移動し、 code .Visual Studio Code を開きます。

すると、Windows側でVisual Studio Code が開きます。

 
拡張機能をインストールしていると Testing が追加されています。その Testing をクリックすると、テストコードが表示されます。

 
テストコードには実行ボタンやデバッグ実行ボタンが表示されています。

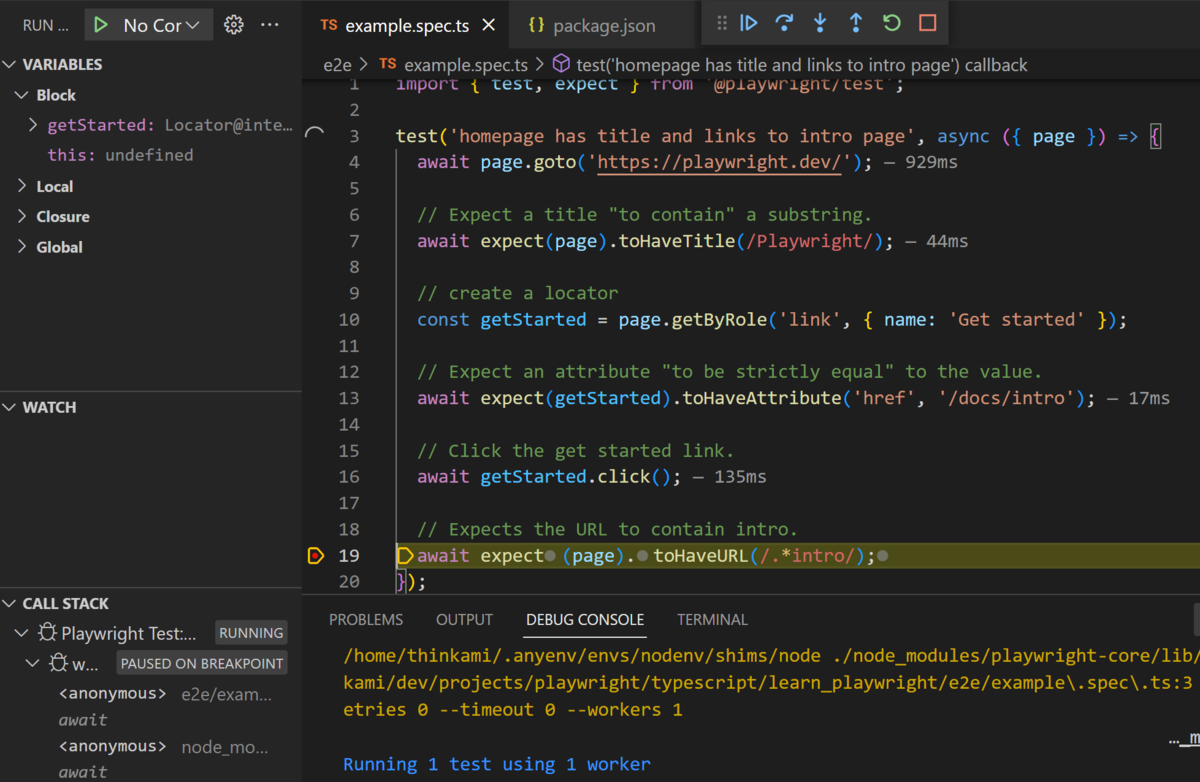
試しに、テストコード上にブレークポイントを置いて実行してみたところ、ブレークポイントのところで止まりました。

 
次に、左ペインの Show browser にチェックを入れてデバッグ実行してみます。

 
すると、ブラウザ (Chromium) が起動してテストが進み、ブレークポイントのところでブラウザの動作が停止しました。

 
以上より、WSL2上にPlaywrightをインストールしても、Visual Studio Code と組み合わせて動かすことができました。

2022年の振り返りと2023年の目標

例年通り、2022年の振り返りと2023年の目標っぽいものを書いてみます。


2022年の振り返り

2021年の振り返りと2022年の目標 - メモ的な思考的な で立てた目標っぽいものについて、ブログの記事を中心に振り返ってみます。

 
目次


身近な技術の素振り・深堀りをして、技術のキャッチアップを継続

Ruby / Rails / React まわり

仕事では、2022年も引き続き

  • Ruby + Rails + OpenAPI
  • React + TypeScript + Vite.js

を書いていました。

そのため、雰囲気でしか分かってなかったことを中心に、メモを残しました。


RubyMineまわり

RubyMineを日常的に使っているため、使ってる中での小ネタも残しました。

 
特に印象に残ったこととしては、Railwaysプラグインの件をGithub issueにも回避策をコメントしたところ、同様に困っている人から +1 をいただいたことです。細かなことでもコメントすれば他の人の役に立つということを実感できました。
Routes window not visible in IDEA 2022.1 · Issue #54 · basgren/railways

今後も同様なことがあれば、細かなことでもどこかに残していこうと思います。

 
仕事以外では、りんご記録アプリをHerokuからGoogle Cloud Run + Litestreamに移行してたりしました。
Python + Django + Highcharts + Coogle Cloud Cloud Run + Cloud Storage + Litestream で食べたリンゴの割合をグラフ化してみた - メモ的な思考的な

ちなみに、今のところ月10円程度のランニングコストでりんご記録アプリは動作しています。

 
他に、レビュアーとして参加した書籍も発売されました。
書籍レビュアーとして参加した、 #Python実践レシピ が発売になります - メモ的な思考的な


腰痛を再び起こさないよう、ストレッチや筋トレの継続

細々と継続できました。ストレッチは風呂上がりに行うのが日課となりました。

ただ、ぎっくり腰にはならなかったものの、冷え性による腰痛はたびたび起こしていました。この年末年始も。。

とはいえ、「自分の体からすると、冷えによる腰痛は脚を温めれば治る」と把握でき、「この腰痛は予防できそう」と分かったことが2022年の収穫でした。


その他

イベント

久しぶりのオフラインイベントとして、PyCon JP 2022に参加しました。
#pyconjp PyCon JP 2022に参加しました - メモ的な思考的な

他にもオンラインイベントにいくつか参加していました。


Github

2021年より微増といった感じです。


ドラクエウォーク

今年も約375万歩、歩いていたようです。


8月

2021年の8月はぎっくり腰を起こしていました。
ヒドいぎっくり腰になったので、経過を記録してみた - メモ的な思考的な

2022年は何も起こらないといいなーと思って過ごしていたら、また同じ8月に病気になってダウンしました。。


2023年の目標っぽいもの

現時点で色々ありそうな年だと分かっているため、2022年のものにちょっと手を加えた

  • 身近な技術の素振り・深堀りをして、技術のキャッチアップを継続
  • 腰痛を再び起こさないよう、ストレッチや筋トレの継続
  • 英語勉強を継続的に行う
  • 8月を健康に過ごす

あたりを目標っぽいものにします。

 
というところで、今年もよろしくお願いします。

「単体テストの考え方/使い方」を読んだ

本屋へ出かけたところ、書籍「単体テストの考え方/使い方」を見かけました。
単体テストの考え方/使い方 | マイナビブックス

表紙に

  • 書名に単体テストと書かれていたこと
  • 原著がManning Publications社なこと

とあったため、購入して読むことにしました。

 
最初、書名から「単体テストに特化して知識を得られそう」という期待を持って読み始めました。

ただ、読み進めていくうちに

など、単体テスト以外の話題にガッツリふれられていることに気づきました。

そのため、読み終わった時の印象は「単体テストを元に、いかにより良い設計とするか」となり、当初の期待以上の内容でした。

各章ごとにまとめページがあったことも理解の手助けとなり、後から振り返りやすくできているように感じました。

 
また、当然ながらテストに関する各種用語の定義の記載があり、テストまわりの知識を増やせました。

例えば、5章ではテストダブルの種類やそれらの違いなどが記載されています。

 
ただ、この本だけではテストコードを書けるようになるかというとそれも難しいような気もしました。

そのため、各言語のテスティングフレームワークについて、深掘りしている書籍やWebの記事を合わせて読むと良さそうです。

例えば、自分がよくさわる言語であれば以下のあたりです。

 
あとは訳注が多めに用意されており、別途読みたくなる関連資料が多く紹介されていました。

特に、Web記事については翻訳版が存在する場合は翻訳版へのリンクも記載されていたため、ありがたかったです。

 
個人的に発見だったのは「単体テストをどのように行うべきかについて異なる見解を持つ学派がある」ことであり、学派として

  • 古典学派
  • ロンドン学派

の2つがあると知ったことでした。

各学派のテストコードが書かれていたので読んだところ、たしかに違いがありました。

 
過去記事にもある通り、自分は古典学派寄りのテストコードを読んだり書いたりしてきたため、ロンドン学派のテストコードは「こういう書き方もあるんだ」と新鮮な感じでした。

 
そのため、ロンドン学派のテストコードについても知りたくなったため、後日、ロンドン学派の以下の書籍も読んでみようと思いました。
実践テスト駆動開発 テストに導かれてオブジェクト指向ソフトウェアを育てる(和智 右桂 和智 右桂 髙木 正弘 髙木 正弘 Steve Freeman Nat Pryce)|翔泳社の本

 
最後になりましたが、著者や翻訳者のみなさま、良い本をありがとうございました。

「手を動かしながら学ぶTypeScript」を写経しながら読んだ

ここしばらく仕事でTypeScriptも書いているものの、まだ雰囲気で書いている感がありました。

そのため、腰を据えて学ぼうと考え、手を動かしながら理解できるチュートリアル的な書籍を探したところ、「手を動かしながら学ぶTypeScript」に出会いました。

 
出版社のWebサイトを見ると

本書では「JavaScript 開発の経験はあるが、TypeScript についてはこれから学ぼうと思っている」という方を対象に、次のように本書の前半部分ではTypeScriptの基礎を解説し、それ以降では「実際に動くものを作ってみる」という内容となっています。

手を動かしながら学ぶ TypeScript | 書籍詳細|株式会社 C&R研究所

とあり、自分の目的と一致してそうでした。

そこで、写経しながら読んだ時のメモを残します。

 
なお、書籍ではwebpackを使っているものの、仕事ではViteを使っていることもあり、Vite + TypeScriptで写経しました。

また、最新のTypeScriptなどで写経しても問題ないだろう(し、問題あったら対応してみよう)と考えて、書籍とは異なるバージョンのTypeScriptで写経しました。

 
目次


環境


感想

書籍では、チュートリアル的に

  • Node.js
  • ブラウザで動くアプリ
  • ReactのUIライブラリ

の3別分野のアプリを作っていきます。

仕事でReactを使ったWebアプリケーションを書いていることから、特に詰まることもなく進められました。

Chapter3までが基本的な機能の解説に感じた一方で、4以降はTypeScript以外の知識も必要にも感じました。

そのため、WebアプリケーションやReactを書いていないとしたら、Chapter4や5は難しく感じるかもしれないです。

 
また、書籍の流れとしては、

  1. まずTypeScriptで書く
  2. 書いたコードの問題点を挙げる
  3. 問題点を解消するようなTypeScriptの機能を解説
  4. 解説したTypeScriptの機能を作って、1のコードをリファクタリング

が繰り返されるため、「TypeScriptの機能を使うと、こんなふうに書けるんだ」と理解しやすかったです。

著者のみなさま、良い本をありがとうございました。

 
なお、自分が雰囲気で書いていた

  • as を使った型アサーション
  • keyoftypeof の使い方
  • 高度な型の Mapped Types や Conditional Types

あたりは、書籍を写経するだけでは理解が浅そうだったので、自分の身近な内容を使い、TypeScript Playgroundを使って再実装してみました。
https://www.typescriptlang.org/play/


この書籍で手を動かせたため、次は評判の良い以下の本を読み進めようと思いました。

   
以降は個人的なメモとなります。


Viteでの環境構築

書籍とは異なりViteで環境構築をしたことから、作業ログを残しておきます。

Vite環境を作るため、Webサイトの手順に従って作業を進めました。
はじめに | Vite


Chapter4向け

webpackの場合は、追加で色々インストールする必要がありました。

一方Viteであれば、手元では npm create だけで十分でした。

$ npm create vite@latest
Need to install the following packages:
  create-vite@4.0.0
Ok to proceed? (y) y
✔ Project name: … browser-app
✔ Select a framework: › Vanilla
✔ Select a variant: › TypeScript

Scaffolding project in path/to/awesome-typescript-book/browser-app...

Done. Now run:

  cd browser_app
  npm install
  npm run dev


Chapter5向け

Chapter4と同様にセットアップしました。

$ npm create vite@latest
✔ Project name: … react-app
✔ Select a framework: › React
✔ Select a variant: › TypeScript

Scaffolding project in path/to/react-app...

Done. Now run:

  cd react-app
  npm install
  npm run dev

 
なお、 styled-components については別途インストールする必要があります。

$ npm install -D @types/styled-components

 
また、Viteで styled-components を使うには、以下のパッケージも追加で必要になりました。
How use with Vite.js, especially displayName for debugging. · Issue #350 · styled-components/babel-plugin-styled-components

$ npm install -D @babel/preset-typescript @babel/plugin-transform-typescript babel-plugin-styled-components

 
他に、Reactのバージョンを書籍の 17.0.2 ではなく 18.2.0 で写経したため、 React.VFC を使っていたところは React.FC へと差し替えました。
今更の React v18 : children の扱いが変わった (TypeScript) - かもメモ


書籍の内容を別の題材でも書いてみたところ

p93 型アサーション (type assertion)

アサーションについて改めて調べてみると、

TypeScriptが推論、分析された型は、任意の方法で上書きできます。これは、型アサーション(type assertion)と呼ばれるメカニズムによって行われます。TypeScriptの型アサーションは、純粋にコンパイラよりもその型をより良く理解していることだけでなく、後で推測するべきではないことをコンパイラに伝えています。

Type Assertion(型アサーション) - TypeScript Deep Dive 日本語版

とありました。

また、書籍 p94 に

アサーションの可否は、対象となる2つの型が包含関係にあるかどうかによって決定されます

とあり、「包含関係」が気になったので、別の題材で書いてみました。

まずはプリミティブ型の場合です。

// 一致
const a1 = 'シナノゴールド' as string

// 包含関係になっていない
const a2 = 'シナノゴールド' as number
// => Conversion of type 'string' to type 'number' may be a mistake 
//    because neither type sufficiently overlaps with the other. 
//    If this was intentional, convert the expression to 'unknown' first.

 
オブジェクト型の場合です。

// オブジェクト型
// 一致
const a3 = { name: 'シナノゴールド' } as { name: string }

// プロパティが異なる
const a4 = { name: 'シナノゴールド'} as { color: string }
// => Conversion of type '{ name: string; }' to type '{ color: string; }' may be a mistake
//    because neither type sufficiently overlaps with the other.
//    If this was intentional, convert the expression to 'unknown' first.
//    Property 'color' is missing in type '{ name: string; }' but required in type '{ color: string; }'.

// asで指定した型より実際のオブジェクトの方が、プロパティが多い
const a5 = { name: 'シナノゴールド', color: '黄' } as { name: string }

// asで指定した型より実際のオブジェクトの方が、プロパティが少ない
const a6 = { name: 'シナノゴールド' } as { name: string, color: string }

 
ただ、理由がなければ型アサーションを使わないほうが良さそうとも理解しました。

多くの場合、アサーションを使用すると、レガシーのコードを簡単に移行できます(また、コードベースにほかのコードのサンプルをコピー・ペーストしたりもできます)。しかし、アサーションの使用には注意が必要です。下記のように、必要なプロパティを実際に追加するのを忘れても、コンパイラはあなたを守りません

アサーションは害 | Type Assertion(型アサーション) - TypeScript Deep Dive 日本語版


p111 as constによる型アサーション

上記で見た as T ではなく as const とすることで、literal type wideningの動きを抑制するとありました。

literal type wideningのざっくりした説明は以下です。詳細は書籍のp53に載っています。

(53ページで説明した内容ですが、) 一言で言うと「ミュータブルな値の型は自動的に汎用型に変換される」というTypeScriptの仕様のことです

書籍「手を動かしながら学ぶTypeScript」 p111

 
literal type widening を実感するため、実際に試してみました。

const shinano_gold_name = 'シナノゴールド'
// => const shinano_gold_name: "シナノゴールド"
//    `シナノゴールド` というリテラル型

// as const 無し
const b2 = {
    name: shinano_gold_name
    // => (property) name: string
    //     nameはstring型
}

// as const あり
const b3 = {
    name: shinano_gold_name  
    // => (property) name: "シナノゴールド"
    //    nameは `シナノゴールド` というリテラル型
} as const

 
また、書籍では実際のデータから型を取り出すために typeof + as const を使っていたので、こちらも試してみました。

// 配列データから型を取り出す
// 配列データに as const を指定して、配列データの型をタプル型にする
const b_data = ['シナノゴールド', '秋映'] as const
// => const b_data: readonly ["シナノゴールド", "秋映"]

type b_type = typeof b_data[number]
// => type b_type = "シナノゴールド" | "秋映"


p113 タプル型・配列型から型の取り出し

ここでは、タプル型から T[number] で型を取り出す場合、ユニオン型へと変換されることを学びました。

// 配列型
type ApplesArray = string[]

type c1 = ApplesArray[0]
// => type c1 = string

type c2 = ApplesArray[number]
// => type c2 = string


// タプル型
type ApplesTuple = ['フジ', 'シナノスイート']

type d1 = ApplesTuple[0]
// => type d1 = "フジ"

type d2 = ApplesTuple[number]
// => type d2 = "フジ" | "シナノスイート"

 
なお、解説で

この number というキーワードは、実はタプル型に対しても使用できます。タプル型に対して [number] で型を取り出すと、そのタプル型が抱えているすべての型のユニオン型が取得できます

書籍「手を動かしながら学ぶTypeScript」 p113

とあった部分について、 number がキーワードなら他には何を指定できるのかが気になりました。

調べてみたところ、以下の記載がありました。

T[number]というのは配列である T に対して number 型のプロパティ名でアクセスできるプロパティの型ですから、すなわち配列 T の要素の型ですね。

TypeScriptの型入門 - Qiita

 
もしかしたら number はキーワードではなく型かもしれないと思って調べたところ、以下の記事がありました。
タプル型 T において、なぜ T[number] はUnion型になるのかに関する考察

その記事からリンクされていたプルリクを見ると

Indexed access types of the form T[K], where T is some type and K is a type that is assignable to keyof T (or assignable to number if T contains a numeric index signature).

Static types for dynamically named properties by ahejlsberg · Pull Request #11929 · microsoft/TypeScript

とありました。

プルリクによれば、 number 型を指定したときだけ index signature によるアクセスとなるようです。
Index Signatures | TypeScript: Documentation - Object Types

ということで、 number はどちらかというと型であると理解しました。

 
ちなみに、index signatureには数字文字列 ('0') も使えるようでした。
Index signature(インデックス型) - TypeScript Deep Dive 日本語版

// 配列型
type ApplesArray = string[]

type c3 = ApplesArray['0']
// => type c3 = string


// タプル型
type ApplesTuple = ['フジ', 'シナノスイート']

type d3 = ApplesTuple['0']
// => type d3 = "フジ"


p132 Mapped Types

書籍のp132では、ユニオン型がオブジェクトのキーとなるような例が記載されていました。

ただ、写経だけでは感覚がつかめなかったので、改めて試してみました。

// りんごの配列をタプル型にする
const appleNames = ['王林', '千秋', '秋映'] as const
// => const appleNames: readonly ["王林", "千秋", "秋映"]

// typeof Tuple[number] でリテラル型として取り出す
type AppleNames = typeof appleNames[number]
// => type AppleNames = "王林" | "千秋" | "秋映"

// Mapped Typesで、colorとparentsプロパティを持つりんご型を作る
type AppleTypes = {
    [key in AppleNames]: { color: string, parents: string[] }
}

// OKな例
const e1: AppleTypes = {
    '王林': { color: '黄', parents: ['ゴールデンデリシャス', '印度'] },
    '千秋': { color: '赤', parents: ['東光', 'フジ'] },
    '秋映': { color: '黄', parents: ['千秋', 'つがる'] },
}

// NGな例:キーが足りない
const e2: AppleTypes = {
    '王林': { color: '黄', parents: ['ゴールデンデリシャス', '印度'] },
    // => Type '{ 王林: { color: string; parents: string[]; }; }' 
    //    is missing the following properties from type 'AppleTypes': 秋映, 千秋
}

// NGな例:キーが多い
const e3: AppleTypes = {
    '王林': { color: '黄', parents: ['ゴールデンデリシャス', '印度'] },
    '千秋': { color: '赤', parents: ['東光', 'フジ'] },
    '秋映': { color: '黄', parents: ['千秋', 'つがる'] },
    'トキ': { color: '黄', parents: ['王林', 'フジ'] },
    // => Object literal may only specify known properties, and ''トキ'' does not exist in type 'AppleTypes'.
}

// NGな例:オブジェクトの型が違う
const e4: AppleTypes = {
    '王林': { color: '黄', parents: ['ゴールデンデリシャス', '印度'] },
    '千秋': { color: '赤', parents: ['東光', 'フジ'] },
    '秋映': { color: 1, parents: ['千秋', 'つがる'] },
    // => The expected type comes from property 'color' 
    //    which is declared here on type '{ color: string; parents: string[]; }'
}

// NGな例:値であるオブジェクトのプロパティが足りない
const e5: AppleTypes = {
    '王林': { color: '黄', parents: ['ゴールデンデリシャス', '印度'] },
    '千秋': { color: '赤', parents: ['東光', 'フジ'] },
    '秋映': { color: '黄' },
    // => Property 'parents' is missing in type '{ color: string; }' 
    //    but required in type '{ color: string; parents: string[]; }'.
}

 
なお、Mapped Typesはinterfaceでは使えないようです。
interfaceとtypeの違い | TypeScript入門『サバイバルTypeScript』

// Mapped Typesはinterfaceでは使えない
interface IAppleTypes {
    [key in AppleNames]: { color: string, parents: string[] }
    // -> A mapped type may not declare properties or methods.
}


p185 列挙型(enum)の代替

書籍では enum について書かれていたもののの、列挙型を使うべきでないとも書かれていました。

その理由として、p185では

  • TypeScriptのコンセプトに合っていない
  • 数値列挙型は型安全でない

が挙げられていました。

手元でも後者について試してみたところ、たしかに型安全ではありませんでした。

enum AppleColor {
    Red,
    Yellow,
    Green,
}

const f1: AppleColor = 'フジ'
// => Type '"フジ"' is not assignable to type 'AppleColor'.

const f2: AppleColor = -1 // エラーにならない

 
また、書籍以外の理由でも、列挙型を使わないほうが良いと分かりました。
さようなら、TypeScript enum - 株式会社カブク | 株式会社カブク

 
書籍や上記記事では代替として as const + keyof + typeof が書かれていたので、手元でも試してみます。

なお、 typeofkeyofワンライナーで書いてあると分かりづらいため、このメモでは都度型として定義しておきます。

const appleColorMap = {
    Red: 0,
    Yellow: 1,
    Green: 2,
} as const

// type TAppleColor = typeof appleColorMap[keyof typeof appleColorMap]
// が長いので、分解して書く
// なお、型は `type TAppleColor = 0 | 2 | 1` になる

// typeof でオブジェクトから型を作成
type TypeOfAppleColorMap = typeof appleColorMap
// => type TypeOfAppleColorMap = {
//        readonly Red: 0;
//        readonly Yellow: 1;
//        readonly Green: 2;
//    }

// keyof で型から各プロパティのユニオン型を取り出す
type KeyOfTypeOfAppleColorMap = keyof TypeOfAppleColorMap
// => type KeyOfTypeOfAppleColorMap = "Red" | "Yellow" | "Green"

// TypeOfAppleColorMap型から、キーがKeyOfTypeOfAppleColorMap(Red/Yellow/Green)である各値(0/1/2)を取り出す
type TAppleColor = typeof appleColorMap[KeyOfTypeOfAppleColorMap]
// => type TAppleColor = 0 | 2 | 1


// 型で定義されていない値を実際に使ってみる
const f3: TAppleColor = -1
// => Type '-1' is not assignable to type 'TAppleColor'


p225 Conditional Types

Conditional Types については

型定義における条件分岐を実現するための機能です。

書籍「手を動かしながら学ぶTypeScript」 p225

Webの記事だとこのあたりが参考になりました。

 
上記記事を参考にしながら、手元でも試してみます。

// nameプロパティを持っていなければ never にする例
type AppleCondition<T> = T extends { name: unknown } ? T : never

type g1 = AppleCondition<{ name: 'シナノホッペ' }>
// => type g1 = {
//       name: 'シナノホッペ';
//    }

type g2 = AppleCondition<{ color: '黄' }>
// => type g2 = never


// 2つ目の型引数を除いた別の型を作る例
type AppleDiff<T, U> = T extends U ? never : T

// りんご配列から、りんご三兄弟にいないフジを除いた型を作る
const apples = ['フジ', '秋映', 'シナノスイート', 'シナノゴールド'] as const
type りんご三兄弟 = AppleDiff<typeof apples[number], 'フジ'>
// => type りんご三兄弟 = "シナノゴールド" | "秋映" | "シナノスイート"


ソースコード

Githubに上げました。
https://github.com/thinkAmi-sandbox/shakyo_awesome-typescript-book

プルリクは各章ごとに作りました。

 
また、手元でTypeScript Sandboxで書いてみて、CodeSandboxにエクスポートしたコードはこちらです。
https://codesandbox.io/s/e24w4q?file=/index.ts

drf-spectacularを使って、Django REST frameworkの実装からOpenAPI 3.0系のスキーマを生成する

これは Djangoのカレンダー | Advent Calendar 2022 - Qiita 12/13の記事です。

 
Django REST framework(DRF)でOpenAPI 3系のスキーマを生成しようと考えた時、DRFの公式ドキュメントでは

という選択肢が示されています。

 
前者については、Django Congress 2022のHonoShiraiさんの発表で詳しく紹介されていました。

 
一方、後者のサードパーティパッケージとしては drf-spectacular があります *1

drf-spectacular では主に

が行なえます。

前者の機能については akiyoko さんのBlogに詳しい解説があります。
Django REST Framework で API ドキュメンテーション機能を利用する方法(DRF 3.12 最新版) - akiyoko blog

後者の機能については、drf-spectacular の公式ドキュメントに充実した解説があります。
drf-spectacular — drf-spectacular documentation

 
ただ、後者の機能については実際に使ってみないと分からないところがありました。

そこで、試してみたときのメモを残します。

 
なお、差分をわかりやすくするよう、記事中では適宜コミットを示しています。

また、記事が長いため、記事ではソースコードを省略している部分が多々あります。もしソースコードの詳細を確認したい場合はGithubを参照ください。

 
目次


環境

  • WSL2
  • Python 3.10.9
  • Django 4.1.4
  • djangorestframework(DRF) 3.14.0
  • drf-spectacular 0.24.2
  • drf-nested-routers 0.93.4


環境構築

ベースとなるDRFアプリをセットアップする

次のようなModel・Serializer・ViewSet・URLconfを持つアプリをセットアップします。

なお、アプリの詳細についてはこのコミットで確認できます。

Model

class Shop(models.Model):
    name = models.CharField('名前', max_length=255)
    established_at = models.DateTimeField('設立日時', default=timezone.now)
    updated_at = models.DateTimeField(auto_now=True)

 
Serializer

class ShopSerializer(serializers.ModelSerializer):
    class Meta:
        model = Shop
        fields = ['id', 'name', 'established_at', 'updated_at']

 
ViewSet

class ShopViewSet(viewsets.ModelViewSet):
    queryset = Shop.objects.all()
    serializer_class = ShopSerializer

 
URLconf

app_name = 'api'

router = routers.SimpleRouter()
router.register('shops', viewset=views.ShopViewSet)

urlpatterns = [
    path('', include(router.urls)),
]

 
実装が終わったら、admin siteからデータを登録します。

最後に、curlで動作が確認できれば、ベースとなるアプリは完成です。

$ curl http://localhost:8000/api/shops/
[{"id":1,"name":"産直所","established_at":"2022-12-11T10:46:38+09:00","updated_at":"2022-12-11T10:46:46.237636+09:00"}]


drf-spectacularをセットアップする

公式ドキュメントに従い、 drf-spectacularをセットアップします。
Installation | drf-spectacular — drf-spectacular documentation

pip install drf-spectacular 後、settings.pyに INSTALLED_APPSREST_FRAMEWORK を設定します。


デフォルト設定で生成したOpenAPIスキーマを確認する

ここまでで準備ができたため、以下のコマンドでOpenAPIスキーマを生成します。

$ python manage.py spectacular --file openapi.yaml

 
生成された openapi.yaml ファイルの中身は以下の通りです(コミット)。

openapi: 3.0.3
info:
  title: ''
  version: 0.0.0
paths:
  /api/shops/:
    get:
      operationId: api_shops_list
      tags:
      - api
      security:
      - cookieAuth: []
      - basicAuth: []
      - {}
      responses:
        '200':
          content:
            application/json:
              schema:
                type: array
                items:
                  $ref: '#/components/schemas/Shop'
          description: ''
    post:
      operationId: api_shops_create
      tags:
      - api
      requestBody:
        content:
          application/json:
            schema:
              $ref: '#/components/schemas/Shop'
          application/x-www-form-urlencoded:
            schema:
              $ref: '#/components/schemas/Shop'
          multipart/form-data:
            schema:
              $ref: '#/components/schemas/Shop'
        required: true
      security:
      - cookieAuth: []
      - basicAuth: []
      - {}
      responses:
        '201':
          content:
            application/json:
              schema:
                $ref: '#/components/schemas/Shop'
          description: ''
  /api/shops/{id}/:
    get:
      operationId: api_shops_retrieve
      parameters:
      - in: path
        name: id
        schema:
          type: integer
        description: A unique integer value identifying this shop.
        required: true
      tags:
      - api
      security:
      - cookieAuth: []
      - basicAuth: []
      - {}
      responses:
        '200':
          content:
            application/json:
              schema:
                $ref: '#/components/schemas/Shop'
          description: ''
    put:
      operationId: api_shops_update
      parameters:
      - in: path
        name: id
        schema:
          type: integer
        description: A unique integer value identifying this shop.
        required: true
      tags:
      - api
      requestBody:
        content:
          application/json:
            schema:
              $ref: '#/components/schemas/Shop'
          application/x-www-form-urlencoded:
            schema:
              $ref: '#/components/schemas/Shop'
          multipart/form-data:
            schema:
              $ref: '#/components/schemas/Shop'
        required: true
      security:
      - cookieAuth: []
      - basicAuth: []
      - {}
      responses:
        '200':
          content:
            application/json:
              schema:
                $ref: '#/components/schemas/Shop'
          description: ''
    patch:
      operationId: api_shops_partial_update
      parameters:
      - in: path
        name: id
        schema:
          type: integer
        description: A unique integer value identifying this shop.
        required: true
      tags:
      - api
      requestBody:
        content:
          application/json:
            schema:
              $ref: '#/components/schemas/PatchedShop'
          application/x-www-form-urlencoded:
            schema:
              $ref: '#/components/schemas/PatchedShop'
          multipart/form-data:
            schema:
              $ref: '#/components/schemas/PatchedShop'
      security:
      - cookieAuth: []
      - basicAuth: []
      - {}
      responses:
        '200':
          content:
            application/json:
              schema:
                $ref: '#/components/schemas/Shop'
          description: ''
    delete:
      operationId: api_shops_destroy
      parameters:
      - in: path
        name: id
        schema:
          type: integer
        description: A unique integer value identifying this shop.
        required: true
      tags:
      - api
      security:
      - cookieAuth: []
      - basicAuth: []
      - {}
      responses:
        '204':
          description: No response body
components:
  schemas:
    PatchedShop:
      type: object
      properties:
        id:
          type: integer
          readOnly: true
        name:
          type: string
          title: 名前
          maxLength: 255
        established_at:
          type: string
          format: date-time
          title: 設立日時
        updated_at:
          type: string
          format: date-time
          readOnly: true
    Shop:
      type: object
      properties:
        id:
          type: integer
          readOnly: true
        name:
          type: string
          title: 名前
          maxLength: 255
        established_at:
          type: string
          format: date-time
          title: 設立日時
        updated_at:
          type: string
          format: date-time
          readOnly: true
      required:
      - id
      - name
      - updated_at
  securitySchemes:
    basicAuth:
      type: http
      scheme: basic
    cookieAuth:
      type: apiKey
      in: cookie
      name: sessionid


settings.pyによりカスタマイズする

デフォルトで生成されるOpenAPIスキーマをカスタマイズする場合、いくつかの方法があります。

まずは、settings.py の設定によるカスタマイズを記載します。

なお、ここでは自分が気になったものだけ記載しています。詳細は公式ドキュメントを参照してください。
Settings — drf-spectacular documentation


operationIdの値をcamelCaseにする

OpenAPIスキーマには operationId という項目があります。

Unique string used to identify the operation. The id MUST be unique among all operations described in the API. The operationId value is case-sensitive. Tools and libraries MAY use the operationId to uniquely identify an operation, therefore, it is RECOMMENDED to follow common programming naming conventions.

https://spec.openapis.org/oas/v3.0.3#operation-object

 
デフォルト設定で出力したスキーマを見ると、operationId は snake_case になっています。

paths:
  /api/shops/:
    get:
      operationId: api_shops_list

 
ただ、 operationId は camelCase のほうが望ましい場合もあります。

例えば、OpenAPI Generator の typescript-axios では、 opearationId を axios クライアントのメソッド名として利用するため、snake_caseだと違和感を生じるかもしれません。

 
そこで、公式ドキュメントの Settings ページを見てみると、 CAMELIZE_NAMES という設定がありました。

Camelize names like "operationId" and path parameter names Camelization of the operation schema itself requires the addition of 'drf_spectacular.contrib.djangorestframework_camel_case.camelize_serializer_fields' to POSTPROCESSING_HOOKS. Please note that the hook depends on djangorestframework_camel_case, while CAMELIZE_NAMES itself does not.

Settings — drf-spectacular documentation

 
デフォルトでは False になっています。

これを True へ設定変更してからOpenAPIスキーマを生成したところ、 operationId は camelCase (apiShopsList) になりました(コミット)。


PATCHメソッドのコンポーネントを他のメソッドと統一する

デフォルトの設定で生成されたスキーマを見たところ、PATCHメソッドだけ別のスキーマ PatchedShop になっていました。

違いは PatchedShop には required がないだけでした。

components:
  schemas:
    PatchedShop:
      type: object
      properties:
# ...
        updated_at:
          type: string
          format: date-time
          readOnly: true
    Shop:
      type: object
      properties:
# ...
        updated_at:
          type: string
          format: date-time
          readOnly: true
      required:
      - id
      - name
      - updated_at

 
公式ドキュメントを見ると

# Create separate components for PATCH endpoints (without required list)
'COMPONENT_SPLIT_PATCH': True,

[Settings — drf-spectacular documentation](https://drf-spectacular.readthedocs.io/en/latest/settings.html)

とあり、デフォルトでは True になっています。

これを 'COMPONENT_SPLIT_PATCH': False へ設定変更してからOpenAPIスキーマを生成したところ、 Shop スキーマに統一されました(コミット)。


OpenAPIのメタデータを設定する

OpenAPI 3.0.3 のスキーマには、 infoservers などのメタデータが存在します。
OpenAPI Specification v3.0.3 | Introduction, Definitions, & More

drf-spectacularの公式ドキュメントによると、それらのメタデータを設定するためには、settings.py に追加すれば良さそうでした。
Settings — drf-spectacular documentation

 
そこで settings.py に以下の設定を行います。

SPECTACULAR_SETTINGS = {
# ...
    # OpenAPI metadata
    'TITLE': 'DRF OpenAPI schema',
    'DESCRIPTION': 'OpenAPI Schema by drf-spectacular',
    'TOS': 'https://example.com/term',
    # Statically set schema version. May also be an empty string. When used together with
    # view versioning, will become '0.0.0 (v2)' for 'v2' versioned requests.
    # Set VERSION to None if only the request version should be rendered.
    'VERSION': '0.0.1',
    # Optional list of servers.
    # Each entry MUST contain "url", MAY contain "description", "variables"
    # e.g. [{'url': 'https://example.com/v1', 'description': 'Text'}, ...]
    'SERVERS': [{'url': 'http://localhost:8000/api/', 'description': '開発環境'}],
}

 
OpenAPIスキーマを生成したところ、以下のようなメタデータが設定されました(コミット)。

ちなみに、 settingsの TOStermsOfService に対する設定のようです。

info:
  title: DRF OpenAPI schema
  version: 0.0.1
  description: OpenAPI Schema by drf-spectacular
  termsOfService: https://example.com/term
#...
servers:
- url: http://localhost:8000/api/
  description: 開発環境


drf-spectacularの機能によりカスタマイズする

ただ、settings.pyでのカスタマイズには限界があります。

そこで、drf-spectacularの機能によるカスタマイズを記載します。


OpenAPIのenumを使う

OpenAPIでは enum にて、項目が取り得る値を指定できます。
Enums | Data Models (Schemas) | OpenAPI Guide | Swagger

 
そこで、DRFenumを定義すれば、drf-spectacularでOpenAPIスキーマへ反映できるかを確認してみます。

なお、DRFenumを定義するにはいくつか方法がありますが、今回は Enumeration typesIntegerChoices を使って定義してみます。
Enumeration types | モデルフィールドリファレンス | Django ドキュメント | Django

 
Shopモデルに IntegerChoices を継承したクラスを choices として追加します。

from django.utils.translation import gettext_lazy as _

class Shop(models.Model):
    class Size(models.IntegerChoices):
        SMALL = 1, _('小')
        MEDIUM = 2, _('中')
        LARGE = 3, _('大')

    size = models.IntegerField('規模', choices=Size.choices, default=Size.MEDIUM)

 
また、enumな項目をレスポンスするため、シリアライザの fields にも size を追加します。

class ShopSerializer(serializers.ModelSerializer):
    class Meta:
        model = Shop
        fields = ['id', 'name', 'size', 'established_at', 'updated_at']

 
OpenAPIスキーマを生成すると、Schemaに SizeEnum が追加されていました(コミット)。

# ...
        size:
          allOf:
          - $ref: '#/components/schemas/SizeEnum'
          title: 規模
# ...
    SizeEnum:
      enum:
      - 1
      - 2
      - 3
      type: integer


メソッドごとに operatoinId を定義する

上記の通り、 settings.pyへ設定することで、operationId の値を snake_case や camelCase に制御できました。

ただ、 アプリ名_モデル名_メソッド名 のようなデフォルトの命名規則ではなく、独自の命名規則で operationId を定義したいとします。

その場合、Viewに @extend_schema_view デコレータを付与し、 extend_schema の引数 operationId に希望する値を指定すれば良さそうでした。

If you want to annotate methods that are provided by the base classes of a view, you have nothing to attach @extend_schema to. In those instances you can use @extend_schema_view to conveniently annotate the default implementations.

Step 2: @extend_schema | Workflow & schema customization — drf-spectacular documentation

 
そこで、 list メソッドのみ operationIdshops を指定するよう定義してみます。

@extend_schema_view(
    list=extend_schema(
        operation_id='shops'
    )
)
class ShopViewSet(viewsets.ModelViewSet):
# ...

 
OpenAPIスキーマを生成すると、list メソッドのみ定義が変更されました(コミット)。

paths:
  /api/shops/:
    get:
      operationId: shops


OpenAPIの拡張項目を使う

OpenAPIのスキーマは、必要に応じて x- 始まりのキーを使って拡張することができます。

Extensions (also referred to as specification extensions or vendor extensions) are custom properties that start with x-, such as x-logo. They can be used to describe extra functionality that is not covered by the standard OpenAPI Specification.

OpenAPI Extensions

 
drf-spectacularでも拡張項目を定義できるか試してみます。


AWS API Gatewayの設定を追加する

AWS API GatewayではOpenAPIの定義を利用できます。また、そのOpenAPIスキーマは一部拡張されています。
HTTP API の OpenAPI 定義の使用 - Amazon API Gateway

今回は、この拡張定義を drf-spectacularでOpenAPIスキーマへ出力できるか試してみます。

drf-spectacularで拡張項目を設定するには、extend_schema の引数 extensions に、拡張項目用のdictを指定すれば良さそうです。
drf_spectacular.utils.extend_schema | Package overview — drf-spectacular documentation

そこで、 list メソッドのときだけ拡張項目を追加するようデコレータで定義してみます。

@extend_schema_view(
    list=extend_schema(
        extensions={
            'x-amazon-apigateway-integration': {
                'type': 'AWS_PROXY',
                'httpMethod': 'POST',
                'uri': 'arn:aws:lambda:***:***:function:HelloWorld',
                'payloadFormatVersion': '1.0'
            }
        }
    )
)
class ShopViewSet(viewsets.ModelViewSet):
# ...

 
OpenAPIスキーマを生成したところ、拡張項目の定義が追加されていました(コミット)

paths:
  /api/shops/:
    get:
# ...
      responses:
        # ...
      x-amazon-apigateway-integration:
        type: AWS_PROXY
        httpMethod: POST
        uri: arn:aws:lambda:***:***:function:HelloWorld
        payloadFormatVersion: '1.0'


enumに x-enum-varnames を追加する

「OpenAPIスキーマから各言語のクライアントを生成するためのツール」の1つに、OpenAPI Generatorがあります。
OpenAPITools/openapi-generator: OpenAPI Generator allows generation of API client libraries (SDK generation), server stubs, documentation and configuration automatically given an OpenAPI Spec (v2, v3)

OpenAPI Generator では、拡張項目 x-enum-varnames を使って enum をより便利に定義する機能があります。
Invalid enum var names are generated by multi-byte characters · Issue #893 · OpenAPITools/openapi-generator

例えば、 typescript-axios のクライアントを OpenAPI Generatorで生成した場合、x-enum-varnames が定義されていれば enumSize.0 ではなく Size.small で参照できるようになります。

 
ただ、先ほどの x-amazon-apigateway-integration と同じ書き方をしても、 enum と一緒には設定されません。

一緒に設定するには

  1. カスタムFieldを作成
  2. 作成したカスタムFieldに対し、 @extend_schema_field デコレータで定義

の流れで実装すれば良さそうでした。

@extend_schema_field({
    'type': 'integer',
    'title': Shop._meta.get_field('size').verbose_name,
    'enum': Shop.Size.values,
    'x-enum-varnames': Shop.Size.names,
})
class SizeField(serializers.IntegerField):
    pass


class ShopSerializer(serializers.ModelSerializer):
    size = SizeField(source='get_size_display')

    class Meta:
        model = Shop
        fields = ['id', 'name', 'size', 'established_at', 'updated_at']

 
この実装でOpenAPIスキーマを生成すると、 x-enum-varnames が設定できました。

ただ、enumスキーマとは別に定義されました。

size:
  allOf:
  - $ref: '#/components/schemas/SizeEnum'  # Enumの定義はこちら
  title: 規模
  x-enum-varnames:  # x-enum-varnames はこちら
  - SMALL
  - MEDIUM
  - LARGE

 
原因は POSTPROCESSING_HOOKS のデフォルト設定に drf_spectacular.hooks.postprocess_schema_enums があったためです。その結果、enumが別スキーマになったようです。

# Postprocessing functions that run at the end of schema generation.
# must satisfy interface result = hook(generator, request, public, result)
'POSTPROCESSING_HOOKS': [
    'drf_spectacular.hooks.postprocess_schema_enums'
],

# https://drf-spectacular.readthedocs.io/en/latest/settings.html

 
もし一緒に定義したい場合は、 POSTPROCESSING_HOOKS の設定を空配列に変更すれば良さそうです。

'POSTPROCESSING_HOOKS': []

 
OpenAPIスキーマを生成すると、 enumx-enum-varnames が同じ場所で定義されるようになりました(コミット)。

size:
  type: integer
  title: 規模
  enum:
  - 1
  - 2
  - 3
  x-enum-varnames:
  - SMALL
  - MEDIUM
  - LARGE


@actionによる追加エンドポイントを反映する

DRFでは、ViewSetのエンドポイントの他に独自のエンドポイントを追加したい場合、 @action デコレータを使って定義します。
Marking extra actions for routing | Viewsets - Django REST framework

 
例えば、以下のように実装すると /api/shops/message/ エンドポイントを増えます。また、このエンドポイントでは {'message': 'open'}JSONが返ってきます。

class ShopViewSet(viewsets.ModelViewSet):
    queryset = Shop.objects.all()
    serializer_class = ShopSerializer

    @action(detail=False, methods=['get'])
    def message(self, request, pk=None):
        return Response({'message': 'open'})

 
ただ、 この実装のままでOpenAPIスキーマを生成したとしても、レスポンスのスキーマ$ref: '#/components/schemas/Shop' となり、実際のレスポンスとは一致しません。

/api/shops/message/:
  get:
    operationId: apiShopsMessageRetrieve
    tags:
    - api
    security:
    - cookieAuth: []
    - basicAuth: []
    - {}
    responses:
      '200':
        content:
          application/json:
            schema:
              $ref: '#/components/schemas/Shop'
        description: ''

 
そこで、 @extend_schema_viewextend_schema を使って @action 分のResponseを定義します。

 
今回は以下のように定義します。

  • extend_schema_viewのキーワード引数は、エンドポイント名の message を使用
  • レスポンス型は、drf-spectacularの OpenApiResponseinline_serializer を使用
  • 例示は、 drf-spectacularの OpenApiExample を使用
@extend_schema_view(
    #...
    message=extend_schema(
        operation_id='shop_status',
        responses={
            200: OpenApiResponse(
                response=inline_serializer(
                    name='MessageResponse',
                    fields={
                        'message': serializers.CharField(),
                    },
                ),
                description='レスポンス型'
            )
        },
        examples=[OpenApiExample(
            name='例',
            value=[
                {'message': 'open'},
                {'message': 'close'}
            ]
        )],
        description='actionデコレータ分'
    )
)
class ShopViewSet(viewsets.ModelViewSet):
    queryset = Shop.objects.all()
    serializer_class = ShopSerializer

    @action(detail=False, methods=['get'])
    def message(self, request, pk=None):
        return Response({'message': 'open'})

 
OpenAPIスキーマを生成すると、追加した action のスキーマが適切に出力されていました(コミット)。

paths:
  /api/shops/message/:
    get:
      operationId: shopStatus
      description: actionデコレータ分
      tags:
      - api
      security:
      - cookieAuth: []
      - basicAuth: []
      - {}
      responses:
        '200':
          content:
            application/json:
              schema:
                $ref: '#/components/schemas/MessageResponse'
              examples:
                :
                  value:
                  - message: open
                  - message: close
          description: レスポンス型
components:
  schemas:
    MessageResponse:
      type: object
      properties:
        message:
          type: string
      required:
      - message


drf-nested-routersによるネストしたルーティングを反映する

DRFでは、 /foo/{foo_id}/bar/{bar_id}/ のようなルーティングは、サードパーティパッケージを使うと容易に実装できます。

DRFの公式ドキュメントでもいくつか紹介されています。
Third Party Packages | Routers - Django REST framework

DRFの公式ドキュメントで紹介されているパッケージのうち、drf-nested-routersIncluded support for となっていました。
drf-spectacular — drf-spectacular documentation

そこで、 drf-nested-routers を使ったとき、どのようにOpenAPIスキーマへ反映されるかを確認してみます。

なお、 drf-nested-routers では

  • 一対多の関連を持つモデル
  • 多対多の関連を持つモデル

のルーティングを定義できるため、今回それぞれ実装してみます。

ちなみに、 drf-nested-routers の導入は、公式ドキュメントにある通り pip install するだけです。
alanjds/drf-nested-routers: Nested Routers for Django Rest Framework

$ pip install drf-nested-routers


一対多の関連を持つモデルの場合

Company : Shop = 1 : 多 になるような Company モデルを用意します。

なお、Companyモデルで default=1 としているように、Shopに対しては必ずCompanyが紐づくものとします。

class Company(models.Model):
    name = models.CharField('名前', max_length=255)

class Shop(models.Model):
    # ...
    updated_at = models.DateTimeField(auto_now=True)
    company = models.ForeignKey(Company, verbose_name='会社', on_delete=models.PROTECT, default=1)

 
CompanyとShopのデータはfixtureで用意します。

[
  {
    "model": "shop.company",
    "pk": 1,
    "fields": {
      "name": "あおり物産"
    }
  },
  {
    "model": "shop.company",
    "pk": 2,
    "fields": {
      "name": "シナノ商店"
    }
  },
  {
    "model": "shop.Shop",
    "pk": 1,
    "fields": {
      "name": "スーパー北紅",
      "company": 1
    }
  },
// ...
]

 
なお、 Shopモデルの updated_atauto_now=True を使っていることから、このままでは manage.py loaddata でエラーになってしまいます。

そこで、signalを使ってfixtureのときだけ自力で updated_at を設定できるような関数を用意します。

# models.py
def fix_updated_at_by_fixture(sender, instance, **kwargs):
    if kwargs['raw']:
        instance.updated_at = timezone.now()

pre_save.connect(fix_updated_at_by_fixture, sender=Shop)

 
モデルの準備ができたため、次はネストしたルーティングで使用するSerializerとViewSet、URLconfを用意します。

 
Serializer

NestedShopSerializer では、Shop モデルの情報のほか、項目 company でCompanyモデルの情報もレスポンスできるようにしています。

class CompanySerializer(serializers.ModelSerializer):
    class Meta:
        model = Shop
        fields = ['id', 'name']

class NestedShopSerializer(serializers.ModelSerializer):
    size = SizeField()
    company = CompanySerializer()

    class Meta:
        model = Shop
        fields = ['id', 'name', 'size', 'established_at', 'updated_at', 'company']

 
ViewSet

NestedShopViewSetでは、company_pk に紐づくShopのみに絞れるよう get_queryset を定義しています。

class CompanyViewSet(viewsets.ModelViewSet):
    queryset = Company.objects.all()
    serializer_class = CompanySerializer

class NestedShopViewSet(mixins.RetrieveModelMixin, viewsets.GenericViewSet):
    serializer_class = NestedShopSerializer

    def get_queryset(self):
        return Shop.objects.filter(company=self.kwargs['company_pk'])

 
URLconf

drf-nested-routersSimpleRouterNestedSimpleRouter を使い、ルーティングを設定します。

from rest_framework_nested import routers as nest_routers

parent_router = nest_routers.SimpleRouter()
parent_router.register(r'companies', views.CompanyViewSet)

nest_shop_router = nest_routers.NestedSimpleRouter(parent_router, r'companies', lookup='company')
nest_shop_router.register(r'shops', views.NestedShopViewSet, basename='company-shops')

urlpatterns = [
# ...
    path(r'', include(nest_shop_router.urls)),
]

 
curlで動作確認してみると、問題なく動作していました。

$ curl http://localhost:8000/api/companies/1/shops/1/
{"id":1,"name":"スーパー北紅","size":2,"established_at":"2022-12-12T18:35:15.505077+09:00","updated_at":"2022-12-12T18:35:15.505109+09:00","company":{"id":1,"name":"あおり物産"}}

 
続いて、OpenAPIスキーマを生成したところ、ワーニングが出ました。

$ python manage.py spectacular --file openapi.yaml

Warning #0: NestedShopViewSet: could not derive type of path parameter "id" because it is untyped and obtaining queryset from the viewset failed. Consider adding a type to the path (e.g. <int:id>) or annotating the parameter type with @extend_schema. Defaulting to "string".

Schema generation summary:
Warnings: 1 (1 unique)
Errors:   0 (0 unique)

 
生成したOpenAPIスキーマを見たところ、path parameter idtypestring 型と、不正なスキーマになっています。

paths:
  /api/companies/{companyPk}/shops/{id}/:
    get:
      parameters:
      - in: path
        name: id
        schema:
          type: string
        required: true

 
そこで、 extend_schema_view で path parameter のスキーマを定義します。

@extend_schema_view(
    retrieve=extend_schema(
        parameters=[
            OpenApiParameter(name='company_pk', location=OpenApiParameter.PATH, type=int),
            OpenApiParameter(name='id', location=OpenApiParameter.PATH, type=int)
        ]
    ),
)
class NestedShopViewSet(mixins.RetrieveModelMixin, viewsets.GenericViewSet):
    serializer_class = ShopSerializer

    def get_queryset(self):
        return Shop.objects.filter(company=self.kwargs['company_pk'])

 
再度、OpenAPIスキーマを生成したところ、適切なparameterになっていました(コミット)。

paths:
  /api/companies/{companyPk}/shops/{id}/:
    get:
      - in: path
        name: id
        schema:
          type: integer
        required: true

 
生成したスキーマの他の部分を見てみると、Serializerで指定した通り、shopの中にcompanyがネストして定義されていました。

components:
  schemas:
    Company:
      type: object
      properties:
        id:
          type: integer
          readOnly: true
        name:
          type: string
          title: 名前
          maxLength: 255
      required:
      - id
      - name
    # ...
    NestedShop:
      type: object
      properties:
# ...
        updated_at:
          type: string
          format: date-time
          readOnly: true
        company:
          $ref: '#/components/schemas/Company'
# ...


多対多の関連を持つモデルの場合

drf-nested-routers では、多対多の関連もサポートしています。
many to many relation? · Issue #69 · alanjds/drf-nested-routers

そこで、Shop : Apple = 多 : 多 になるような Apple モデルを用意します。

class Apple(models.Model):
    name = models.CharField('りんご名', max_length=255)
    shops = models.ManyToManyField(Shop, verbose_name='店')

 
また、fixtureも多対多のモデルにデータを投入できる内容へと修正します。
many to many - How do Django Fixtures handle ManyToManyFields? - Stack Overflow

[
// ...
  {
    "model": "shop.Apple",
    "pk": 1,
    "fields": {
      "name": "彩香",
      "shops": [1]
    }
  },
// ...
]

 
あとは、一対多と同様、Serializer・ViewSet・URLconf を修正します。

 
Serializer

一対多のときに使ったSerializerを shops として指定します。

また、多対多を扱えるようにするため、 many=True を指定します。
Nested relationships | Serializer relations - Django REST framework

class M2MAppleSerializer(serializers.ModelSerializer):
    shops = NestedShopSerializer(many=True)

    class Meta:
        model = Apple
        fields = ['id', 'name', 'shops']

 
ViewSet

get_querysetApple モデルの絞り込みを記載します。

なお、ShopとAppleは多対多の関係なので、 prefetch_related を使って絞り込むようにしています。
prefetch_related() | QuerySet API リファレンス | Django ドキュメント | Django

class M2MAppleViewSet(mixins.RetrieveModelMixin, viewsets.GenericViewSet):
    serializer_class = M2MAppleSerializer

    def get_queryset(self):
        return Apple.objects.all().prefetch_related('shops').filter(id=self.kwargs.get('pk'))

 
URLconf

一対多のところで出てきた nest_shop_router を利用して、ルーティングを追加します。

m2m_router = nest_routers.NestedSimpleRouter(nest_shop_router, r'shops', lookup='shop')
m2m_router.register(r'apples', views.M2MAppleViewSet, basename='company-shops-apples')

urlpatterns = [
    path(r'', include(m2m_router.urls)),
]

 
curlで動作確認をしたところ、良さそうでした。

$ curl http://localhost:8000/api/companies/1/shops/1/apples/1/
{"id":1,"name":"彩香","shops":[{"id":1,"name":"スーパー北紅","size":2,"established_at":"2022-12-12T18:35:15.505077+09:00","updated_at":"2022-12-12T18:35:15.505109+09:00","company":{"id":1,"name":"あおり物産"}}]}

 
この状態でOpenAPIスキーマを生成したところ、一対多と同様、ワーニングが出ました。

$ python manage.py spectacular --file openapi.yaml
Warning #0: M2MAppleViewSet: could not derive type of path parameter "company_pk" because model "shop.models.Apple" contained no such field. Consider annotating parameter with @extend_schema. Defaulting to "string".
Warning #1: M2MAppleViewSet: could not derive type of path parameter "shop_pk" because model "shop.models.Apple" contained no such field. Consider annotating parameter with @extend_schema. Defaulting to "string".

Schema generation summary:
Warnings: 2 (2 unique)
Errors:   0 (0 unique)

 
そこで、ViewSetに @extend_schema_view を追加します。

その後OpenAPIを生成すると、ワーニングが消えて適切なスキーマとなりました(コミット)。

@extend_schema_view(
    retrieve=extend_schema(
        parameters=[
            OpenApiParameter(name='company_pk', location=OpenApiParameter.PATH, type=int),
            OpenApiParameter(name='shop_pk', location=OpenApiParameter.PATH, type=int)
        ]
    ),
)
class M2MAppleViewSet(mixins.RetrieveModelMixin, viewsets.GenericViewSet):
# ...


例外に対するスキーマを追加する

デフォルトでdrf_spectacularが生成するOpenAPIスキーマには、4xxや5xxの例外系のレスポンス用スキーマが含まれていません。

ここで、 bad_request を使って常に400を返すViewSetを用意した時に 400なスキーマが追加されるかを試してみます。
Generic Error Views | Exceptions - Django REST framework

class ExceptionViewSet(mixins.ListModelMixin, viewsets.GenericViewSet):
    queryset = Company.objects.all()
    serializer_class = CompanySerializer

    def list(self, request, *args, **kwargs):
        return bad_request(request=request, exception=kwargs.get('exception'))

 
OpenAPIスキーマを生成してみると、レスポンスには200のものしかありませんでした。

/api/exceptions/:
  get:
# ...
    responses:
      '200':
        content:
          application/json:
            schema:
              type: array
              items:
                $ref: '#/components/schemas/Company'
# ...

 
そのため、OpenAPIスキーマに例外系を定義したい場合は、自分で実装する必要がありそうです。

自分で実装するときの参考になる情報としては以下がありました。

 
その中から、今回は OpenApiResponse を使った定義を試してみます。
drf_spectacular.utils.OpenApiResponse | Package overview — drf-spectacular documentation

class ExceptionViewSet(mixins.ListModelMixin, viewsets.GenericViewSet):
    queryset = Company.objects.all()
    serializer_class = CompanySerializer

    @extend_schema(
        responses={
            400: OpenApiResponse(
                response=inline_serializer(
                    name='ExceptionResponse',
                    fields={
                        'error': serializers.CharField(),
                    },
                ),
                description='Error Response Type'
            )
        },
    )
    def list(self, request, *args, **kwargs):
        return bad_request(request=request, exception=kwargs.get('exception'))

 
OpenAPIスキーマを生成したところ、400なレスポンスのスキーマが生成されました。

/api/exceptions/:
  get:
    operationId: exceptionsList
    tags:
    - exceptions
    security:
    - cookieAuth: []
    - basicAuth: []
    - {}
    responses:
      '400':
        content:
          application/json:
            schema:
              $ref: '#/components/schemas/ExceptionResponse'
        description: Error Response Type
# ...
ExceptionResponse:
  type: object
  properties:
    error:
      type: string
  required:
  - error


その他

ここでは取り上げていない内容(例えば、ModelViewSet以外を使う時の実装)をOpenAPIスキーマに反映する場合も、 drf-spectacular の公式ドキュメントが参考になります。

また、FAQも充実しているため、迷ったら読むと良さそうです。
FAQ — drf-spectacular documentation


ソースコード

Githubに上げました。
https://github.com/thinkAmi-sandbox/drf_spectacular_sample

今回のプルリクはこちらです。
https://github.com/thinkAmi-sandbox/drf_spectacular_sample/pull/1
*1:OpenAPI 2系の場合は、 drf-yasg を使うことになります。https://github.com/axnsan12/drf-yasg/

django-vite を使って、Django の template 上で React を動かしてみた

これは Djangoのカレンダー | Advent Calendar 2022 - Qiita 12/6の記事です。

フロントエンドのビルドツール Vite を使って、ReactをDjangoで動かす方法を調べたところ、awesome-viteのページに django-vite の記載がありました。

 
そこで、フロントエンドとして React + Vite 、バックエンドとして Django + Django REST framework な構成でTODOアプリを作って試してみたため、メモを残します。

なお、記事が長いため、記事ではソースコードを省略している部分が多々あります。もしソースコードの詳細を確認したい場合はGithubを参照ください。

 
目次


環境

  • WSL2
  • Django環境
  • React 環境
    • React 18.2.0
    • React Router 6.4.4
    • Vite 3.2.3
    • TypeScript 4.6.4

 
なお、 django-vite を使った場合のシステム構成は書籍「 現場で使える Django REST Framework の教科書 (Django の教科書シリーズ) | 横瀬 明仁 」のチュートリアル同様、

  • Django
  • Django REST framework (DRF)
    • フロントエンド向けWeb API
  • React + React Router + axios
    • フロントエンドのルーティングやDRFのWeb APIへのリクエス

となります*1


バックエンド(Django + DRF)のセットアップ

まずはバックエンドから作成していきます。なお、ソースコードは後述の場所で公開していますので、バックエンドの作成では省略します。

モデルを含む task アプリと、APIapi アプリを作成します。

$ pip install django djangorestframework django-vite

$ django-admin startproject config .

$ python manage.py startapp api
$ python manage.py startapp task

 
taskアプリを実装します。今回はadminサイトでデータ登録するため、 admin.py も実装しておきます。

  • models.py
  • admin.py

 
apiアプリも実装します。

  • serializers.py
  • views.py
  • urls.py

 
configディレクトリにも修正を加えます。

  • urls.py

 
ファイルの実装が終わったところでマイグレーションを実行します。

$ python manage.py makemigrations
$ python manage.py migrate

 
adminサイトでデータ登録するためのユーザーを作成します。

$ python manage.py createsuperuser
Username (leave blank to use 'thinkami'): admin
Email address: admin@example.com
Password: pass12345
Password (again): pass12345
Superuser created successfully.

 
Djangoを起動し、adminサイトでデータを登録します。

$ python manage.py runserver

# http://localhost:8000/admin/ にアクセスして、データ登録

 
データ登録後、curlで動作確認を行います。レスポンスがあればOKです。

$ curl http://localhost:8000/api/tasks/
[{"id":1,"content":"買い物","updated_at":"2022-11-28T20:36:19.668279+09:00"}]


フロントエンドのセットアップ

Viteを使ってReactをセットアップ

django-viteのREADMEによると、Viteを使ってReactをセットアップするところまでは、通常のVite + Reactのセットアップで良いようです。
https://github.com/MrBin99/django-vite#vitejs

 
そこで、Viteを使って frontend ディレクトリの中にReactアプリをセットアップしていきます。

$ npm create vite@latest
Need to install the following packages:
  create-vite@3.2.1
Ok to proceed? (y) y
✔ Project name: … frontend
✔ Select a framework: › React
✔ Select a variant: › TypeScript

Scaffolding project in path/to/django_vite/static...

Done. Now run:

  cd static
  npm install
  npm run dev

 
あとは画面にあるように、 npm installnpm run dev を実行した後、ターミナルに表示されたURLへアクセスして、Vite + React 画面が出ればOKです。


frontendディレクトリの整理

以下の設定ファイルを、 frontend ディレクトリからプロジェクトルートディレクトリへと移動します。

  • package.json
  • package-lock.json
  • tsconfig.json
  • tsconfig.node.json
  • vite.config.ts

 
また、以下の不要なディレクトリファイルは削除します。

  • node_modules/
  • public/
  • index.html

 
整理後、ルートディレクトリで npm install しておきます。


DjangoとReactを連携して、開発環境で動かす

ここまでで一通りセットアップできたので、DjangoとReactが連携するアプリを作っていきます。


vite.config.tsでNode.jsの path モジュールを import できるようにする

以下を参考に、Node.jsの path モジュールを import できるようにします。
TypeScriptのモジュールのインポートには import を使う|まくろぐ

$ npm install --save-dev @types/node


Djangoと連携できるよう vite.config.ts を設定

Viteの設定ファイルである vite.config.ts を定義します。

 
設定ファイル全体は以下のとおりです。

import { defineConfig } from 'vite'
import { resolve } from 'path'
import react from '@vitejs/plugin-react'

// https://vitejs.dev/config/
export default defineConfig({
  plugins: [react()],

  // 開発環境のmain.tsxが置いてある場所
  root: resolve('./frontend/src'),

  // Djangoでの静的ファイル配信設定である STATIC_URL と同じになるよう設定
  base: '/static/',

  server: {
    host: 'localhost',
    port: 5173,
    open: false,
    watch: {
      usePolling: true,
      disableGlobbing: false,
    },
  },
})


Vite側と連携できるよう、Djangoの設定ファイルを修正

Djangoの設定ファイルは開発環境向けと本番環境向けとで分けます。

今回は開発環境で動作を確認してから本番環境の設定を行うことにします。

そこで、まずは開発環境向けの設定のみを行います。


開発環境向け

django-viteまわりの設定

django-viteのREADMEに従い設定します。

いくつか設定項目はありますが、開発環境向けとしては以下の項目を settings.py に追加すれば良さそうです。

ちなみに、Viteは3系から開発サーバの起動するポートが 5173 へと変更になりましたが、django-viteでのデフォルトポートは今のところ 3000 のままのようです。
Vite 3.0 no longer defaults to port 3000 · Issue #51 · MrBin99/django-vite

そのため、 DJANGO_VITE_DEV_SERVER_PORT の設定も必要です。

# 開発環境の場合、この値は参照されないので設定不要
# ただ、キーや中身がないと以下のエラーになるため、中身は適当な値を設定しておく
# AttributeError: 'Settings' object has no attribute 'DJANGO_VITE_ASSETS_PATH'
DJANGO_VITE_ASSETS_PATH = BASE_DIR

# HMRするためDebugと同じにしておく
DJANGO_VITE_DEV_MODE = DEBUG

# Vite.jsがv3系からポートが変更になったので対応
DJANGO_VITE_DEV_SERVER_PORT = 5173


CORSの設定

開発環境では、ReactとDjangoでは別オリジンになります。

 
そのため、 django-cors-headers をインストールしてCORSの設定を追加します。
adamchainz/django-cors-headers: Django app for handling the server headers required for Cross-Origin Resource Sharing (CORS)

INSTALLED_APPS = [
    ...
    'corsheaders',
    ...
]

MIDDLEWARE = [
    ...
    'corsheaders.middleware.CorsMiddleware',  # 追加
    'django.middleware.common.CommonMiddleware',
    ...
]

CORS_ALLOWED_ORIGINS = (
    'http://localhost:5173',
    'http://127.0.0.1:5173',
)


templateで if debug をするための設定

後述しますが、templateでは開発環境のみ設定するタグやスクリプトがあります。

そのためには、Djangoのtemplateで if debug を使うことで、開発環境のみレンダリングするようにします。

 
また、templateで debug の値を使えるようにするには、

  • template の context_processors'django.template.context_processors.debug' を追加
  • INTERNAL_IPS で使用するIPアドレスを定義

すれば良さそうです。
django.template.context_processors.debug | The Django template language: for Python programmers | Django ドキュメント | Django

 
なお、ルートディレクトリの templates ディレクトリに React を render するテンプレートを入れておくことから、 DIRS への追加も合わせて行っておきます。

TEMPLATES = [
    {
        ...
        'DIRS': [BASE_DIR / 'templates'],  # 追加
        ...
        'OPTIONS': {
            'context_processors': [
                ...
                'django.contrib.messages.context_processors.messages',
                'django.template.context_processors.debug',  # 追加
            ],
        },
    },
]


フロントエンドを実装

今回は frontend/src ディレクトリの中に、Reactアプリを実装していきます。

ライブラリのインストール

まずは必要なライブラリとして

  • React Router
    • フロントエンドでのルーティングを行うため
  • axios
    • バックエンドとの連携を行うため

をインストールします。

$ npm install axios
$ npm install react-router-dom


Reactアプリを実装

frontend/src/ ディレクトリの中に、以下の役割を持ったファイルを用意します。

なお、各ファイルの実装については、 django-vite だからといって特別なことをしていません。

そのため、ここでは省略します。詳細は公開したソースコードを参照してください。

ファイルパス 主な役割
main.tsx エントリポイントであり、App.tsxを読み込む
App.tsx pages/ 以下のコンポーネントに対するルーティングを定義
pages/Index.tsx 一覧ページ
pages/TaskDetail.tsx 詳細ページ
pages/TaskForm.tsx 登録ページ


Djangoの実装

Django template

django-viteのテンプレートタグを使う

今回は templates/index.html の上で django-vite のテンプレートタグ

  • {% load django_vite %}
  • {% vite_hmr_client %}
  • {% vite_asset '<path to your asset>' %}

を使ってReactアプリを動かすことにします。
MrBin99/django-vite: Integration of ViteJS in a Django project.

 
ちなみに、 vite_asset に指定する path to your asset は、Reactのエントリポイントのファイルを指定します。今回は main.tsx を指定します。

また、 main.tsx までのパス frontend/src については、 vite.config.ts にて root で設定しています。

export default defineConfig({
  // 開発環境のmain.tsxが置いてある場所
  root: resolve('./frontend/src'),
//...
}


@vitejs/plugin-react can't detect preamble に対応するコードを追加

Reactの場合、 django-vite のテンプレートタグを書いただけでは

Uncaught Error: @vitejs/plugin-react can't detect preamble. Something is wrong. See https://github.com/vitejs/vite-plugin-react/pull/11#discussion_r430879201

のようなエラーが表示されて動作しません。

そのため、 django-vite のissueにあるコードを追加する必要があります。
Add tag to render the react-refresh script · Issue #15 · MrBin99/django-vite

なお、この問題に対するプルリクも存在しましたが、現時点ではマージされていません。
Add template tag to enable react-refresh by BrandonShar · Pull Request #53 · MrBin99/django-vite


templateのコード全体

上記の対応を踏まえたtemplateのコード全体は以下となります。

{% load django_vite %}
{% load static %}

<!DOCTYPE html>
<html lang="en">
  <head>
    <meta charset="UTF-8" />
    <meta name="viewport" content="width=device-width, initial-scale=1.0" />

      {% if debug %}
          <script type="module">
            import RefreshRuntime from 'http://localhost:5173/@react-refresh'
            RefreshRuntime.injectIntoGlobalHook(window)
            window.$RefreshReg$ = () => {}
            window.$RefreshSig$ = () => (type) => type
            window.__vite_plugin_react_preamble_installed__ = true
          </script>
          {% vite_hmr_client %}
          {% vite_asset 'main.tsx' %}

      {% else %}
          {% vite_asset 'main.tsx' %}
      {% endif %}

    <title>Django + Vite + React + TS</title>
  </head>
  <body>
    <div id="root"></div>
  </body>
</html>


urls.pyへの追加

上記テンプレートをTemplateViewで描画するよう、config/urls.pyに追加します。

なお、 re_path を使い、Djangoでルーティングできない場合はフロントエンドにルーティングを任せています。

urlpatterns = [
    path('admin/', admin.site.urls),
    path('api/', include('api.urls')),
    re_path('', TemplateView.as_view(template_name='index.html')),  # 追加
]


動作確認

DjangoとViteの開発サーバをそれぞれ起動します。

# Django
python manage.py runserer

# Vite
npm run dev

 
その後、 http://localhost:8000/tasks にアクセスするとTODOアプリが表示されます。


DjangoとReactを連携して、本番環境で動かす

開発環境での動作が確認できたので、次は本番環境で動作させてみます。


Vite側での作業

vite.config.ts にビルド設定を追加

開発環境ではReactアプリをViteの開発サーバから配信していました。

一方、 django-vite のREADMEにあるように、本番環境ではDjangoで配信することになります。

In production mode, assets are included as standard assets (no ViteJS webserver and HMR) like default Django static files. This means that your assets must be compiled with ViteJS before.

Configuration | Usage | MrBin99/django-vite: Integration of ViteJS in a Django project.

 
そこで、ViteでReactアプリをビルドするための設定を vite.config.ts に追加します。

rollupOptions.input にて、Reactのエントリポイントのファイルを指定します。
build.rollupOptions | ビルドオプション | Vite

また、 outDirコンパイル後のファイルの出力先を指定します。
build.outDir | ビルドオプション | Vite

全体はこんな感じです。

export default defineConfig({
  // ...
  build: {
    // コンパイル後の出力先。DJANGO_VITE_ASSET_PATHと一致させる
    outDir: resolve('./frontend/dist'),
    assetsDir: '',
    manifest: true,
    emptyOutDir: true,
    rollupOptions: {
      input: {
        main: resolve('./frontend/src/main.tsx'),
      },
      output: {
        chunkFileNames: undefined,
      },
    }
  }
})


ViteでReactアプリをビルド

ビルドの設定ができたため、Viteでビルドします。

$ npm run build

> static@0.0.0 build
> tsc && vite build

vite v3.2.4 building for production...
✓ 80 modules transformed.
../dist/manifest.json       0.21 KiB
../dist/main.3fce1f81.css   1.37 KiB / gzip: 0.71 KiB
../dist/main.f792177d.js    186.01 KiB / gzip: 61.81 KiB

 
すると、 build.outDir で指定したディレクトリにファイルが出力されます。

 
Vite側での作業は以上です。


Djangoの設定

settings_production.py の設定

今回は config/settings_production.py に本番環境用の設定を追加することにします。

まずは、本番環境なので以下の環境変数を設定します。

from .settings import *

ALLOWED_HOSTS = [
    'localhost',
    '127.0.0.1',
]

# 本番環境化
DEBUG = False
DJANGO_VITE_DEV_MODE = False

 
また、 django-cors-headers 向けの設定は不要なので空配列を指定しておきます。

CORS_ALLOWED_ORIGINS = []

 
本番環境では collectstatic コマンドを使って静的ファイルを収集するため、収集対象のディレクトリを設定します。

DJANGO_VITE_ASSETS_PATH でViteでビルドした後のファイルが含まれるディレクトリ(Viteの build.outDir で指定したディレクトリ) を指定します。
Configuration | MrBin99/django-vite: Integration of ViteJS in a Django project.

また、ビルドしたファイルを collectstatic の収集対象とするため、 STATICFILES_DIRSDJANGO_VITE_ASSETS_PATH を含めます。
STATICFILES_DIRS | 設定 | Django ドキュメント | Django

他に、 collectstatic の結果を入れておくディレクトリも STATIC_ROOT にて指定します。今回はルート直下の collected_static ディレクトリに入れるようにします。
STATIC_ROOT | 設定 | Django ドキュメント | Django

ちなみに、静的ファイルに関する設定の全体像は、以下の記事の図がわかりやすかったです。
Djangoにおける静的ファイル(static file)の取り扱い - Qiita

# collectstaticの結果を格納するディレクトリ
STATIC_ROOT = BASE_DIR / 'collected_static'

# 本番環境の場合、build.outDir と同じパスを指定する
DJANGO_VITE_ASSETS_PATH = BASE_DIR / 'frontend' / 'dist'
STATICFILES_DIRS = [DJANGO_VITE_ASSETS_PATH]


本番環境でも静的ファイルをDjangoの開発サーバから配信するよう urls.py に設定

色々準備するのが手間なので、今回はDjangoの開発サーバから静的ファイルを配信することにします。

(注意) 通常想定している本番運用とは異なるため、今回の記事を参考にして環境を構築する場合は、ここの設定はあるべき姿にしてください。

 
settings.pyで DEBUG=True であればDjangoの開発サーバから配信するため、今回はその設定を無理やり移植することで、 DEBUG=False のときもDjangoの開発サーバから配信できるようにします。

ソースコードを読むと django/conf/urls/static.py のこのあたりの実装を移植・修正すれば良さそうです。
https://github.com/django/django/blob/4.1.3/django/conf/urls/static.py#L10

なお、ルーティングの仕様によりtemplateへルーティングされるのを防ぐため、ルーティングの先頭に静的ファイルのルーティングを追加します。

static_patterns = [
    re_path(r"^%s(?P<path>.*)$" % re.escape(settings.STATIC_URL.lstrip("/")),
            serve,
            {'document_root': settings.STATIC_ROOT}),
] if not settings.DEBUG else []

urlpatterns = static_patterns + [
    path('admin/', admin.site.urls),
    path('api/', include('api.urls')),
    re_path('', TemplateView.as_view(template_name='index.html')),
]


collectstatic の実行

設定が終わったので、 collectstatic を実行します。

なお、本番環境の設定ファイルを使って実行するよう --settings config.settings_production オプションを付けて実行します。

$ python manage.py collectstatic --settings config.settings_production

You have requested to collect static files at the destination
location as specified in your settings:

    path/to/todo_app_with_django_vite/collected_static

This will overwrite existing files!
Are you sure you want to do this?

Type 'yes' to continue, or 'no' to cancel: yes

3 static files copied to 'path/to/todo_app_with_django_vite/collected_static', 165 unmodified.


本番環境を起動して動作確認

ViteやDjangoの開発サーバを停止した上で、Djangoの本番環境を起動します。

$ python manage.py runserver --settings config.settings_production
Performing system checks...

System check identified no issues (0 silenced).
December 06, 2022 - 22:46:40
Django version 4.1.3, using settings 'config.settings_production'
Starting development server at http://127.0.0.1:8000/
Quit the server with CONTROL-C.

 
http://localhost:8001/tasks にアクセスすると、画面が表示されます。

React developer tools の色が青くなっており、ビルドしたReactで動いていることが分かります。


また、Djangoのログを見ると、Djangoから静的ファイルが配信されていることも分かります。

[06/Dec/2022 22:47:59] "GET /tasks HTTP/1.1" 200 422
[06/Dec/2022 22:47:59] "GET /static/main.3fce1f81.css HTTP/1.1" 200 1405
[06/Dec/2022 22:47:59] "GET /static/main.f792177d.js HTTP/1.1" 200 190476
[06/Dec/2022 22:47:59] "GET /api/tasks/ HTTP/1.1" 200 311
[06/Dec/2022 22:47:59] "GET /favicon.ico HTTP/1.1" 200 422

 
以上で、django-viteを使って、Djangoの template 上で React を動かすことができました。


ソースコード

Githubに上げました。
https://github.com/thinkAmi-sandbox/react_todo_app_with_django_vite

今回のプルリクはこちらです。
https://github.com/thinkAmi-sandbox/react_todo_app_with_django_vite/pull/1

*1:akiyokoさんの記事 https://akiyoko.hatenablog.jp/entry/2022/12/01/064746 によると、DRFの本は今月改訂になるようです